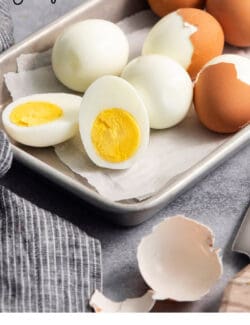

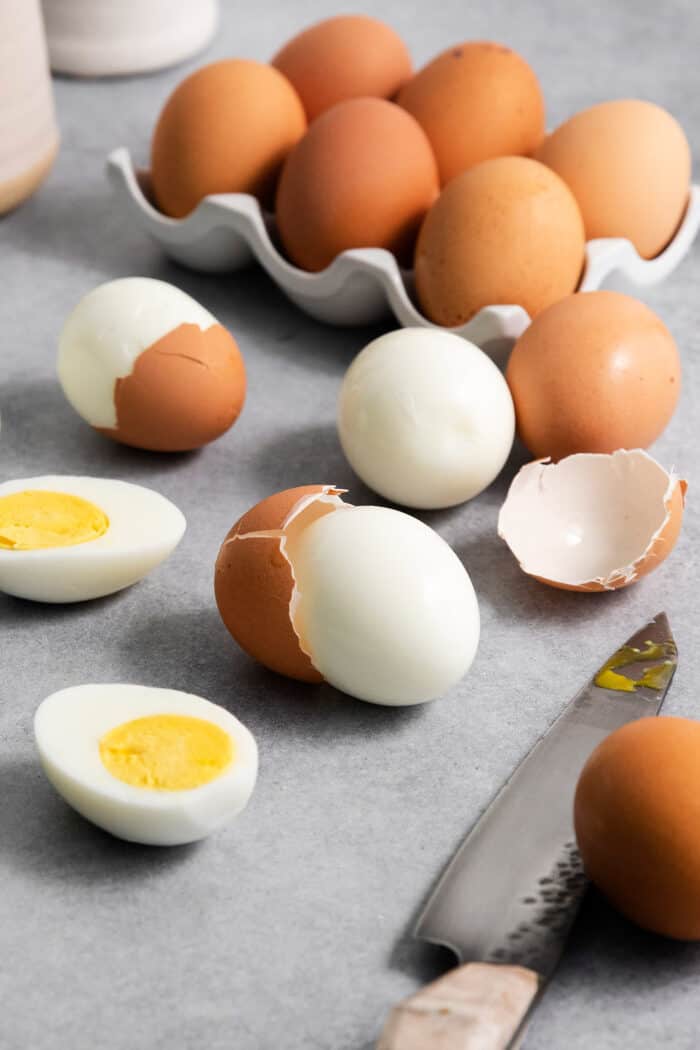
This simple recipe for Easy Peel Hard Boiled Eggs says goodbye to frustrating peeling and HELLO to perfectly cooked, perfectly peeled eggs — every single time. When I want exceptional eggs for a deviled eggs appetizer, this is the method I use!

I want to introduce you to my BFF in the kitchen — this simple recipe for Easy Peel Hard Boiled Eggs! We always keep a batch of hard boiled eggs on hand for easy, protein-rich breakfast and snack options. Plus, I’m often in charge of making the Deviled Eggs for Easter, and we always color Easter eggs on Good Friday. So this no-fail recipe is EVERYTHING to me!
Say HELLO To Easy Peel Hard Boiled Eggs!

How to make hard boiled eggs that are easy to peel? I’ve tried countless different ways over the years. And then my friend Joanne shared this method with me. Here’s why it’s the most reliable recipe I know:
WHAT YOU CAN EXPECT:
- Actually easy to peel. The egg shells come off easily, in larger pieces – it’s nearly effortless.
- Egg whites stay intact. This method leaves you with actually pretty eggs – no chunks of white stuck to the shell. Which is especially nice for entertaining, when I’m wanting a nicer presentation.
- Yolks are perfect. By simply adjusting the cook time, I can make centers that are either jammy or solidly set – and they’re always beautifully yellow. No dull gray-green coloring with this recipe.
- Quick & easy, 100% reliable. This method delivers the BEST hard boiled eggs, using eggs straight from the fridge, and they’re ready in less than 20 minutes!

“Thank you for these helpful step by step instructions. I followed them exactly and my eggs turned out perfectly.”
Jill
What You’ll Need
This recipe is super simple. Here’s what you’ll need:
Ingredients
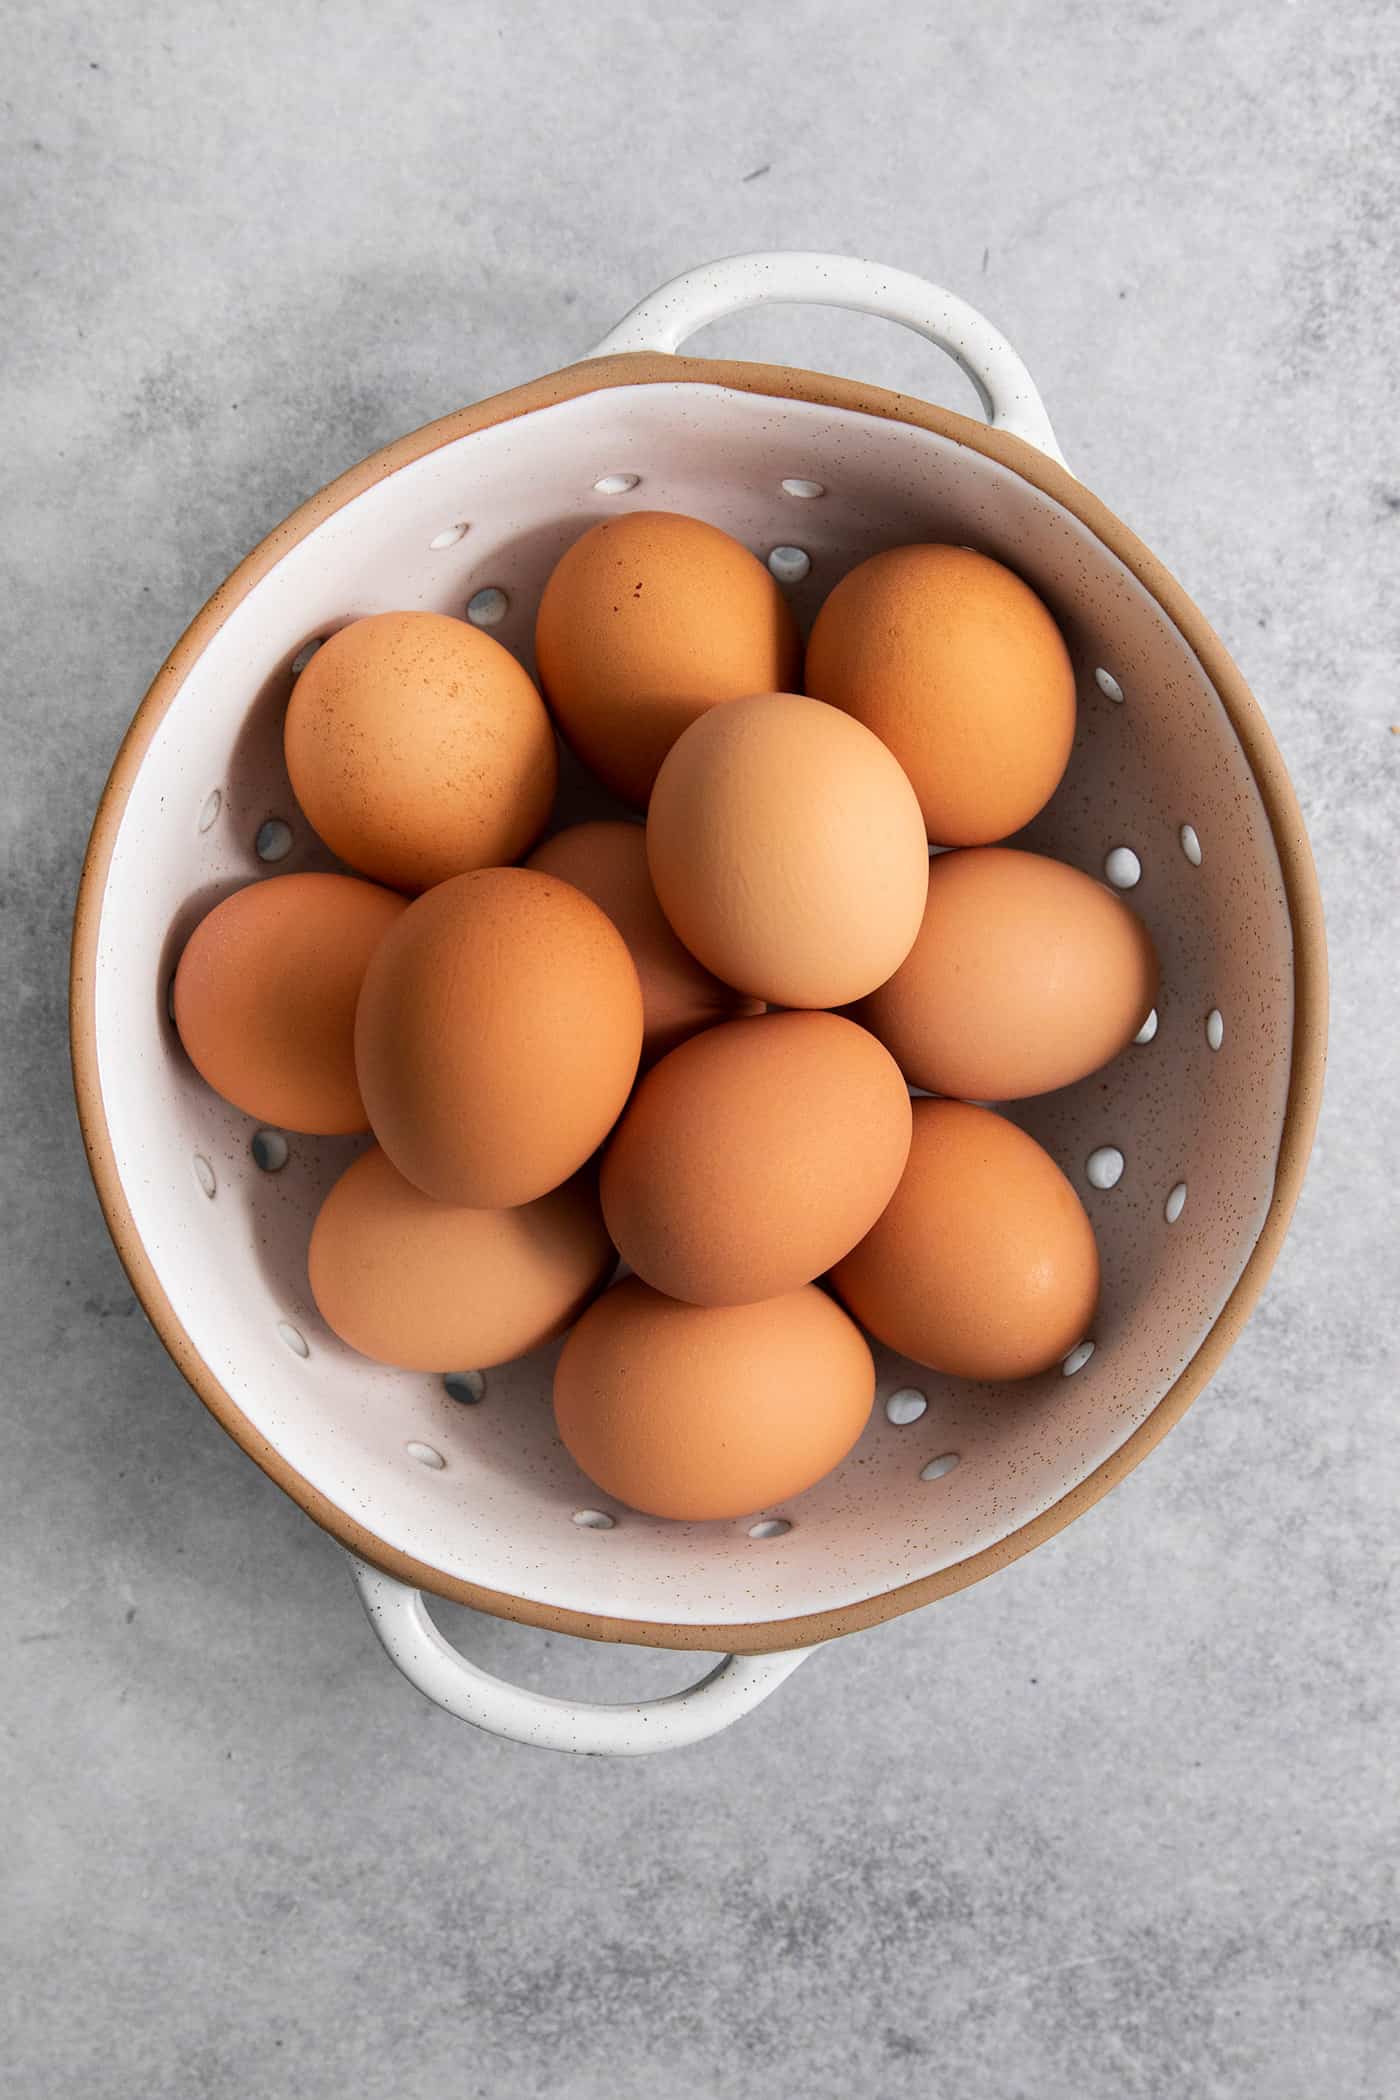
- Eggs – Use this method to make between 6 eggs and one dozen eggs. I always use large eggs from the grocery store, straight from the fridge (cold).
- Water – This method uses boiling water to cook the eggs in a pot, plus ice water to quickly stop the cooking.
- Ice – You’ll make an ice water bath (simply ice and water in a bowl) and transfer the cooked eggs to the ice water, to stop the cooking.
Equipment
- Pot – Use a large pot or a 2-quart, or larger, saucepan.
- Bowl – For the ice water bath. The bowl just needs to be big enough to hold the water, ice, and eggs.
- Large slotted spoon – Use this to set the cold eggs in the boiling water, and then pull them out again. If you have a strainer/spider with a handle, that’ll work too.
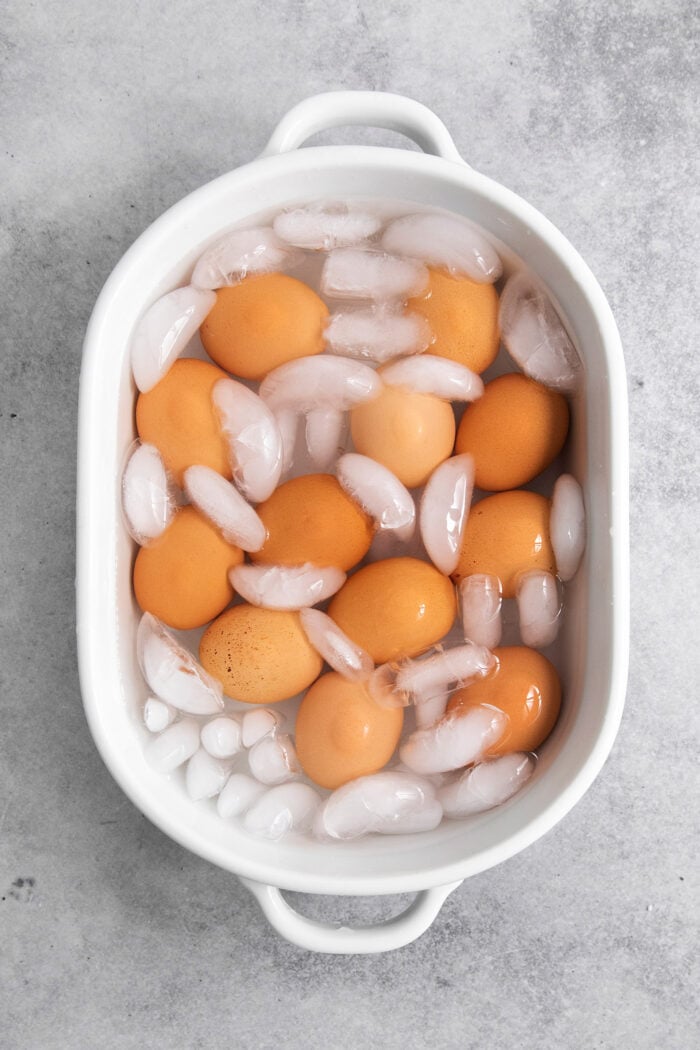
The Most Important Thing To Know about making perfect hard boiled eggs is this: use a hot boiling start and an ice cold finish.
The sudden heat helps separate the egg white from the shell membrane, for easier peeling.
How To Cook Hard Boiled Eggs
Here’s how to make easy-to-peel hard boiled eggs, step by step:
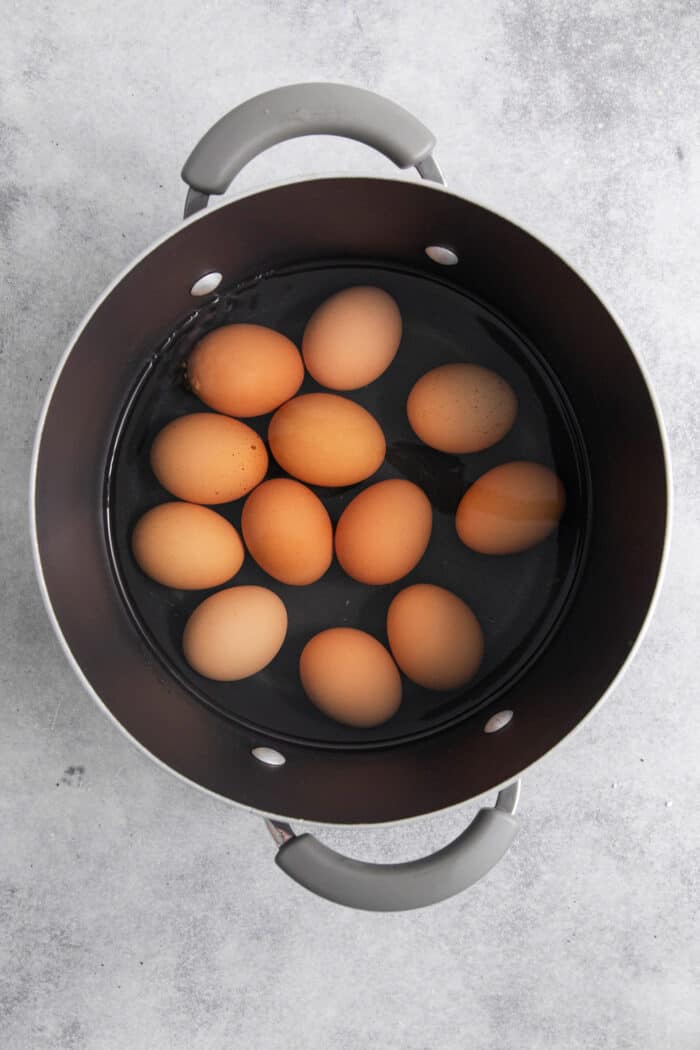
- Boil water. Fill a large pot with 2″ to 3″ of water and then bring it to a rolling boil – this is your hot boiling start.
- Add eggs. Use a large slotted spoon to carefully place eggs in the boiling water.
- Set timer. Immediately set a timer for 14 minutes, for firm egg yolks and whites. For jammy centers, cook for just 8 minutes. (When I’m making deviled eggs or when I simply want the eggs more firm, I cook for 14 minutes. Other times, I usually opt to cook for less time, so the yolks are at least a little bit jammy.)
- Simmer. Reduce the heat to cook the eggs at a very gentle simmer. Do not let the water boil.
- Shock eggs in ice water. Transfer the cooked eggs to an ice water bath for 3 minutes, to quickly cool down the eggs – this is your ice cold finish. Then remove the eggs from the ice water and peel or store.

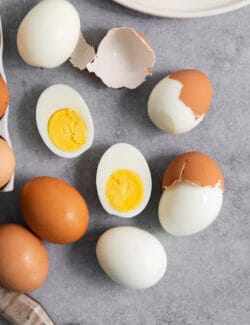
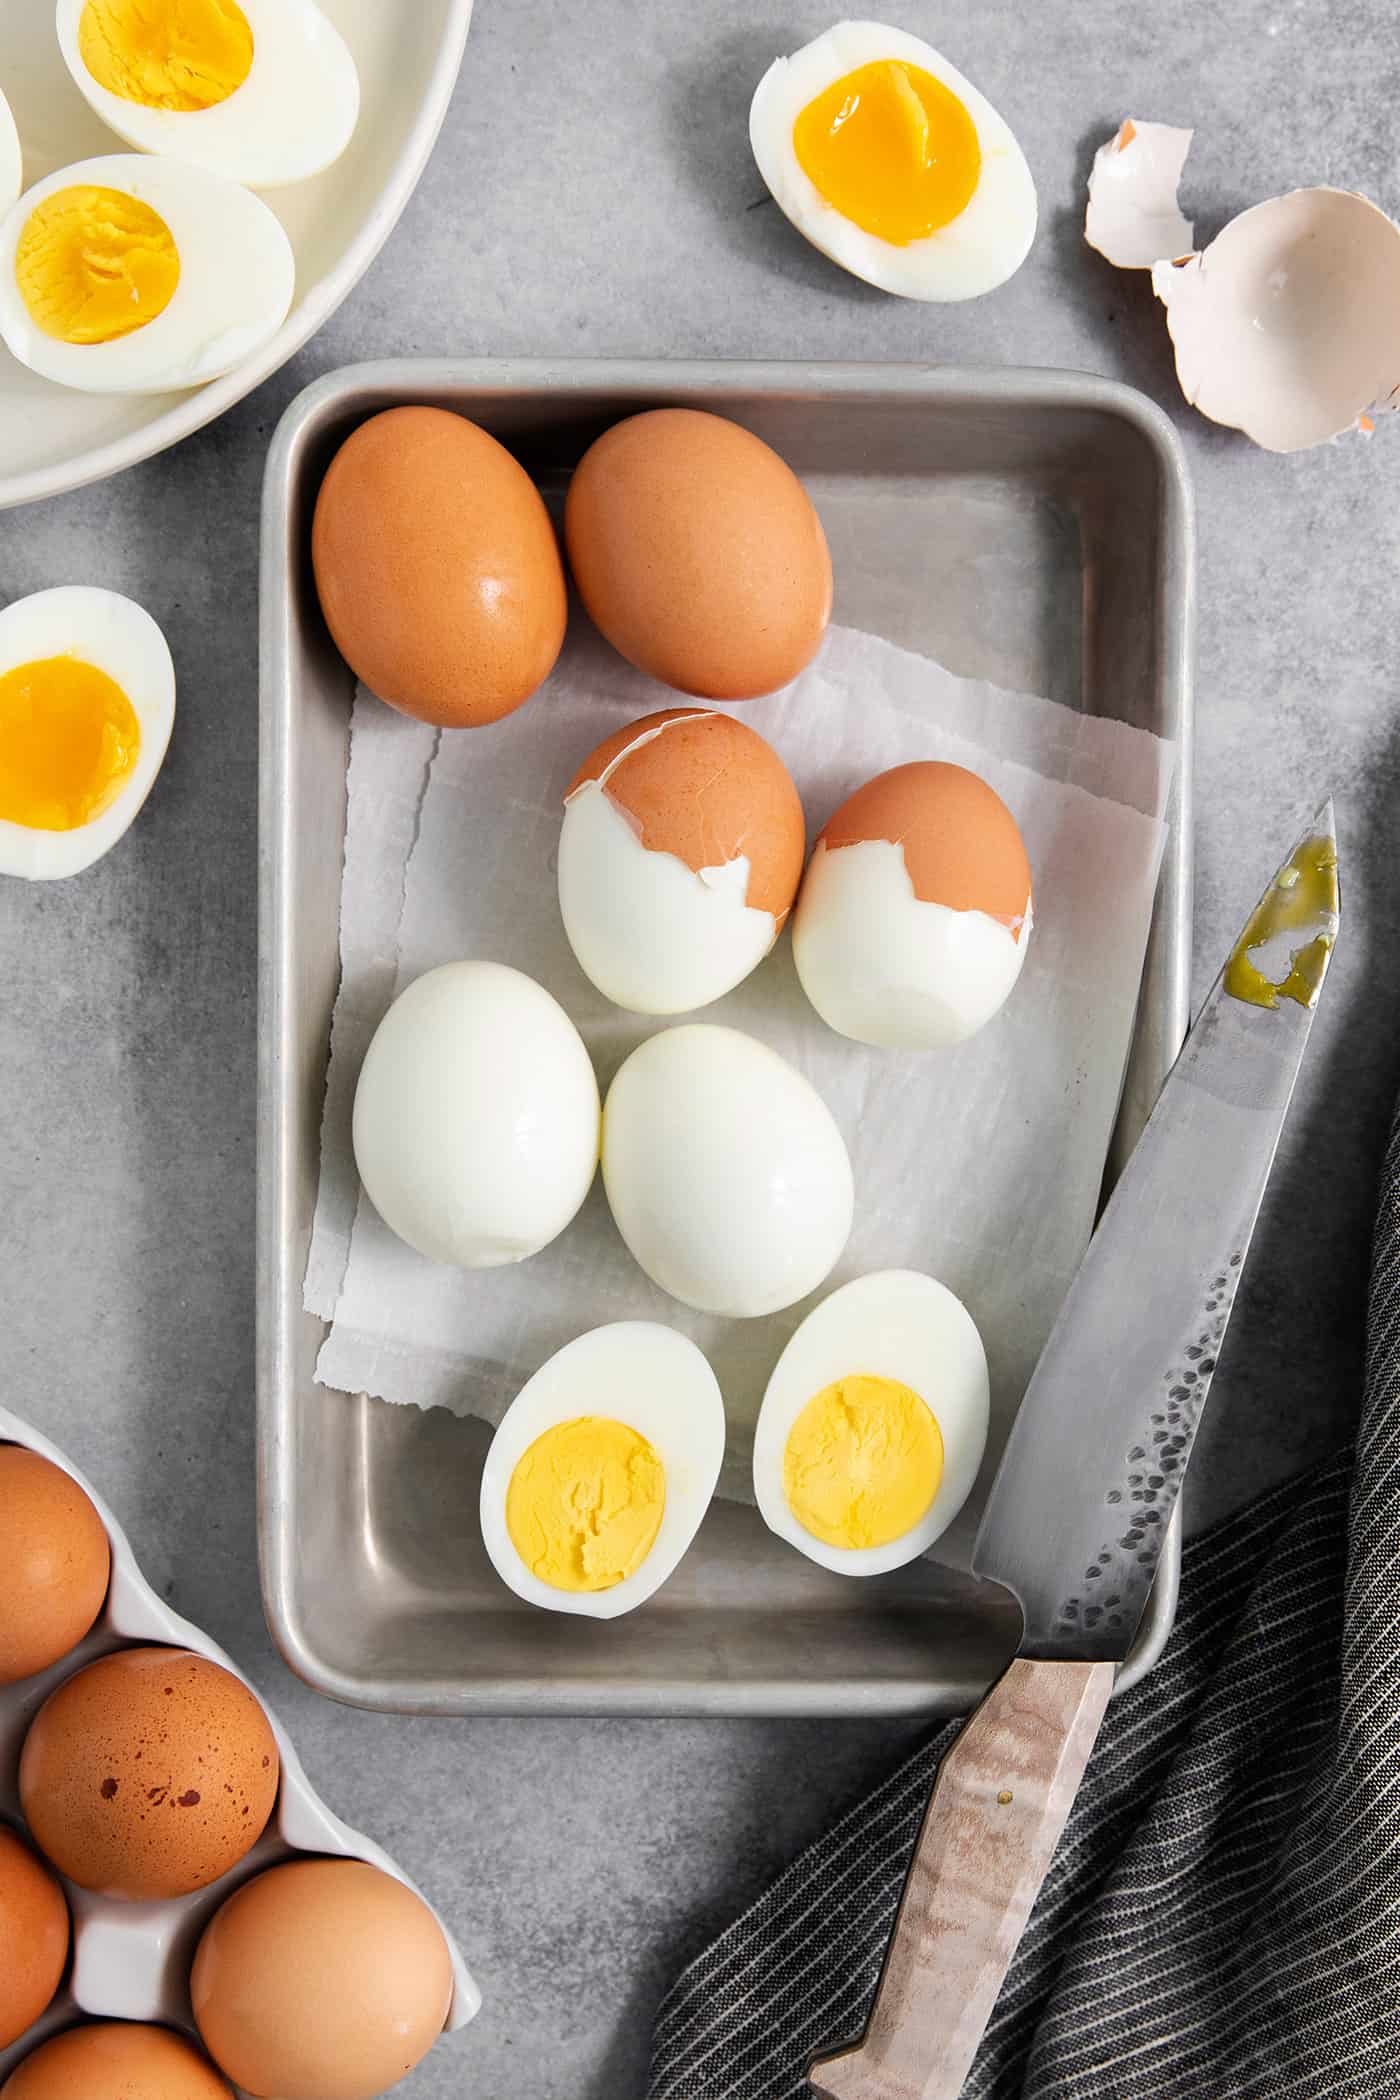
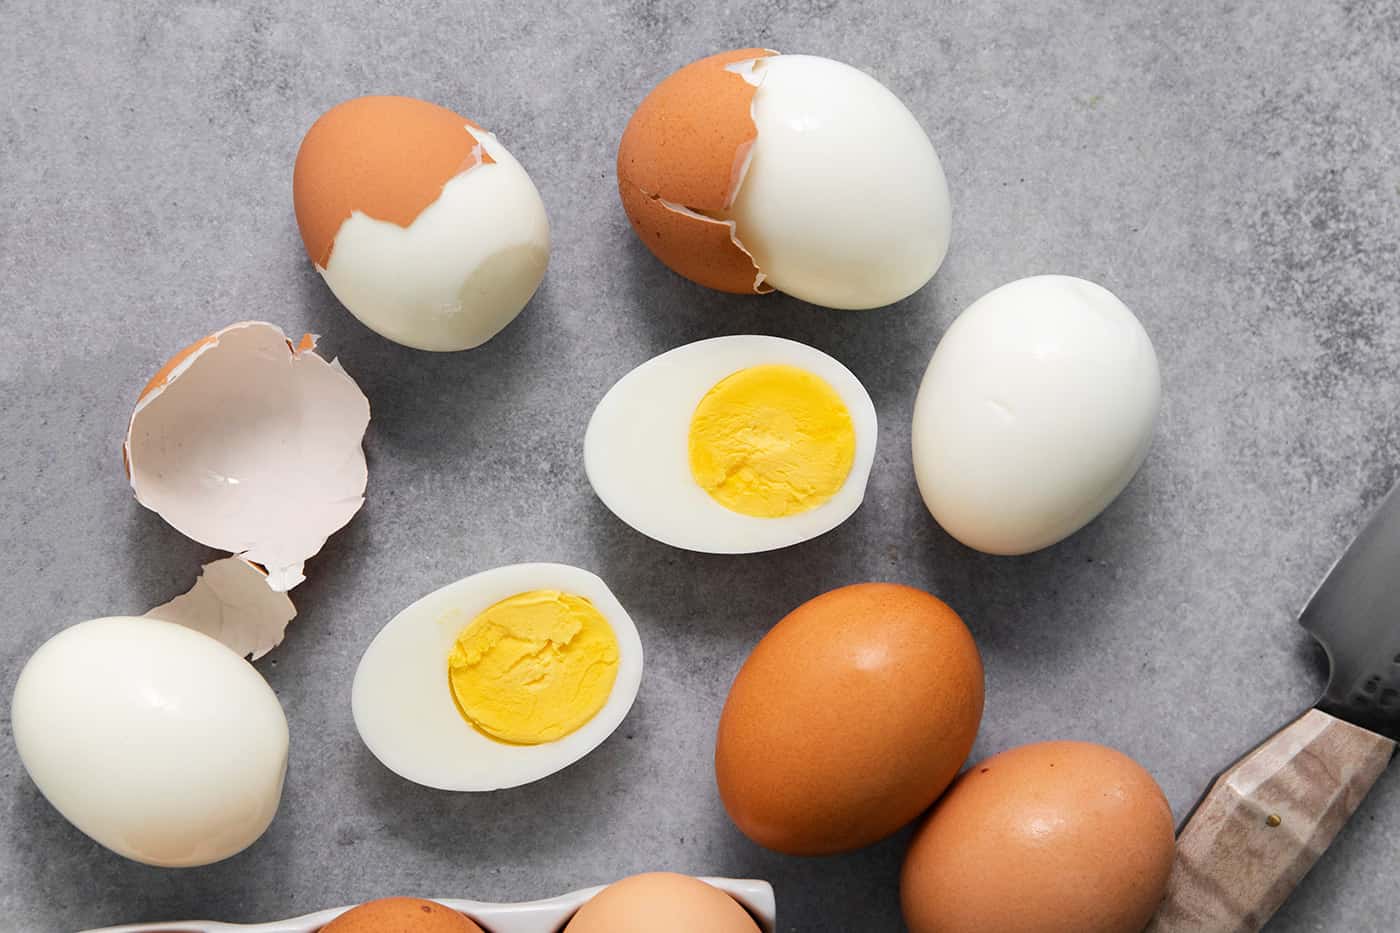
How Do You Get Boiled Eggs To Peel Easily?
The best way to peel hard boiled eggs starts with gently tapping the wide end of the egg on the counter, to crack the shell. The wider end has an air pocket, which makes for an easier start. Then peel away the shell. It should come off in a few large pieces.
It’s also helpful to peel the eggs under cool running water. This helps the shells slide off even faster, and ensures that any little shells bits are washed away. (I really hate biting a piece of egg shell when I’m eating hard boiled eggs!)
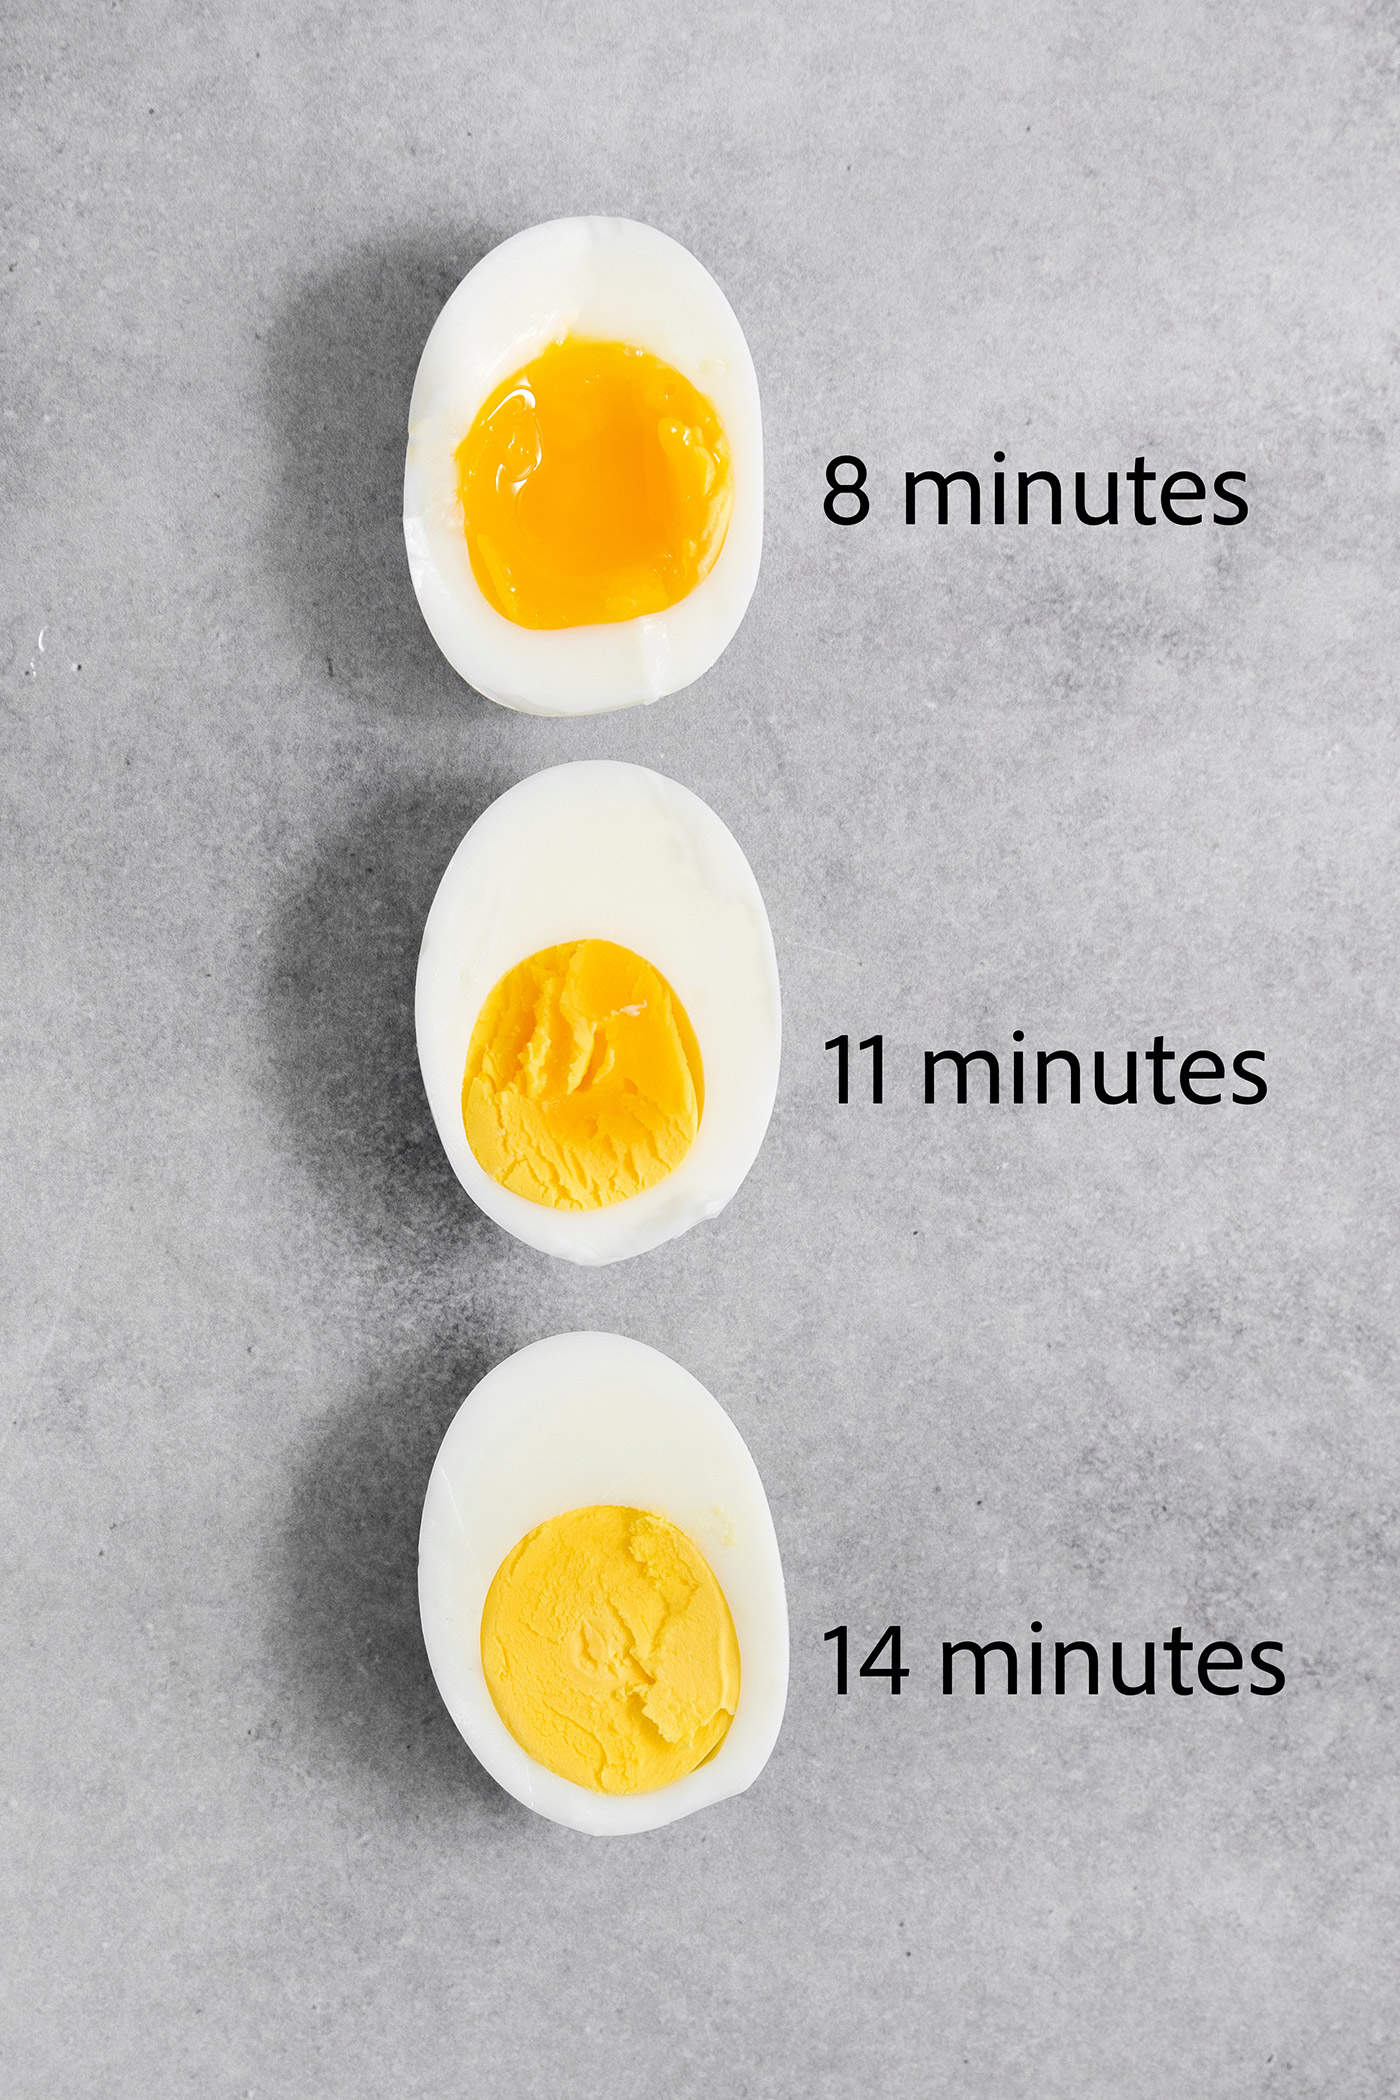
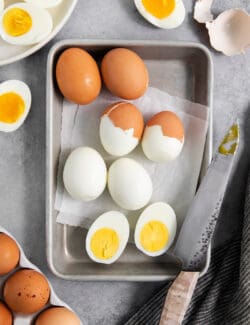
How Long To Boil Eggs?
Do you like eggs with a solid set or ones that are jammy and soft-boiled? Refer to the above photo to see how cook time affects the doneness of hard boiled eggs.
How long to boil the eggs depends on several factors, including size of eggs, pot size, amount of water in the pot, cooking temperature, etc. I always cook large eggs for 13-14 minutes to get firm yolks and whites. Everyone has different preferences, so I encourage you to experiment and find the timing you like best.
Egg Cooking Times:
- Soft-boiled eggs (runny or jammy yolks): 6-8 minutes
- Medium-boiled (a mix of hard and soft yolks): 9-12 minutes
- Hard-boiled (fully set yolks): 13-15 minutes
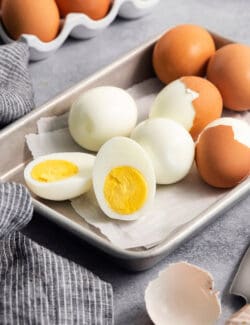
How Long Can You Store Hard Boiled Eggs?
- Store your easy-peel eggs in the refrigerator for up to 1 week. If you eat these regularly, go ahead and make a batch for the upcoming week. Blake and I go through a lot of eggs, so I always cook a dozen at a time.
- You can peel all the eggs right away, or leave them unpeeled. I personally prefer to leave the shells on if I’m planning to store them in the fridge for more than a day. The cooked whites maintain a better, fresher texture for a longer time when you leave the shells on.
- Store them in a sealed airtight container. Cooked eggs, both unpeeled and peeled, can cause odors in the fridge. If that egg-y odor doesn’t bother you, you can use the same (not airtight) egg carton for storage.
How To Use Them
You can eat hard boiled eggs as soon as you remove them from the ice water bath. Or store them in the fridge for quick breakfasts and snacking – all they need is a little sprinkle of salt & pepper. They’re great for coloring Easter eggs. Or use them in recipes!
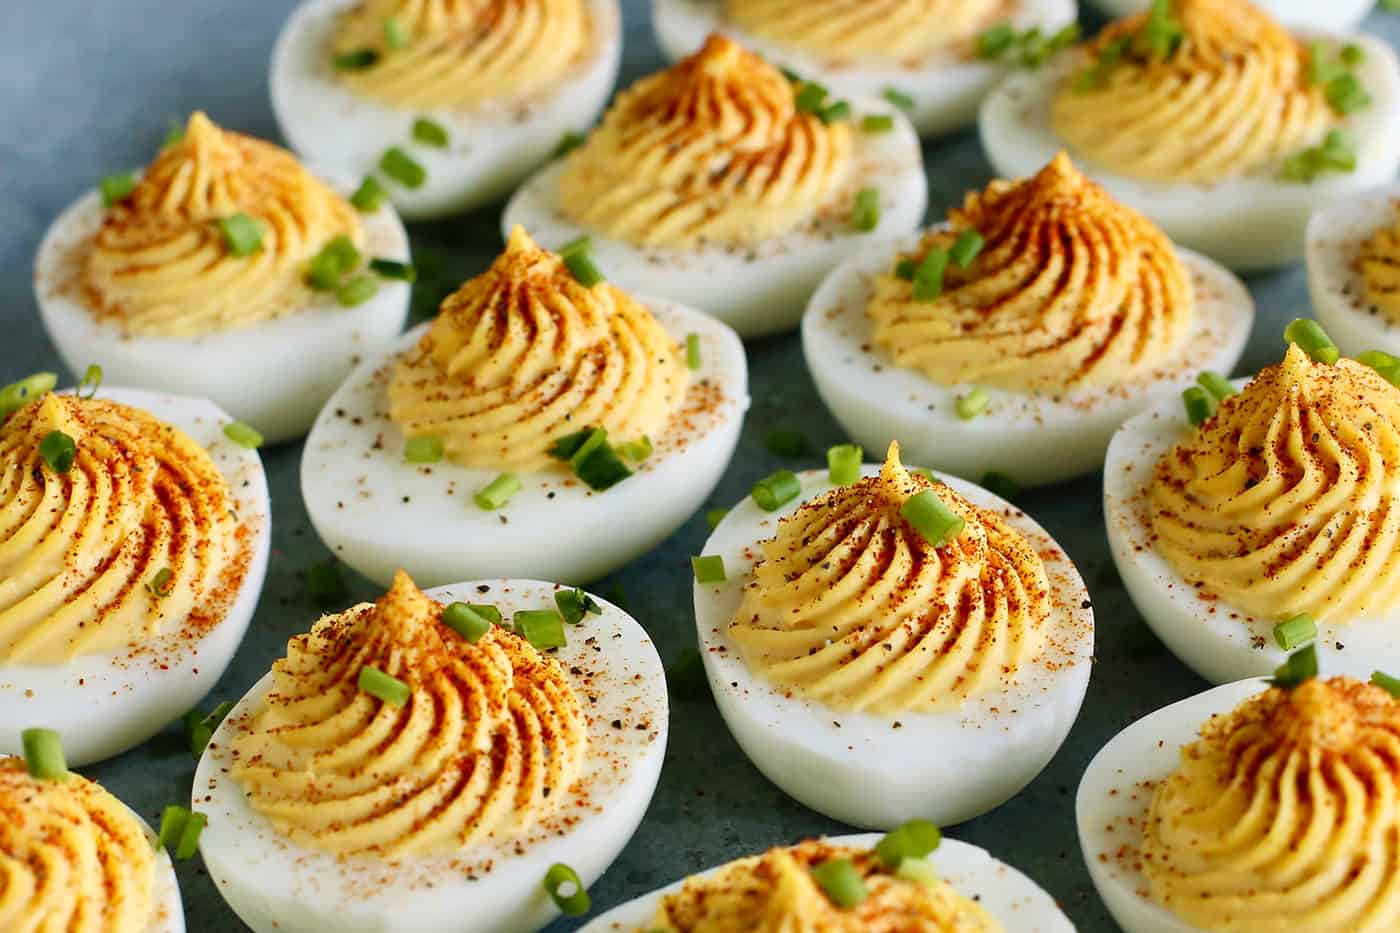
- Deviled Eggs – Create irresistible Classic Deviled Eggs (see link at the start of this post).
- Breakfast – Serve hard boiled eggs alongside Cheesy Hashbrown Casserole or Beef & Sweet Potato Hash. Or with Biscuits & Gravy or just some simple Cream Biscuits. Savory eggs also pair well with breakfast recipes like Buttermilk Pancakes or decadent Double Chocolate Pancakes. Or make Yeast Waffles!
- Egg Salad – I adore an Egg Salad Sandwich. And even better, this Egg Salad with Bacon!
- Potato Salad – My Dill Pickle Potato Salad includes tender chunks of hard boiled eggs. And you could easily add slices of cooked eggs to this Grilled Potato Salad.
- Pasta Salad – Add chopped hard boiled eggs to Bacon Ranch Pasta Salad.
- Green Salad – I like to cut cooked eggs into wedges and add them to this Roasted Beet Salad and Grilled Romaine Salad.
- Pickled! – And yes, you can even make gorgeous Beet Pickled Eggs!

Easy-To-Peel Hard Boiled Eggs
Ingredients
- 12 large eggs
Instructions
- Fill a large pot with 2" to 3" of water, then set it on the stovetop over high heat. Bring to a boil.
- Use a large slotted spoon or spider to gently and quickly lower the eggs into the hot water. Cook any number of eggs that you wish, as long as you only have a single layer of eggs that is not overcrowded.
- As soon as you finish adding the last egg to the pot, set a timer to cook for 14 minutes. This will give you egg yolks that are cooked through + whites that are firm. If you want eggs with very jammy centers, cook for just 7-8 minutes. This may take some experimenting to get your idea of a perfectly cooked egg, as there are many variables (age and size of eggs, pot size, amount of water in the pot, cooking temperature, etc.). See Notes below for more.
- Reduce the heat as needed to cook the eggs at a very gentle simmer, with very small bubbles rising throughout the water. If the water is ever boiling rapidly, causing the eggs to knock around, be sure to decrease the heat.
- While the eggs are cooking, set up an ice bath: just add cold water and ice to a bowl that's large enough to hold the eggs.
- Once the time is up, drain the eggs (or remove them with a large slotted spoon or spider) and gently add them to the ice bath, for 3 minutes, to stop them from cooking more. Then remove the eggs.
- Gently tap the eggs on the counter, at the rounder/wider end of each egg. This end has an air pocket, which makes it easier to start peeling the egg. It's helpful to peel the eggs under cool running water. If you won't be using/eating the eggs right away, leave the eggs unpeeled and store them in an airtight container in the fridge for up to 1 week.

This method is a total game changer! Thank you!
WONDERFUL!! Thank you so much for coming back here to rate the recipe and let me know. Enjoy! :)
I have been doing hard boiled eggs like this for a while now, and they have turned out perfect every time! Thank you!!!
Hi Alane – isn’t it the most awesome thing, to have hard boiled eggs that peel so easily?! Thank you so much for coming back here to share a comment and star rating – much appreciated!
This worked perfectly! Thank you!!
I love to hear this, Kristin. Thank you so much for coming back here to let me know + rate the recipe. Happy New Year!
Thank you for these helpful step by step instructions. I followed them exactly and my eggs turned out perfectly.
So glad you liked this recipe, Jill! Thanks for coming back to leave a comment and rating! Enjoy!!