

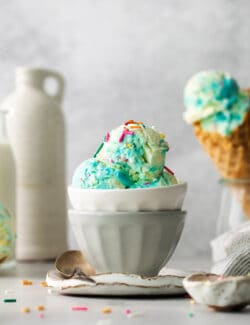
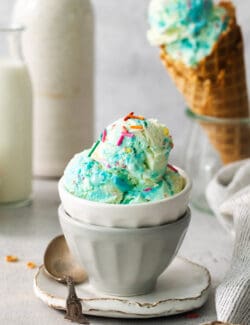
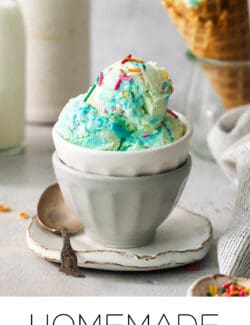
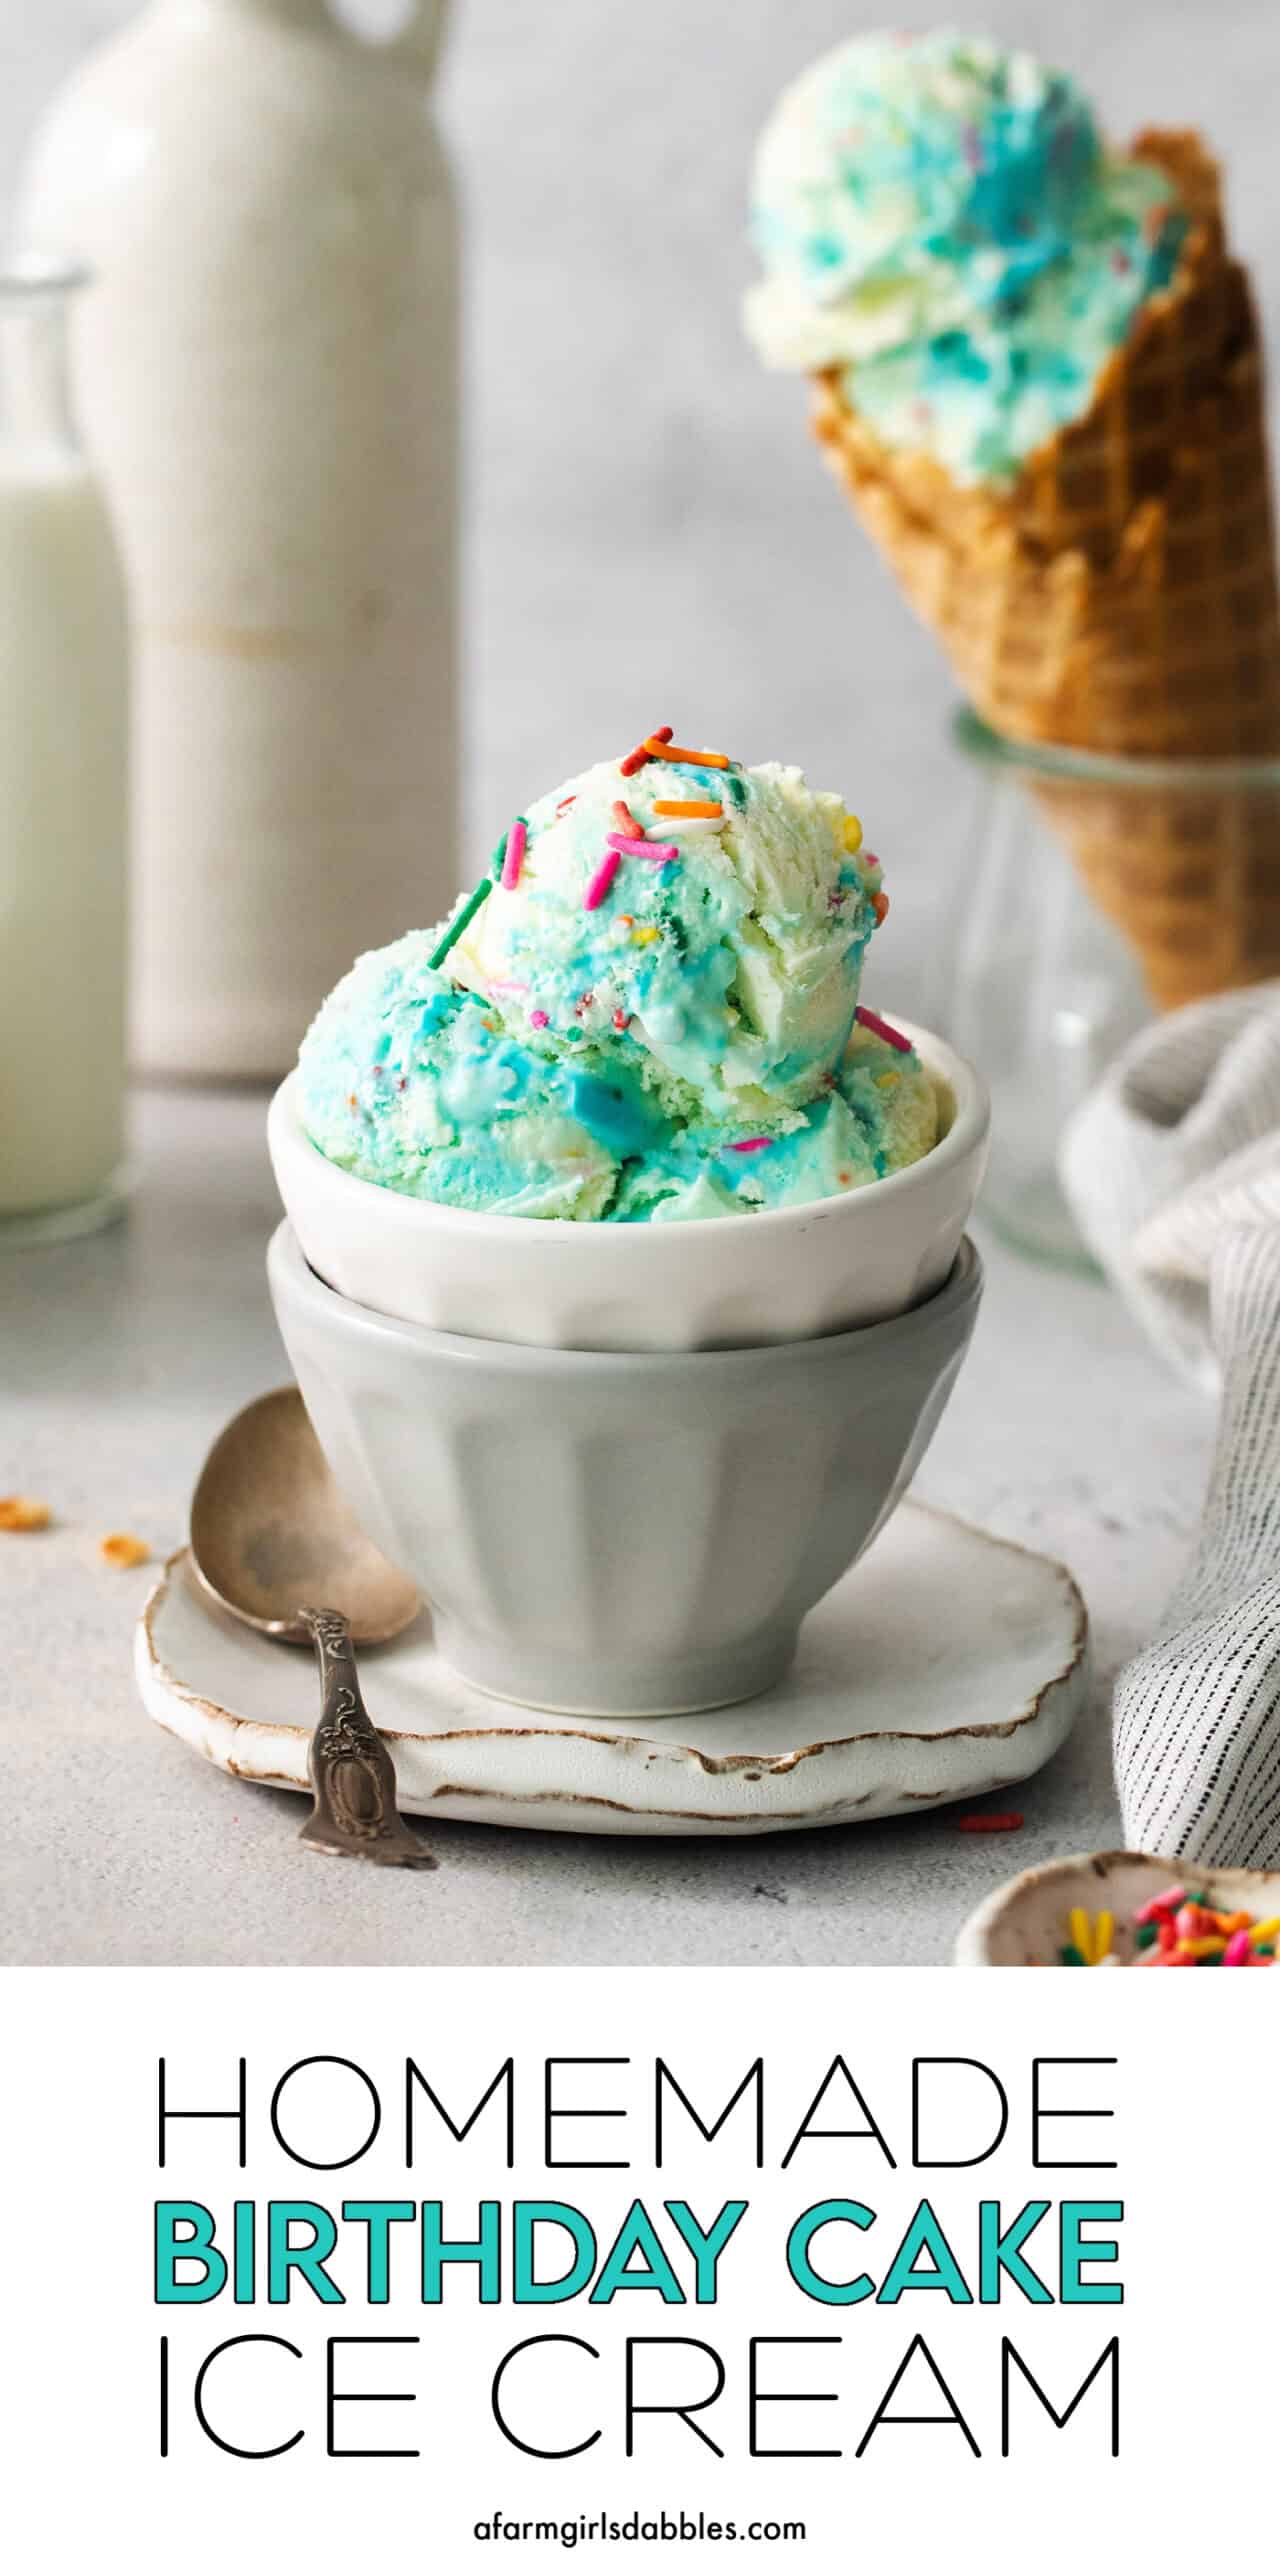
This homemade Birthday Cake Ice Cream features a rich and creamy vanilla base, with swirls of blue vanilla frosting and sprinkles. It tastes like you’re eating a slice of vanilla birthday cake – and it’s super easy to make, no eggs or custard required!

Homemade Birthday Cake Ice Cream
When it comes to super fun ice cream flavors, this homemade Birthday Cake Ice Cream should be at the top of your list!
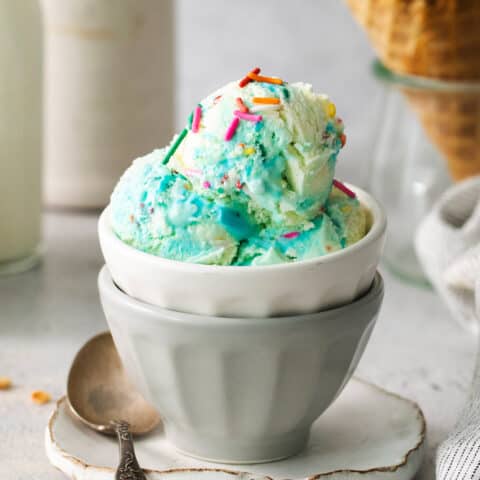
I love the vibrant colors in this homemade ice cream, with that fabulous streak of blue frosting and a rainbow of sprinkles thrown in like confetti. Much like I’m drawn to the blue hue of cookie monster ice cream that’s stuffed with Oreos and cookie dough!
This birthday cake ice cream recipe is full of rich and creamy vanilla flavor – both in the ice cream base and in the blue frosting swirl. And it’s easy to make – no need to use eggs or make a custard base!

Why You’ll Love This Birthday Cake Ice Cream Recipe
If you’re a fan of vanilla cake and ice cream, you’ll love birthday cake ice cream. Here’s why we love this recipe:
- Super easy and creamy. I’ve made a lot of homemade ice creams, and this recipe always surprises me with its great creamy texture without needing to make a cooked egg custard base.
- Classic vanilla cake flavor. If classic vanilla cake and ice cream is your jam, this ice cream flavor is sure to please. It’s like a frosted vanilla birthday cake in frozen ice cream form!
- A crowd-pleaser. Kids and grown-ups love the nostalgic taste of birthday cake ice cream.
- It’s FUN!!!!!!!! Which should be expected from birthday cake ice cream with blue frosting…right?!

What Flavor Is Birthday Cake Ice Cream?
Birthday cake ice cream, with its swirl of vanilla frosting, tastes like…you guessed it…frozen birthday cake batter!
I’d describe the flavor as a combination of vanilla and butter, kinda like if you’d taste a vanilla cake batter before it’s baked.
Can I Make this Birthday Cake Ice Cream with Cake Pieces?
Yes, you can!
Sometimes birthday cake ice cream includes pieces of vanilla cake. Sometimes it doesn’t. I prefer mine without the cake pieces, so I add some cake batter flavor to the ice cream base instead. This adds that classic, freshly baked cake taste.
But our daughters like birthday cake ice cream with cake pieces…so we make it both ways, and it’s easy to do! I include information about how to do this below in the “Tips & Variations” section.

Recipe Ingredients
Here’s a list of everything you’ll need to make homemade birthday cake ice cream.
Scroll down to the recipe card at the end of this post for the exact ingredient amounts.
- Milk – This recipe includes both whole milk and heavy cream to create a rich and creamy ice cream that isn’t too dense. I highly recommend using whole milk and not substituting a lower fat milk.
- Heavy cream – It’s important to use heavy cream in this recipe, as it adds extra richness and creaminess.
- Granulated sugar – Granulated sugar sweetens the ice cream.
- Cake batter flavor – Cake batter flavor makes this taste like a slice of birthday cake! It’s available in the baking aisle of most grocery stores, with the other extracts/flavors, or online.
- Vanilla extract – Pure vanilla extract adds rich vanilla flavor and enhances the sweetness of the frosting.
- Vanilla frosting – I always use a store-bought vanilla frosting, but cream cheese or buttercream frosting would be great too. If using chocolate or strawberry frosting, skip the food coloring.
- Blue food coloring – Blue food coloring adds fun color to the ice cream. I use Americolor Soft Gel Paste in “Sky Blue” but you could use any color you like.
- Rainbow sprinkles – Rainbow sprinkles are like colorful confetti, adding bit of crunch and color – plus they’re super festive and perfect for birthdays!

How to Make Birthday Cake Ice Cream
Here’s everything you need to know about how to make this homemade ice cream recipe:

- Freeze your ice cream bowl. Freeze your ice cream maker bowl according to the manufacturer’s instructions. I like to freeze ours for at least 24 hours prior to making ice cream.
- Combine the ice cream base ingredients. In a large bowl, whisk together the whole milk, heavy cream, sugar, cake batter flavor, and vanilla extract until the sugar is dissolved.

- Churn the ice cream base in the ice cream maker. Transfer the mixture to your ice cream maker and churn according to the manufacturer’s instructions until it reaches soft-serve consistency. Depending on your ice cream maker, this should take 15-25 minutes.

- Prepare the blue frosting. Place the frosting in a small bowl and heat in the microwave for 5-10 seconds, or until it is just barely pourable. Add a drop of blue food coloring and stir to combine.

- Layer the frozen ice cream, blue frosting, and sprinkles into a pan. Transfer ⅓ of the churned ice cream to a 9×5-inch loaf pan and drizzle ⅓ of the blue frosting over the top. Use a butter knife to swirl the frosting into the ice cream. Top with ⅓ of the rainbow sprinkles.
- Repeat the layering two more times. Repeat the layering of remaining ice cream, frosting, and sprinkles two more times – ending with frosting and sprinkles on top for garnish (see photo above).
- Freeze the ice cream. Cover the loaf pan tightly with plastic wrap and freeze for at least 6 hours, or until the ice cream is fully set. Then scoop and enjoy!

Tips for Making Homemade Ice Cream
Homemade ice cream is one of the best DIY kitchen dessert projects – it’s very fun to make!
Here are some helpful tips when making this ice cream:
- Don’t skimp on the fat. As noted above, for the ultimate rich and creamy ice cream, use whole-fat milk and heavy cream in this recipe.
- Don’t skimp on the sugar. Sugar adds both sweetness and creamy texture to this ice cream base. If you reduce the amount of sugar, you will get less favorable ice cream texture results.
- Keep your ice cream maker bowl frozen. Keep your ice cream maker in the freezer so it’s super cold when it comes time to make the ice cream. I recommend freezing the bowl for a full 24 hours prior to making ice cream.
- Fully dissolve the sugar. Your ice cream will have a gritty texture if the sugar isn’t fully dissolved. Blend the mixture on high speed in a blender for 30 seconds if it’s not dissolving.
- Chill the ice cream base. Chill the liquid ice cream base for at least 30 minutes and up to overnight before churning the ice cream. I oftentimes place the ice cream base in the freezer, then set a timer in 20 minute increments to stir the base and check on the temperature. This will give you the best (and quickest) frozen texture when you churn it in the ice cream maker.
- Freeze the finished ice cream before serving it. After freezing the custard in the ice cream maker and layering it into the pan with the frosting and sprinkles, then place the finished ice cream in the freezer for at least 6 hours or longer.
Variation Ideas
And if you’d like to change up this recipe, here are a few ideas:
- Use almond extract. My family loves almond flavoring – it would be delicious in this recipe. You could use it instead of the either the vanilla extract or the cake batter flavoring.
- Can’t find cake batter flavor? Then use butter extract instead, because butter is the flavoring in this ice cream recipe that makes it taste like cake.
- Add some white chocolate. If desired, add some shaved or chopped white chocolate into the ice cream base.
- Change the color. I love using blue food coloring, but you could use any color you like. Or, you could omit the food coloring and keep this as a simple vanilla ice cream.
- Use sprinkles that won’t bleed their color. Use rainbow “jimmies” that have are colored all the way through, inside and out. Do not use the smaller, round nonpareils, as they are only coated with color and that color will bleed into the ice cream.
- Add cake pieces. If you want cake pieces in your birthday cake ice cream, a boxed cake mix is an easy way to include fresh cake pieces. Cut the baked cake into small bites to equal 1 cup. Then quickly yet gently fold the cake bites into the finished ice cream, right in the ice cream maker bowl. You could also cut/crumble two regular sized vanilla cupcakes instead of making a vanilla cake.

Serving Suggestions
Birthday cake ice cream is, of course, perfect for celebrating birthdays. But we make it whenever the craving strikes!
Here are a few serving suggestions:
- Top with magic shell. Homemade chocolate magic shell is so easy to make and it’s a delightful topping for a bowl of homemade birthday cake ice cream.
- With cake. A scoop of birthday cake ice cream is the perfect side to a slice of cake, like my chocolate wacky cake, red velvet sheet cake, or marble cake.
- In ice cream cones. You can enjoy scoops of this ice cream in bowls or in ice cream cones.
- Add chocolate. A spoonful of hot fudge sauce draped over a bowl of birthday cake ice cream gives a rich chocolatey finish.
- Go fruity. Or for an entirely different flavor combination, try some strawberry sauce.
- Make a sundae. Dress up homemade birthday cake ice cream with whipped cream, toasted nuts, more sprinkles, and a cherry on top!
- Make a BROWNIE sundae! Brownie sundaes are a favorite around here. We use my mom’s brownies recipe. Just place brownies in individual serving bowls and top with a big scoop of ice cream, plus some hot fudge.
- Top with candied pecans. If you like nuts on your ice cream, try my candied pecans recipe. You can add them whole or chop them up first.
Proper Storage
Store birthday cake ice cream in an airtight container in the freezer for up to 2 weeks.
Press plastic wrap down onto the surface of the ice cream, then place the cover of the container over that. This helps to prevent ice crystals from forming on the surface of the ice cream.
Homemade ice cream doesn’t keep as well as store-bought ice cream because it does not contain any added preservatives.
Like this Recipe? Save to Pinterest
Birthday Cake Ice Cream
Ingredients
- 1½ cups whole milk
- 1½ cups heavy cream
- ½ cup granulated sugar
- 2 teaspoons cake batter flavor
- 1 teaspoon pure vanilla extract
- ¾ cup vanilla frosting
- 1 drop blue food coloring or any color – I use Americolor gel paste “sky blue”
- ⅓ cup rainbow sprinkles
Instructions
- Freeze your ice cream maker bowl according to the manufacturer’s instructions.
- In a large bowl, whisk together the whole milk, heavy cream, sugar, cake batter flavor, and vanilla extract until the sugar is dissolved. Make sure the sugar is fully dissolved, otherwise your ice cream will have a gritty texture. If you’re having trouble dissolving the sugar, blend the mixture on high speed in a blender for 30 seconds.
- Transfer the mixture to your ice cream maker and churn according to the manufacturer's instructions until it reaches a soft-serve consistency. Depending on your ice cream maker, this should take 15-25 minutes.
- Place the frosting in a small bowl and heat in the microwave for 5-10 seconds, or until it is just barely pourable. Add a drop of blue food coloring to the frosting and stir to combine. Add more if desired.
- When the ice cream is done churning, transfer ⅓ of it to a 9" x 5" loaf pan and drizzle the blue frosting over the ice cream. Use a butter knife to swirl the frosting into the ice cream. Top with rainbow sprinkles.
- Repeat Step 5 with the remaining ice cream, frosting, and sprinkles two more times – creating another two layers, ending with frosting and sprinkles on top for garnish.
- Cover the loaf pan tightly with plastic wrap and freeze for at least 6 hours, or until the ice cream is fully set. Then scoop and enjoy.
Notes
Nutrition Information:
More Ice Cream Recipes
- Ice Cream Pizza
- Crème Fraîche Strawberry Ice Cream
- Salted Caramel Ice Cream
- Butter Pecan Ice Cream
- Crème Fraîche Blueberry Ice Cream
- Chocolate Malt Banana Ice Cream
- Peppermint Ice Cream


get new posts via email: