
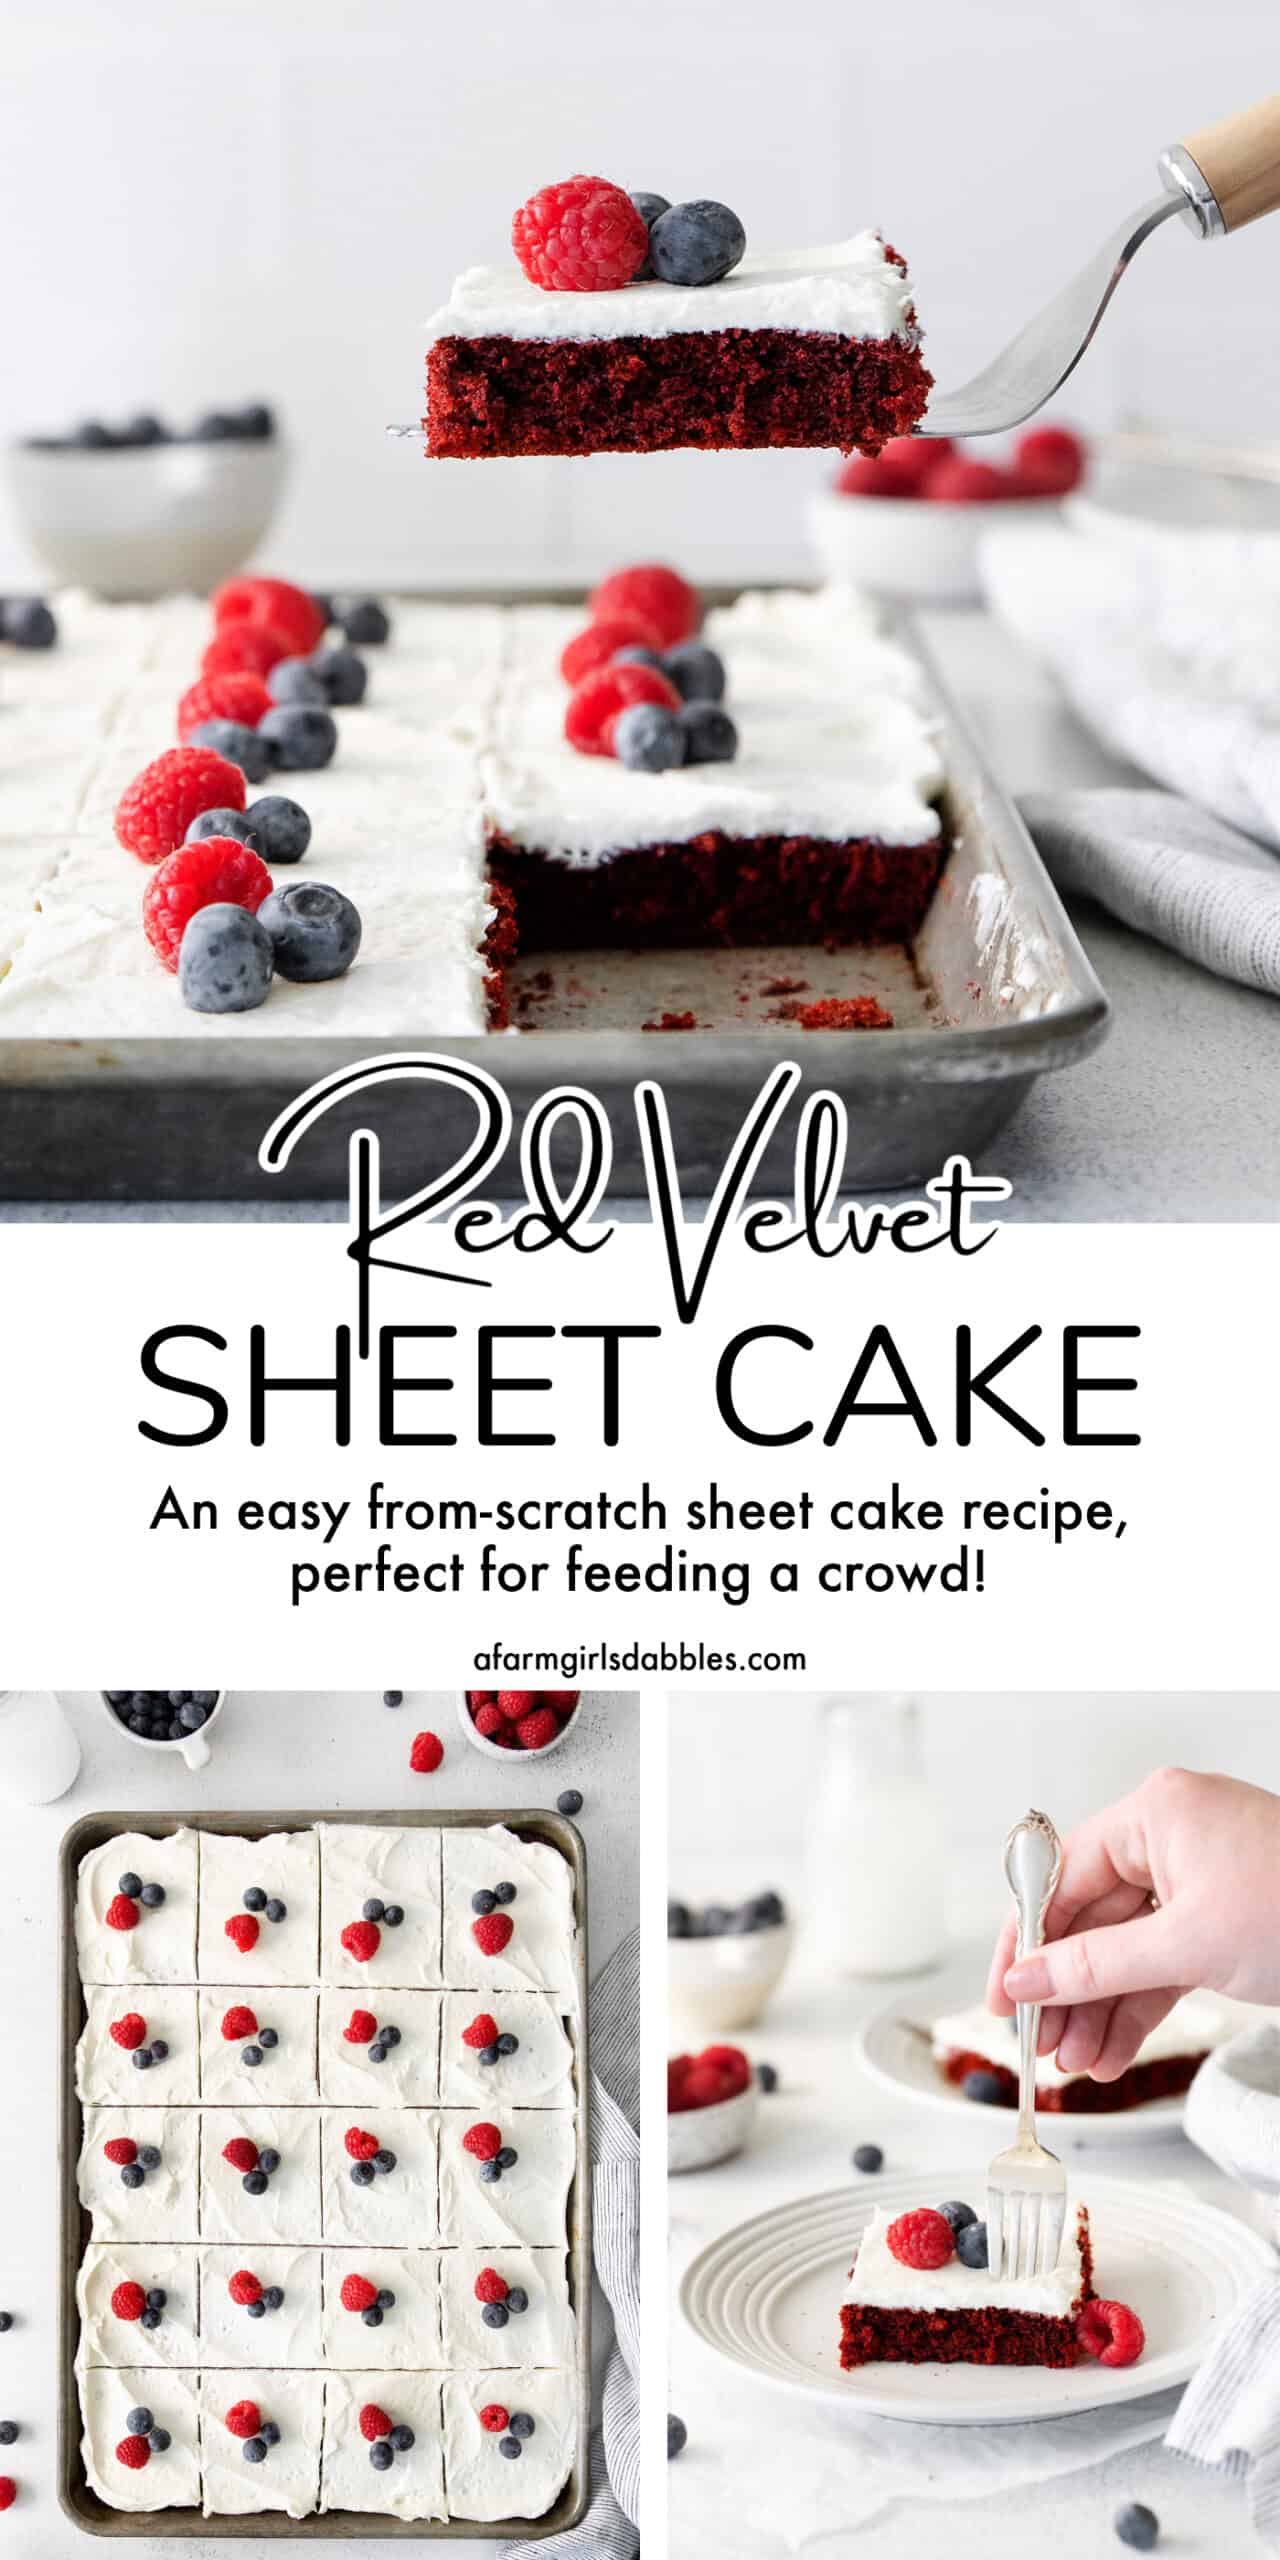
This Red Velvet Sheet Cake is tangy, moist, and topped with a cream cheese frosting – a guaranteed crowd pleaser. Ready in just a few easy steps, this homemade sheet cake recipe can easily serve a gathering of 24 or more!
The Best Red Velvet Cake
This Red Velvet Sheet Cake is a no-fuss, from-scratch red velvet recipe that comes together in quick and easy fashion. Moist and tender, with that classic tangy red velvet flavor topped with a simple cream cheese frosting, this easy sheet cake recipe is a guaranteed crowd pleaser!
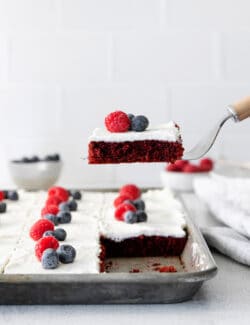
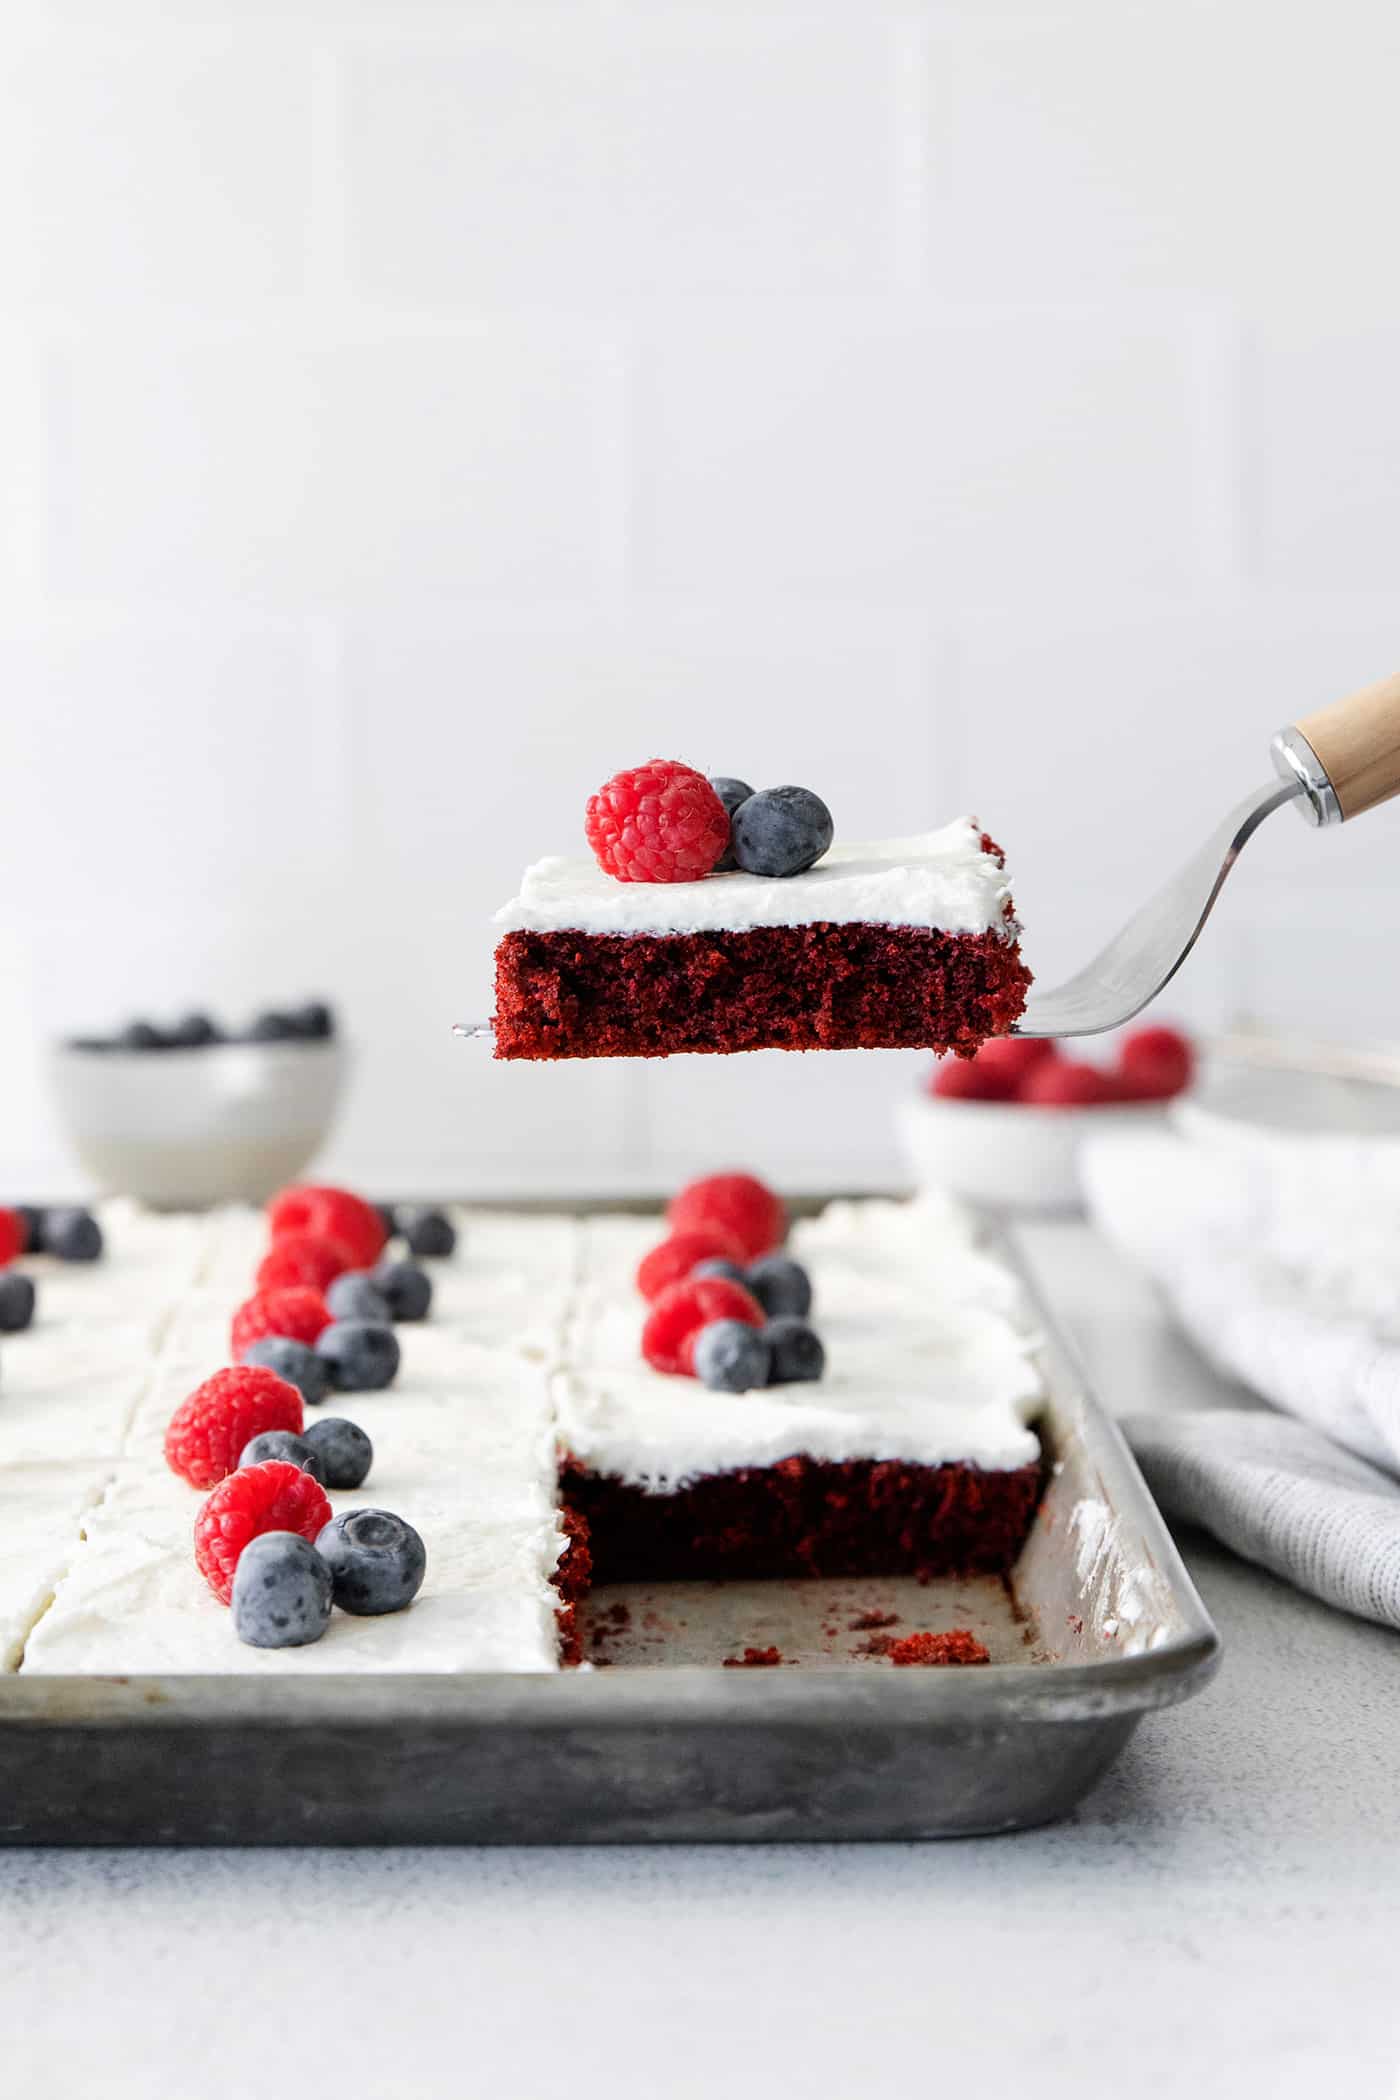
The vibrant red color of this old-fashioned red velvet cake makes it perfect for holidays from Memorial Day and the 4th of July, to Christmas and Valentine’s Day. You can even top it with some fresh berries to make it red-white-and-blue festive for our patriotic holidays.
I love serving this at summer potlucks because it can easily serve larger groups and it’s always a hit!
What You’ll Need
This homemade red velvet cake uses pantry staples, plus some food coloring, to achieve its signature red color.
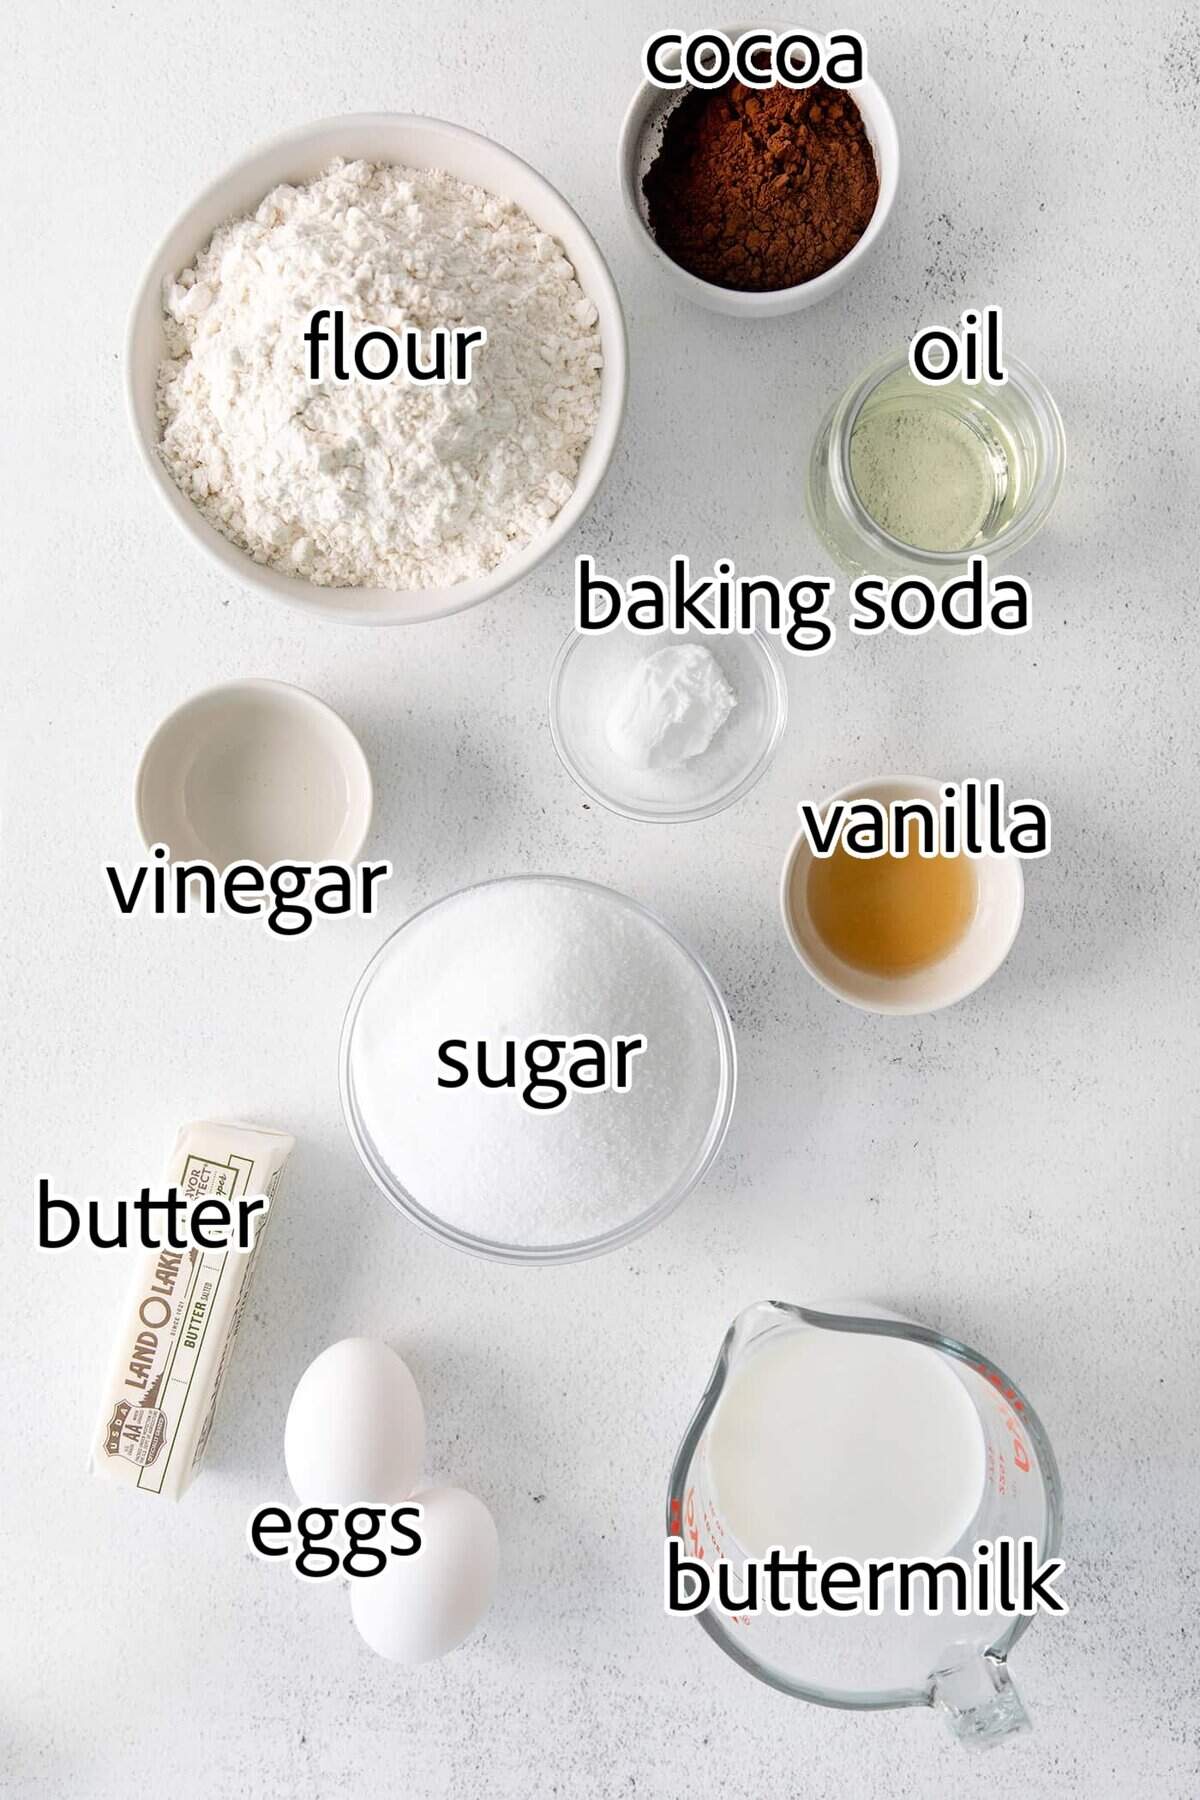
For the Cake
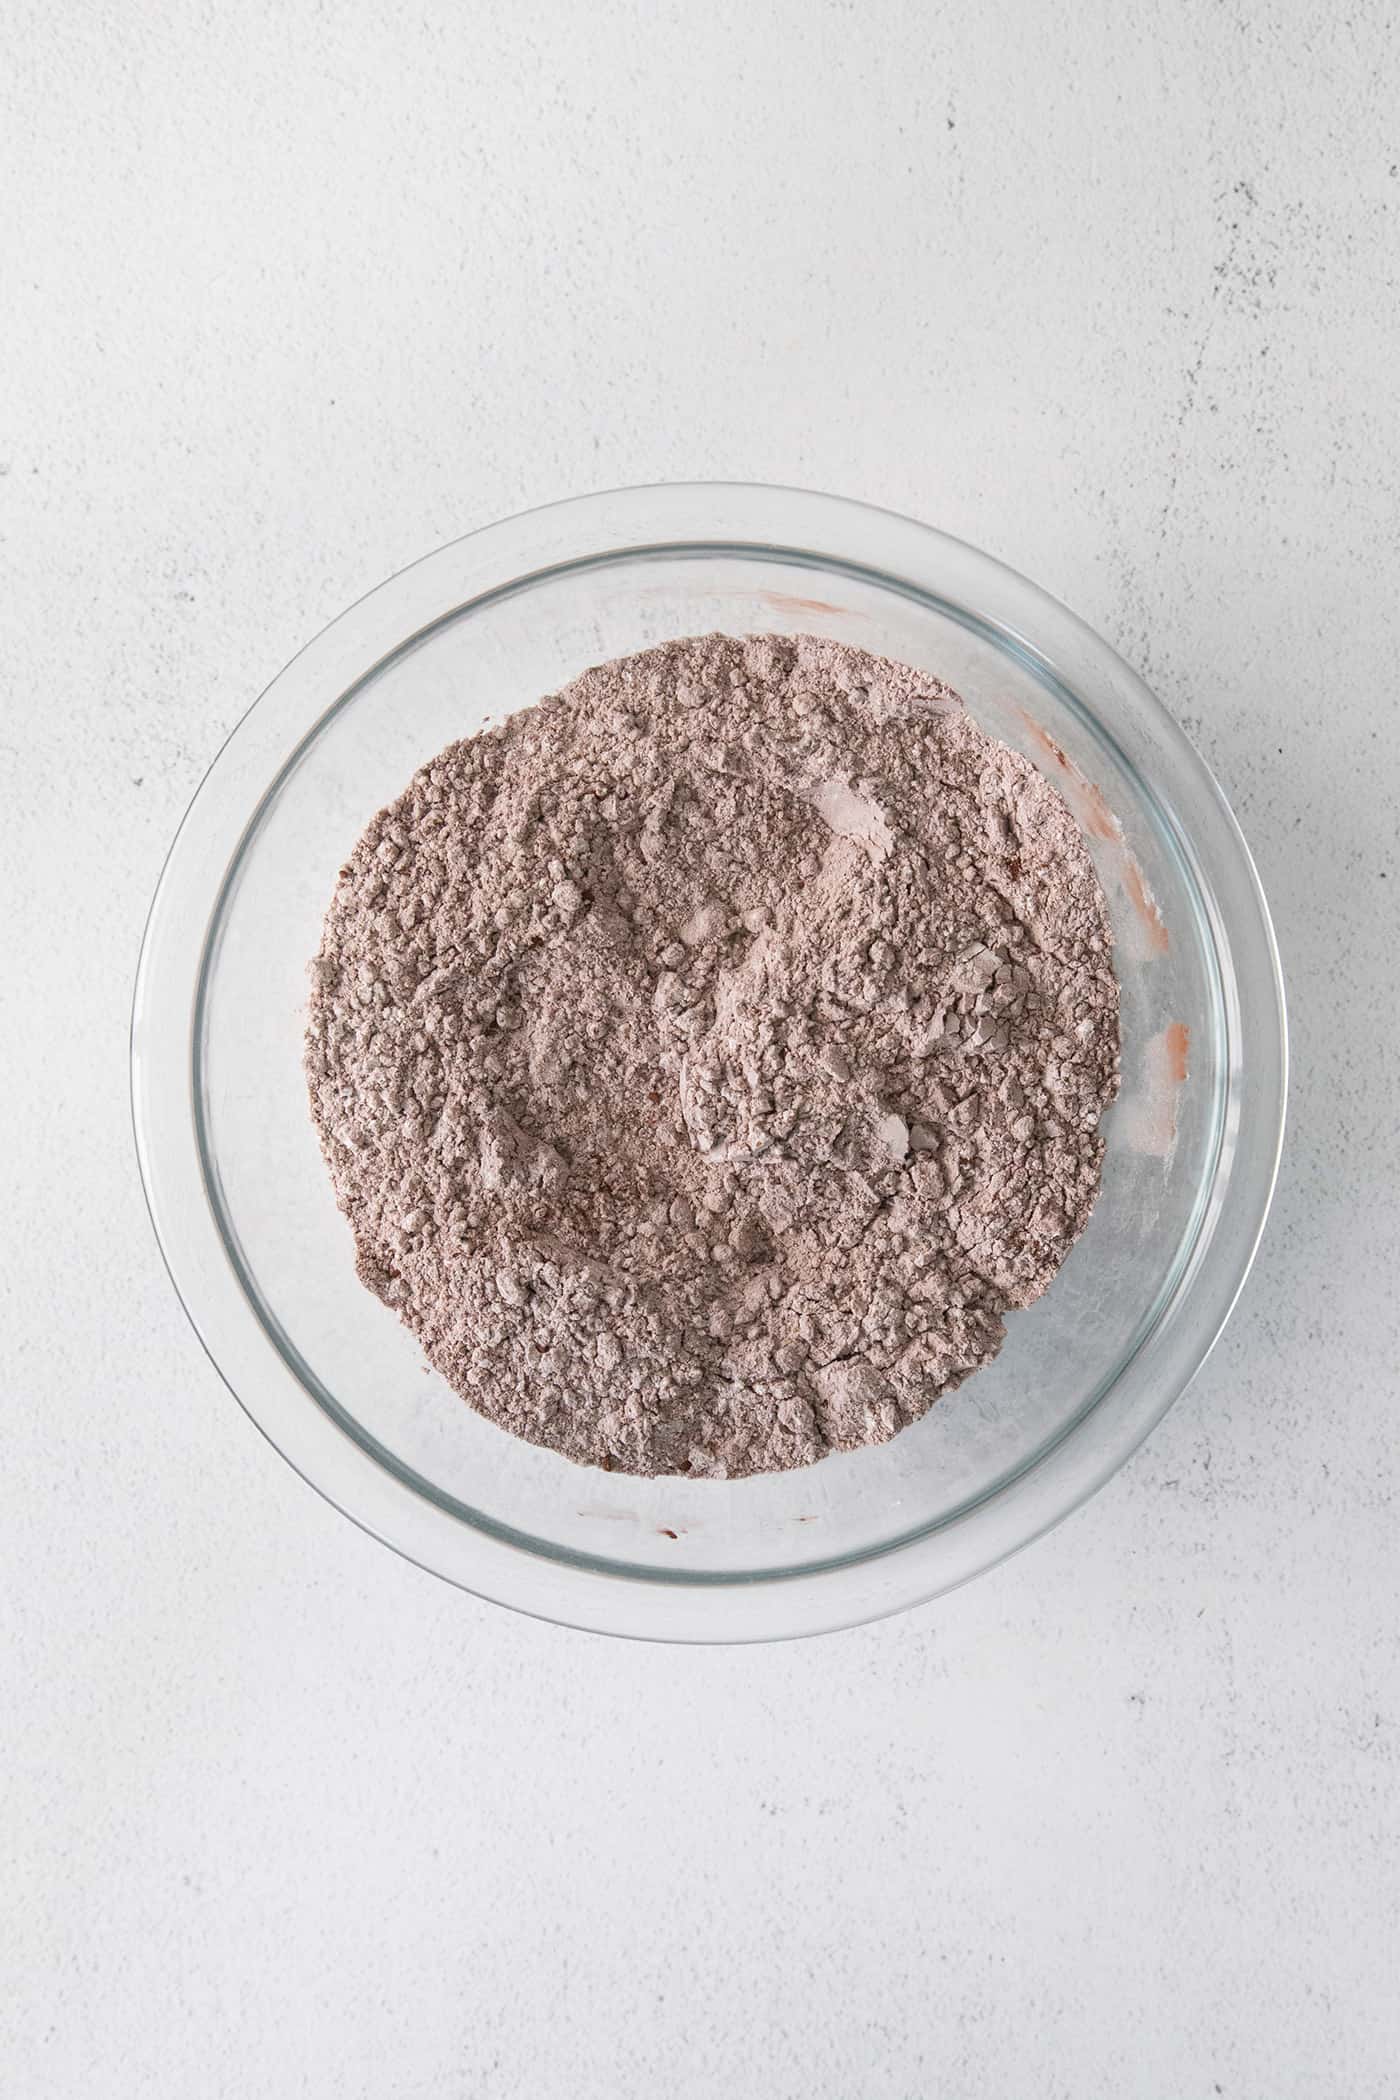
- Cake flour – Be sure to measure using the spoon and level method as adding too much flour can result in a dry cake.
- Cocoa powder – Cocoa powder was originally added to red velvet cake (along with vinegar and buttermilk) to create the red color – now we keep the same original ingredients but add some food coloring for some extra red oomph!
- Granulated sugar – Granulated sugar sweetens the cake.
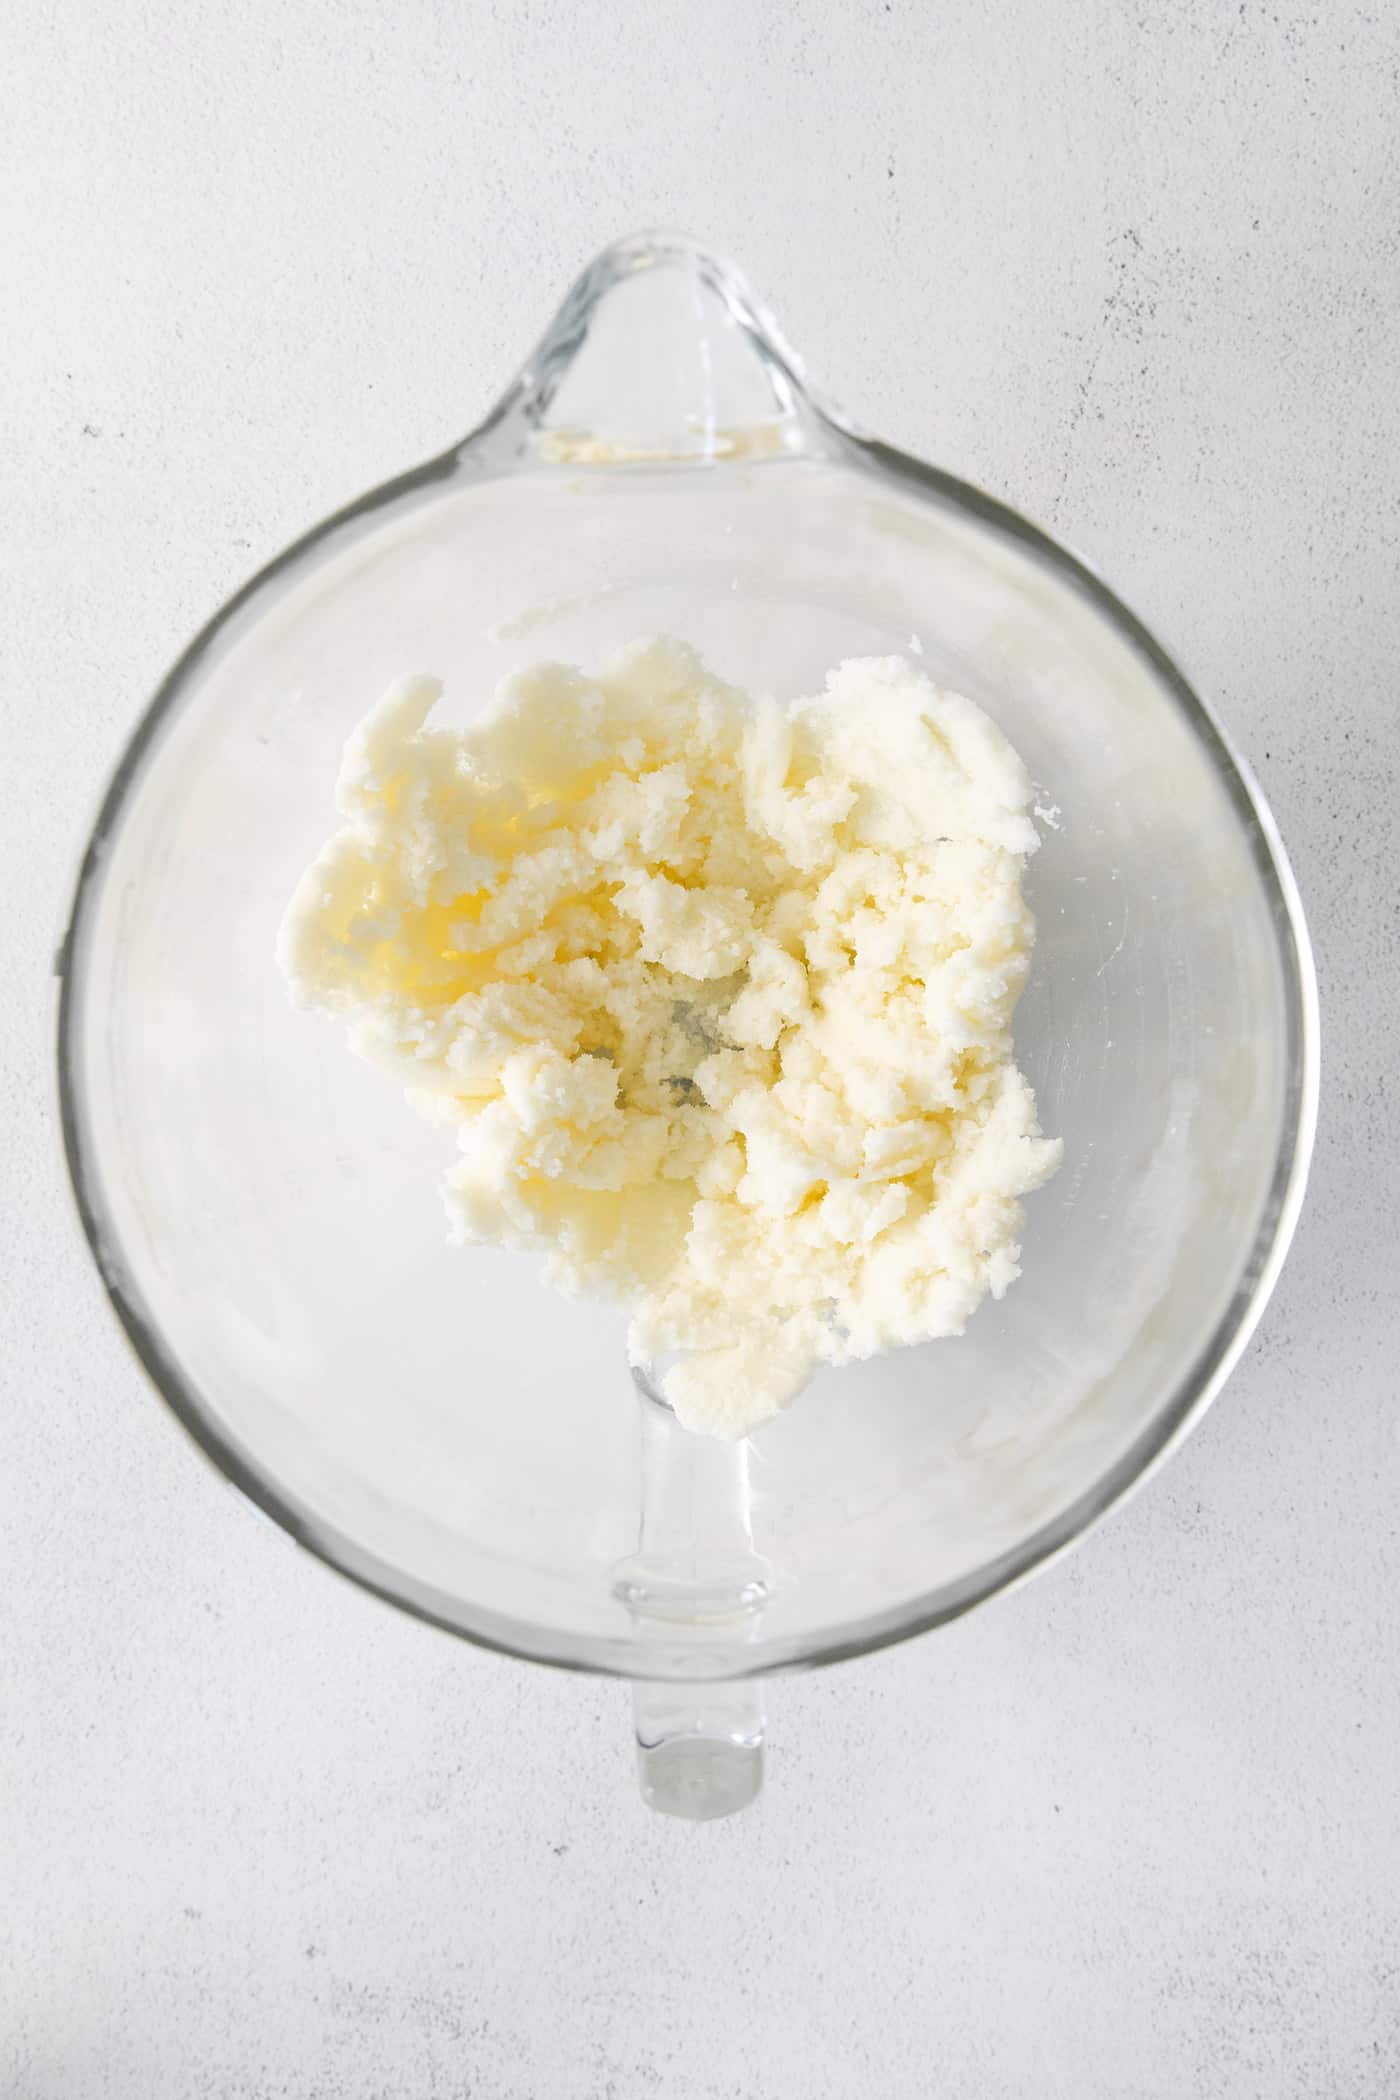
- Butter – Butter adds moisture and richness to the cake, plus delicious flavor. It’s very important that you fully soften the butter for both the cake and the frosting.
- Vegetable oil – Vegetable oil adds extra moisture and helps keep the cake fresher longer.
- Eggs – Eggs bind the cake batter together and add rich flavor.
- Pure vanilla extract – Vanilla adds flavor and enhances the sweetness of the cake.
- Red food coloring – I use Americolor #119 Red Red gel food coloring for this recipe. Feel free to make this cake as brightly colored as you like. Start with a little food coloring (either gel or liquid) and keep adding until you like the color – just know that the color of the batter will become a bit more muted when baked.
- Buttermilk – Buttermilk adds moist, tangy tenderness to the cake, plus it combines with the cocoa and vinegar to turn the cake red and activate the baking soda.
- Baking Soda – When combined with an acidic ingredient and a liquid, baking soda is activated and produces carbon dioxide. This gives rise to the cake, making it light and tender.
- White vinegar – A little bit of vinegar is another key ingredient that helps give the cake its red color. Plus it helps to activate the baking soda.
For the Frosting
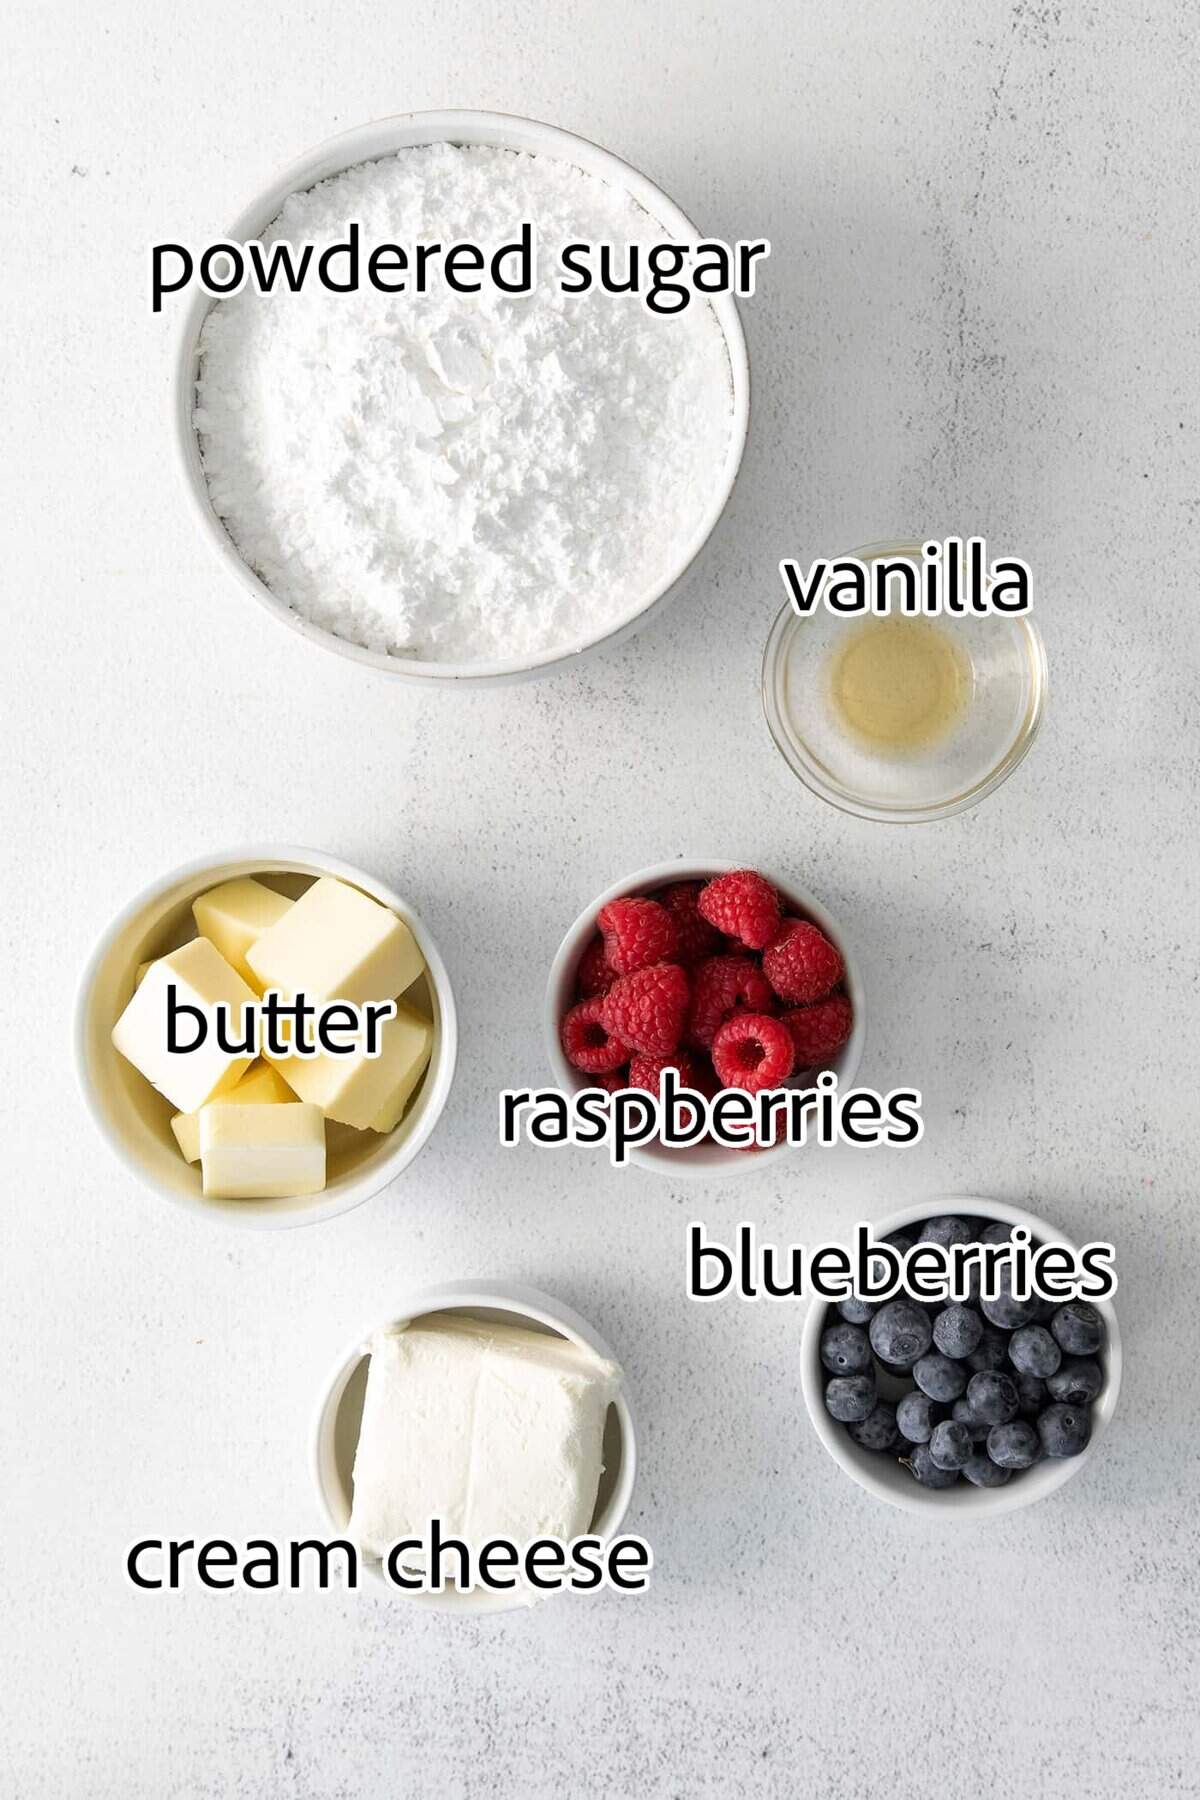
- Butter – I’m a big fan of homemade buttercream. And red velvet cake is all about the cream cheese frosting. So I married the butter and cream cheese into just the perfect ratio to top this cake!
- Cream cheese – Make sure it’s fully softened so it incorporates super smoothly with the butter. You don’t want a lumpy frosting!
- Powdered sugar – Powdered sugar gives the frosting sweetness and structure, and lightens up the overall texture.
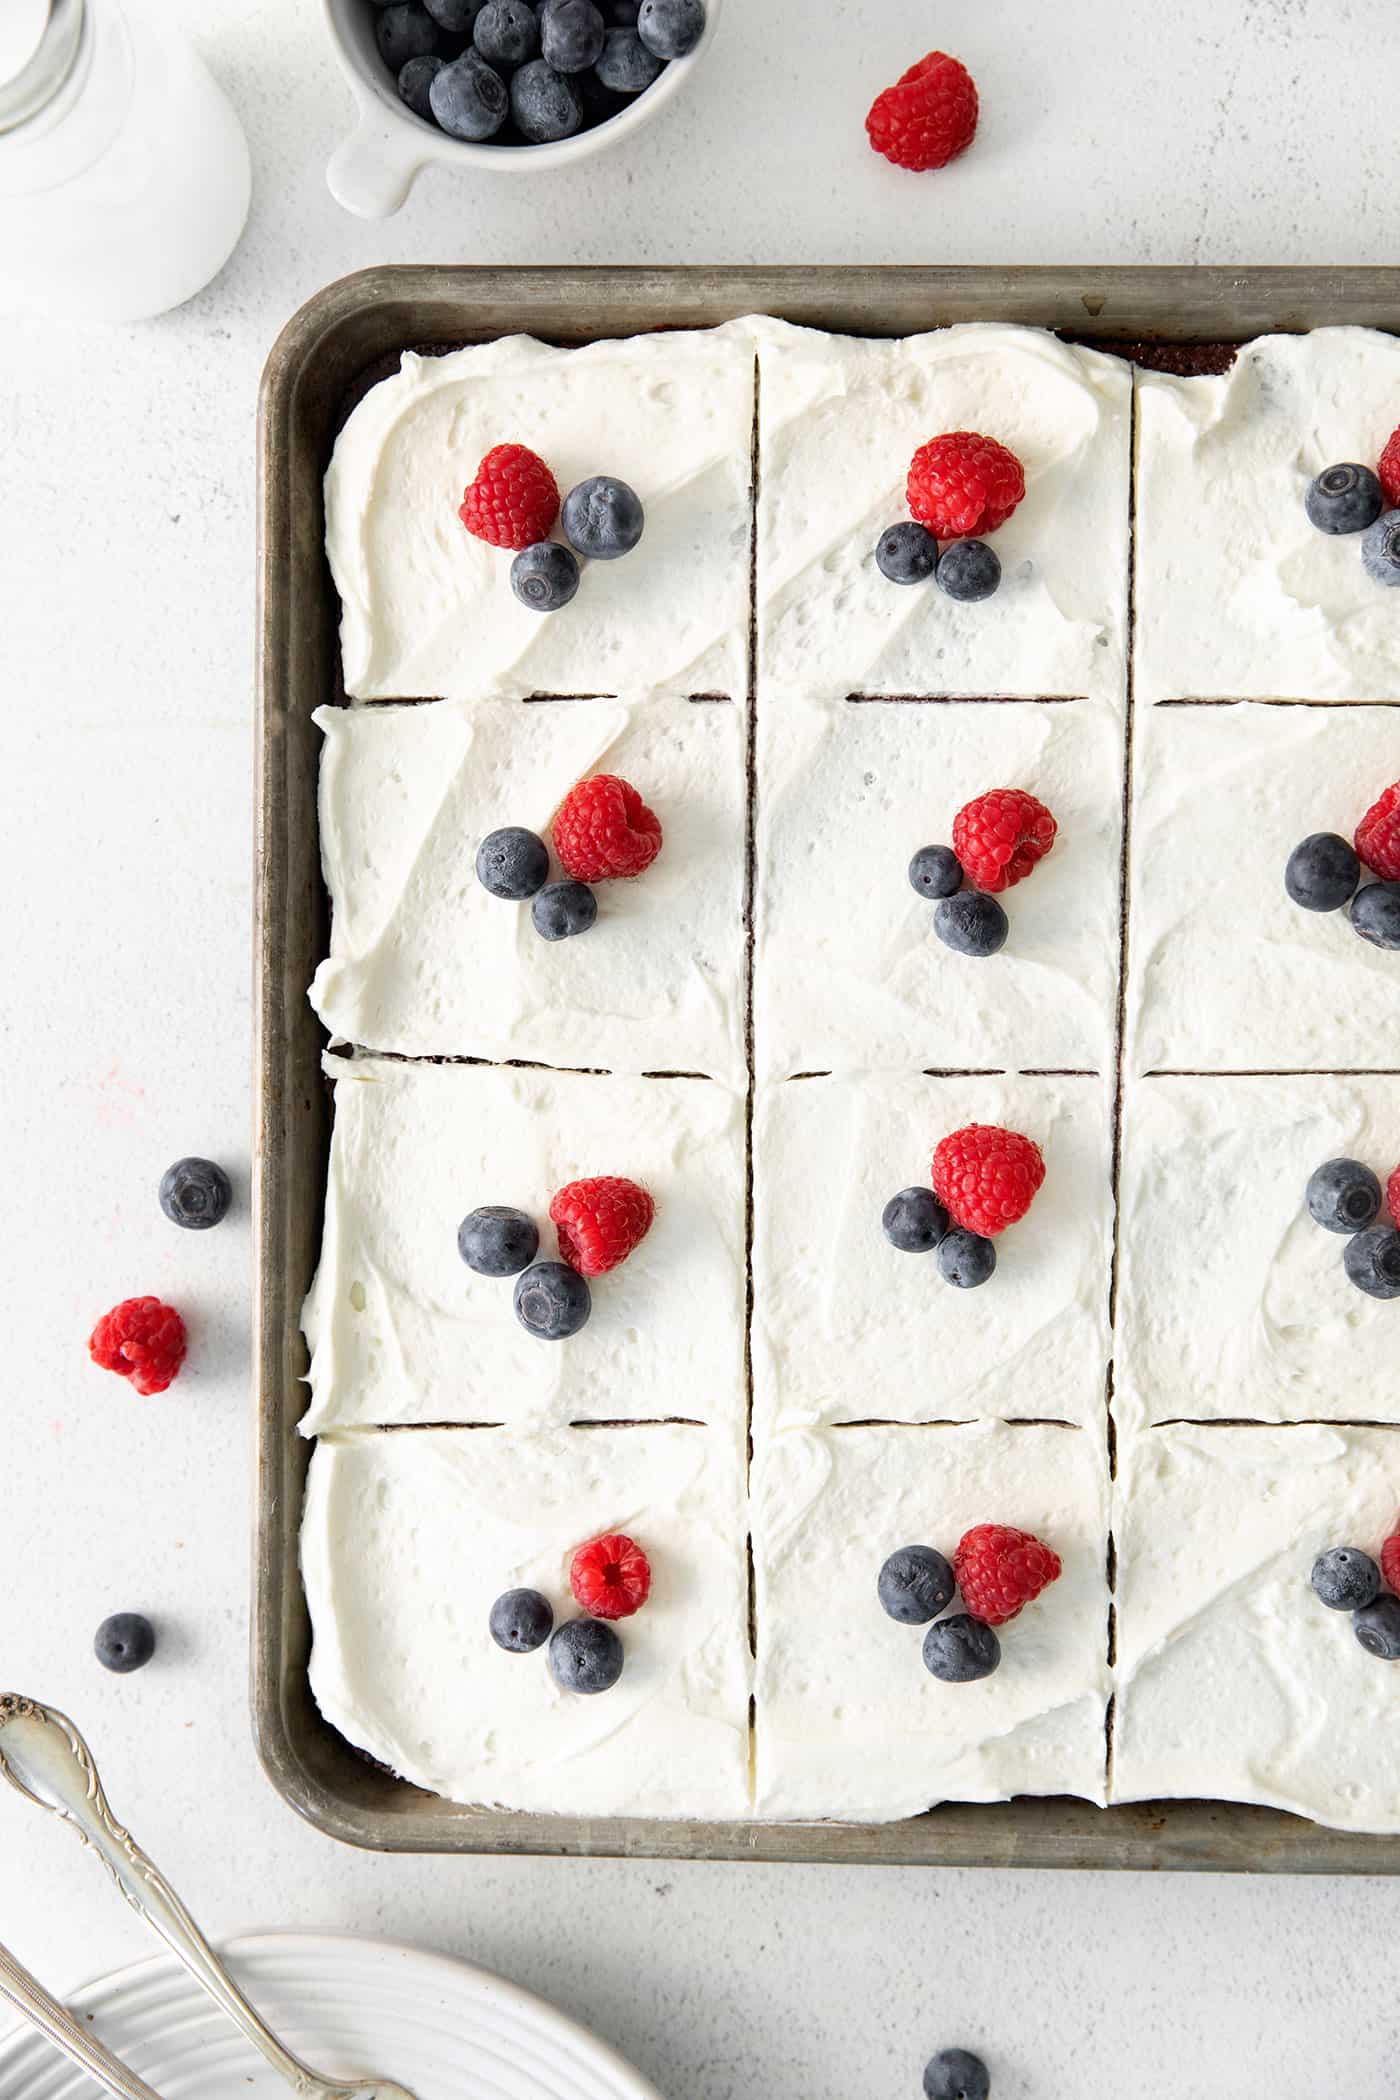
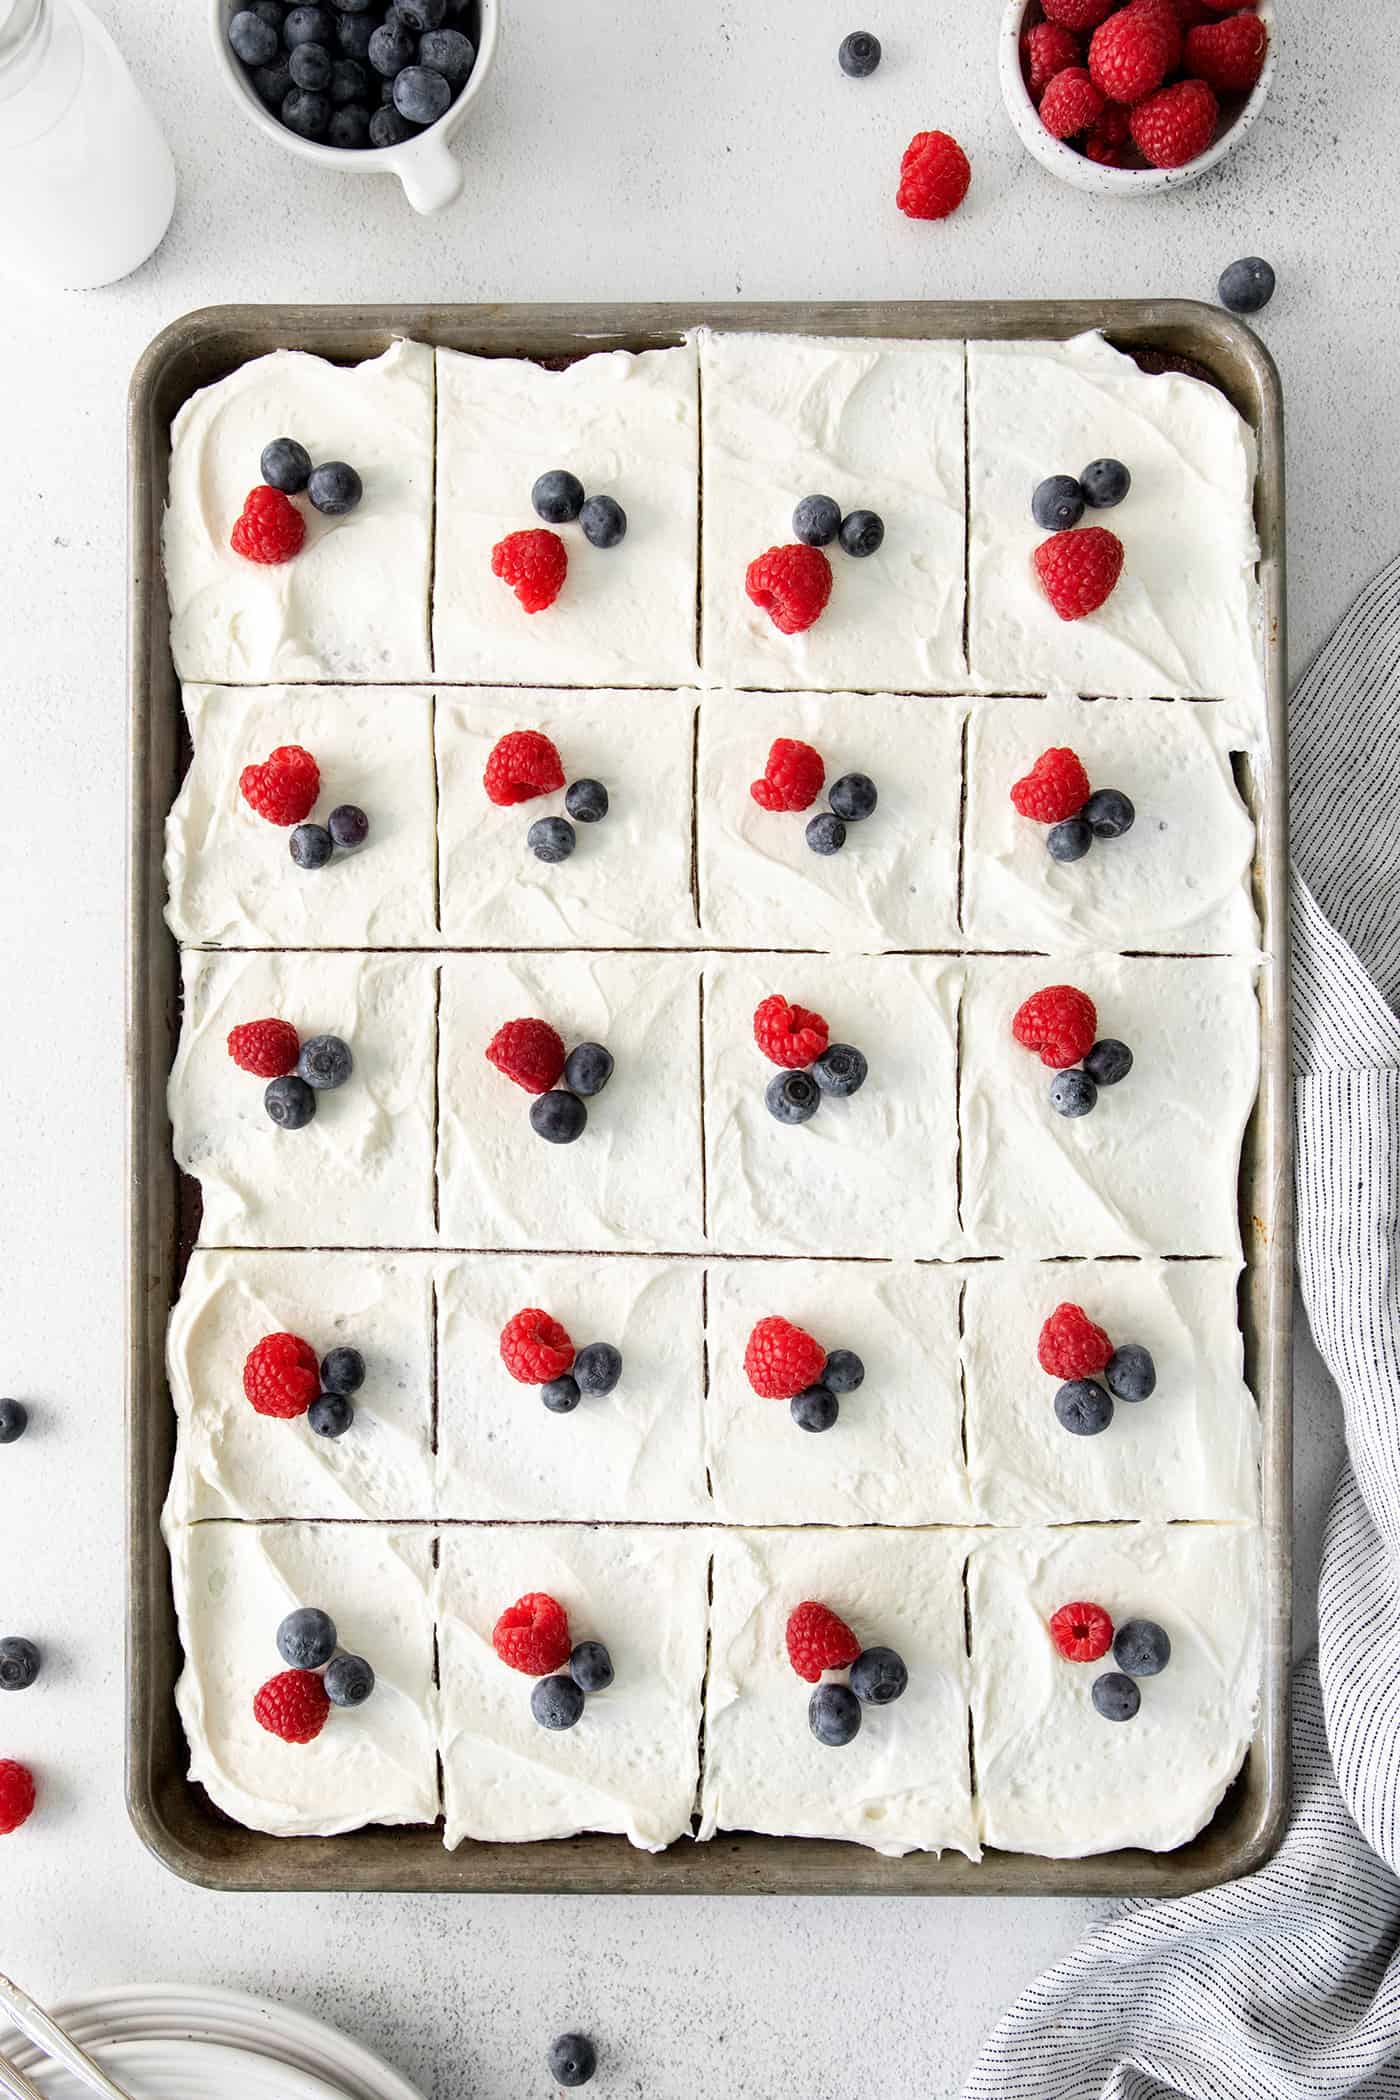
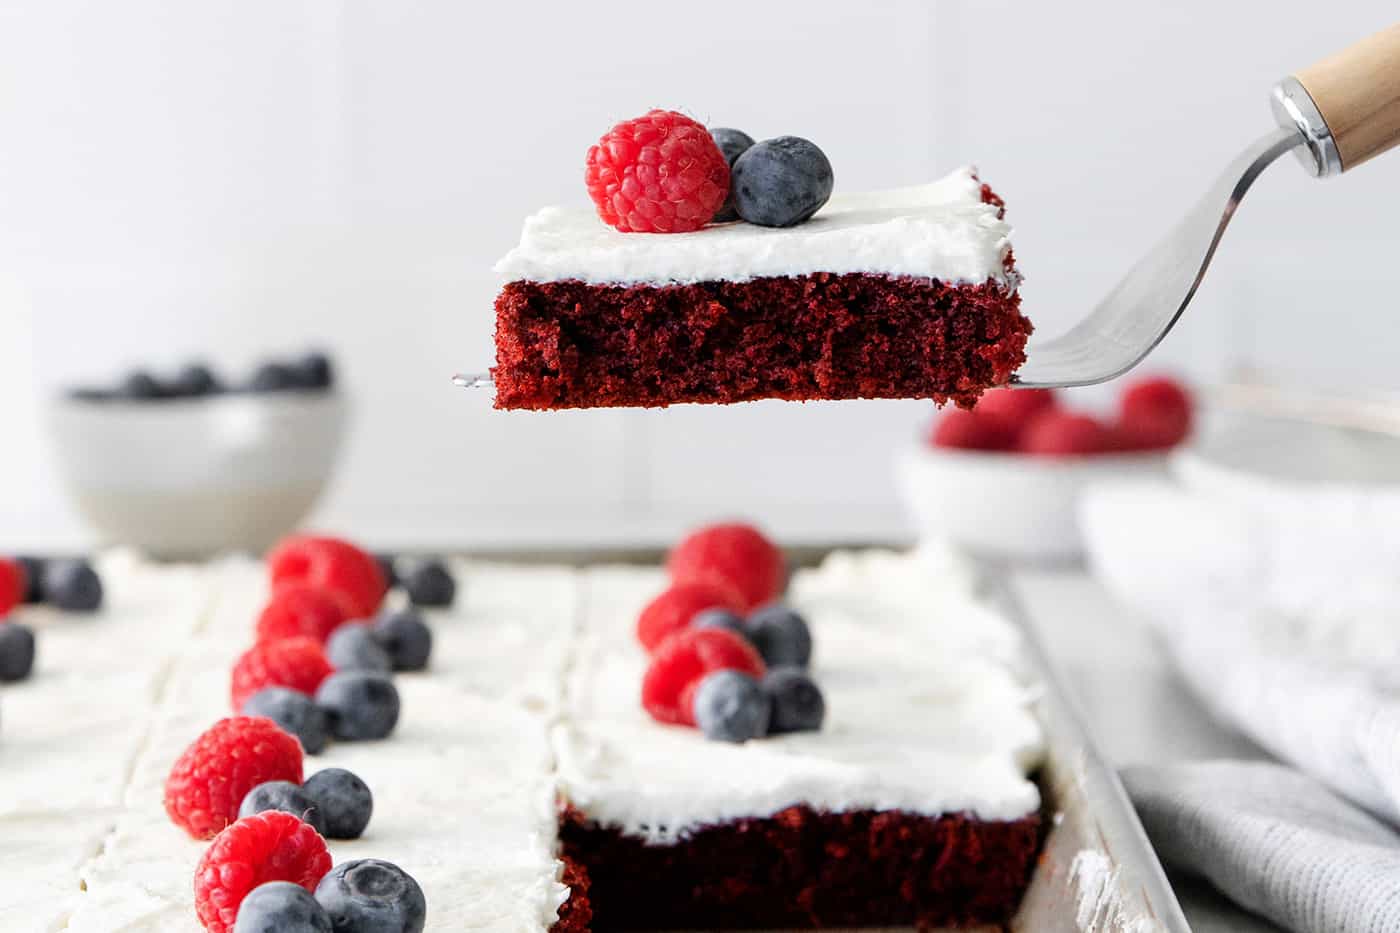
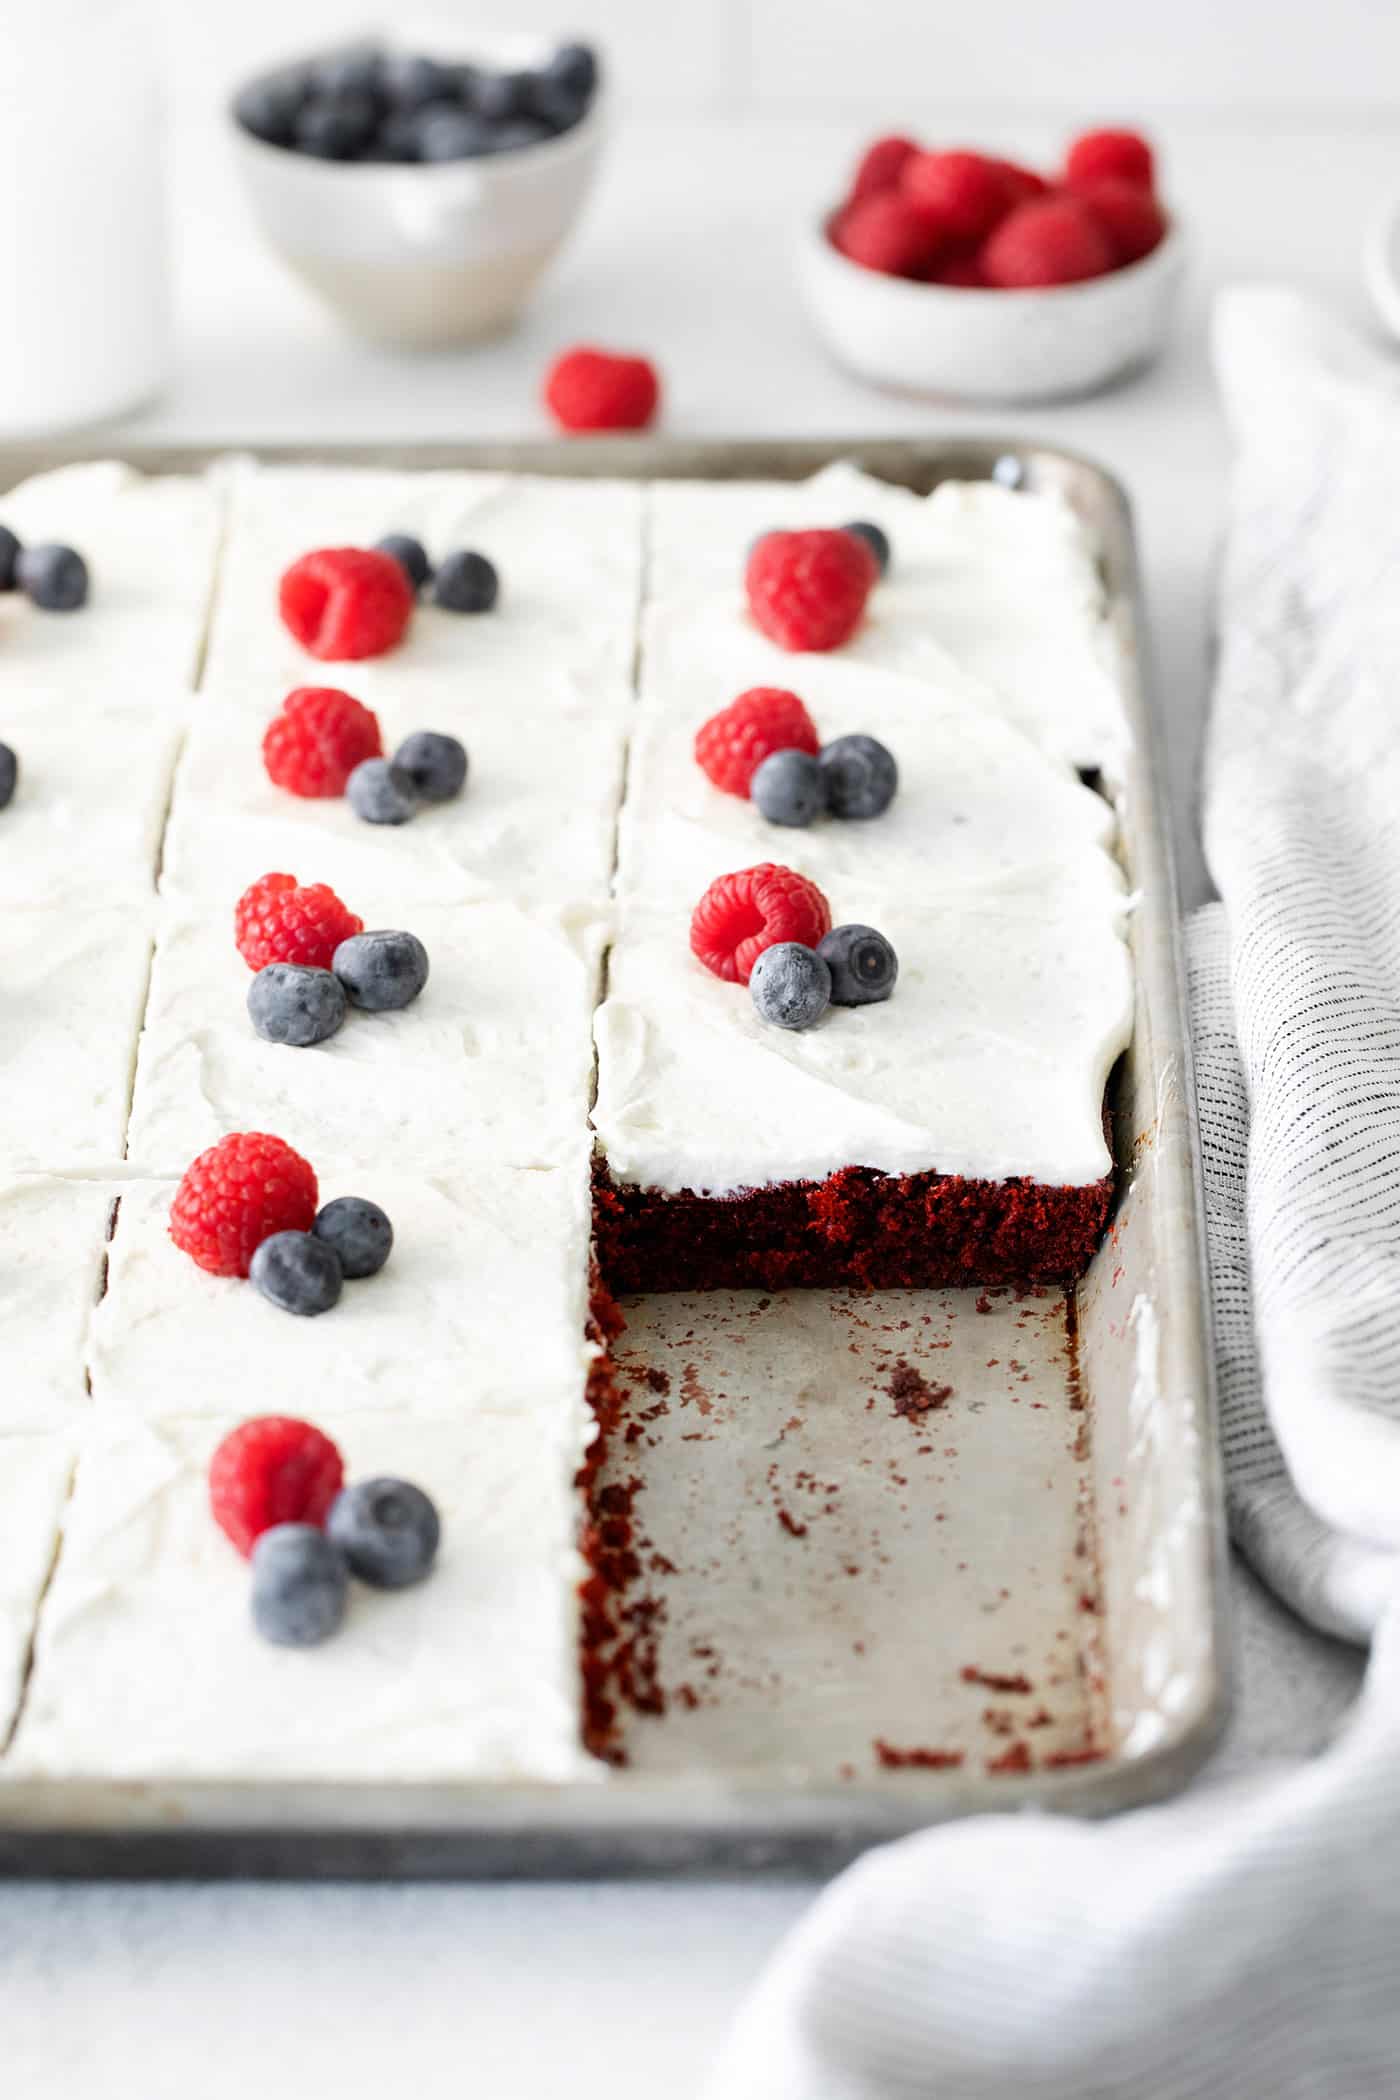
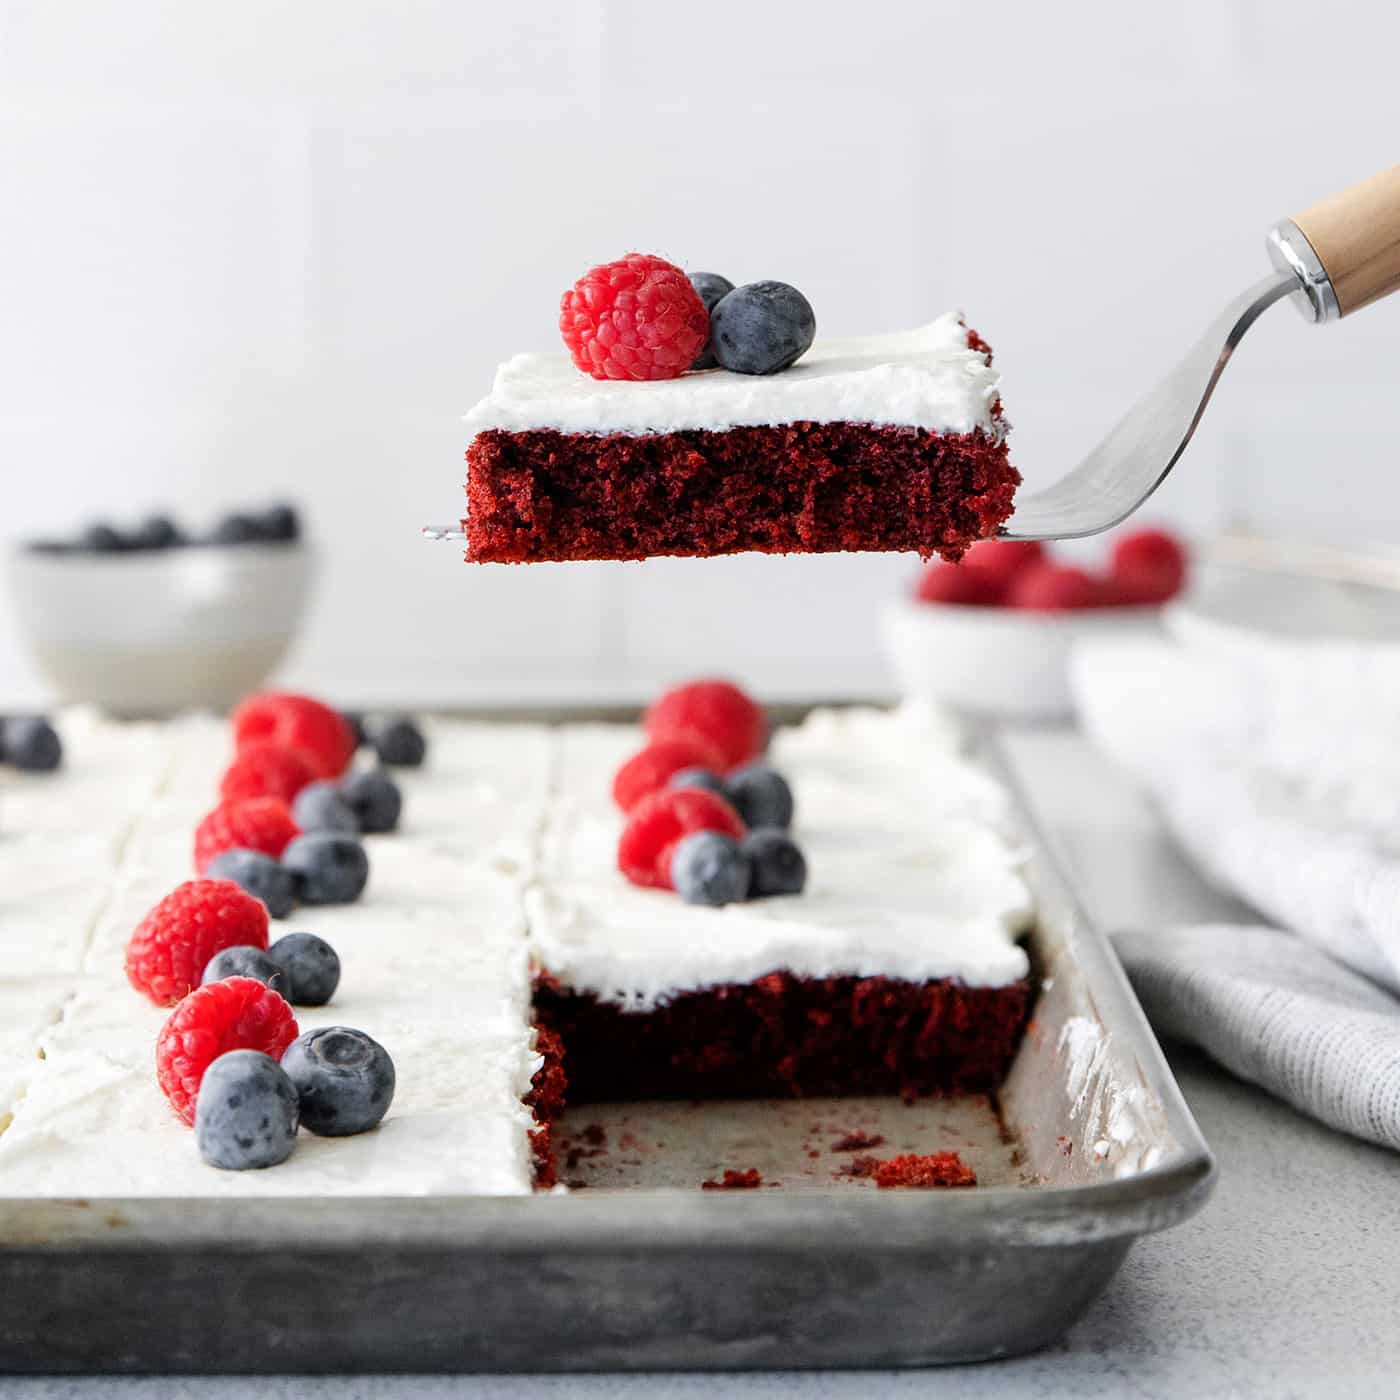
- Fresh raspberries & blueberries – Fresh raspberries and blueberries add a festive garnish to the cake (a perfect red, white & blue theme for patriotic holidays!), but you could also use sprinkles – or just leave it plain and simple and beautiful!
How to Make Red Velvet Sheet Cake
This easy red velvet cake recipe comes together in just a few steps. Just be sure to allow time for the cake to cool before you frost it.
- Make the cake batter. Whisk together the dry ingredients. Beat the sugar and butter until light and fluffy, then slowly add the vegetable oil, eggs, and vanilla. Add the food coloring, followed by the baking powder and vinegar. Finish by alternately adding the flour mixture and buttermilk.
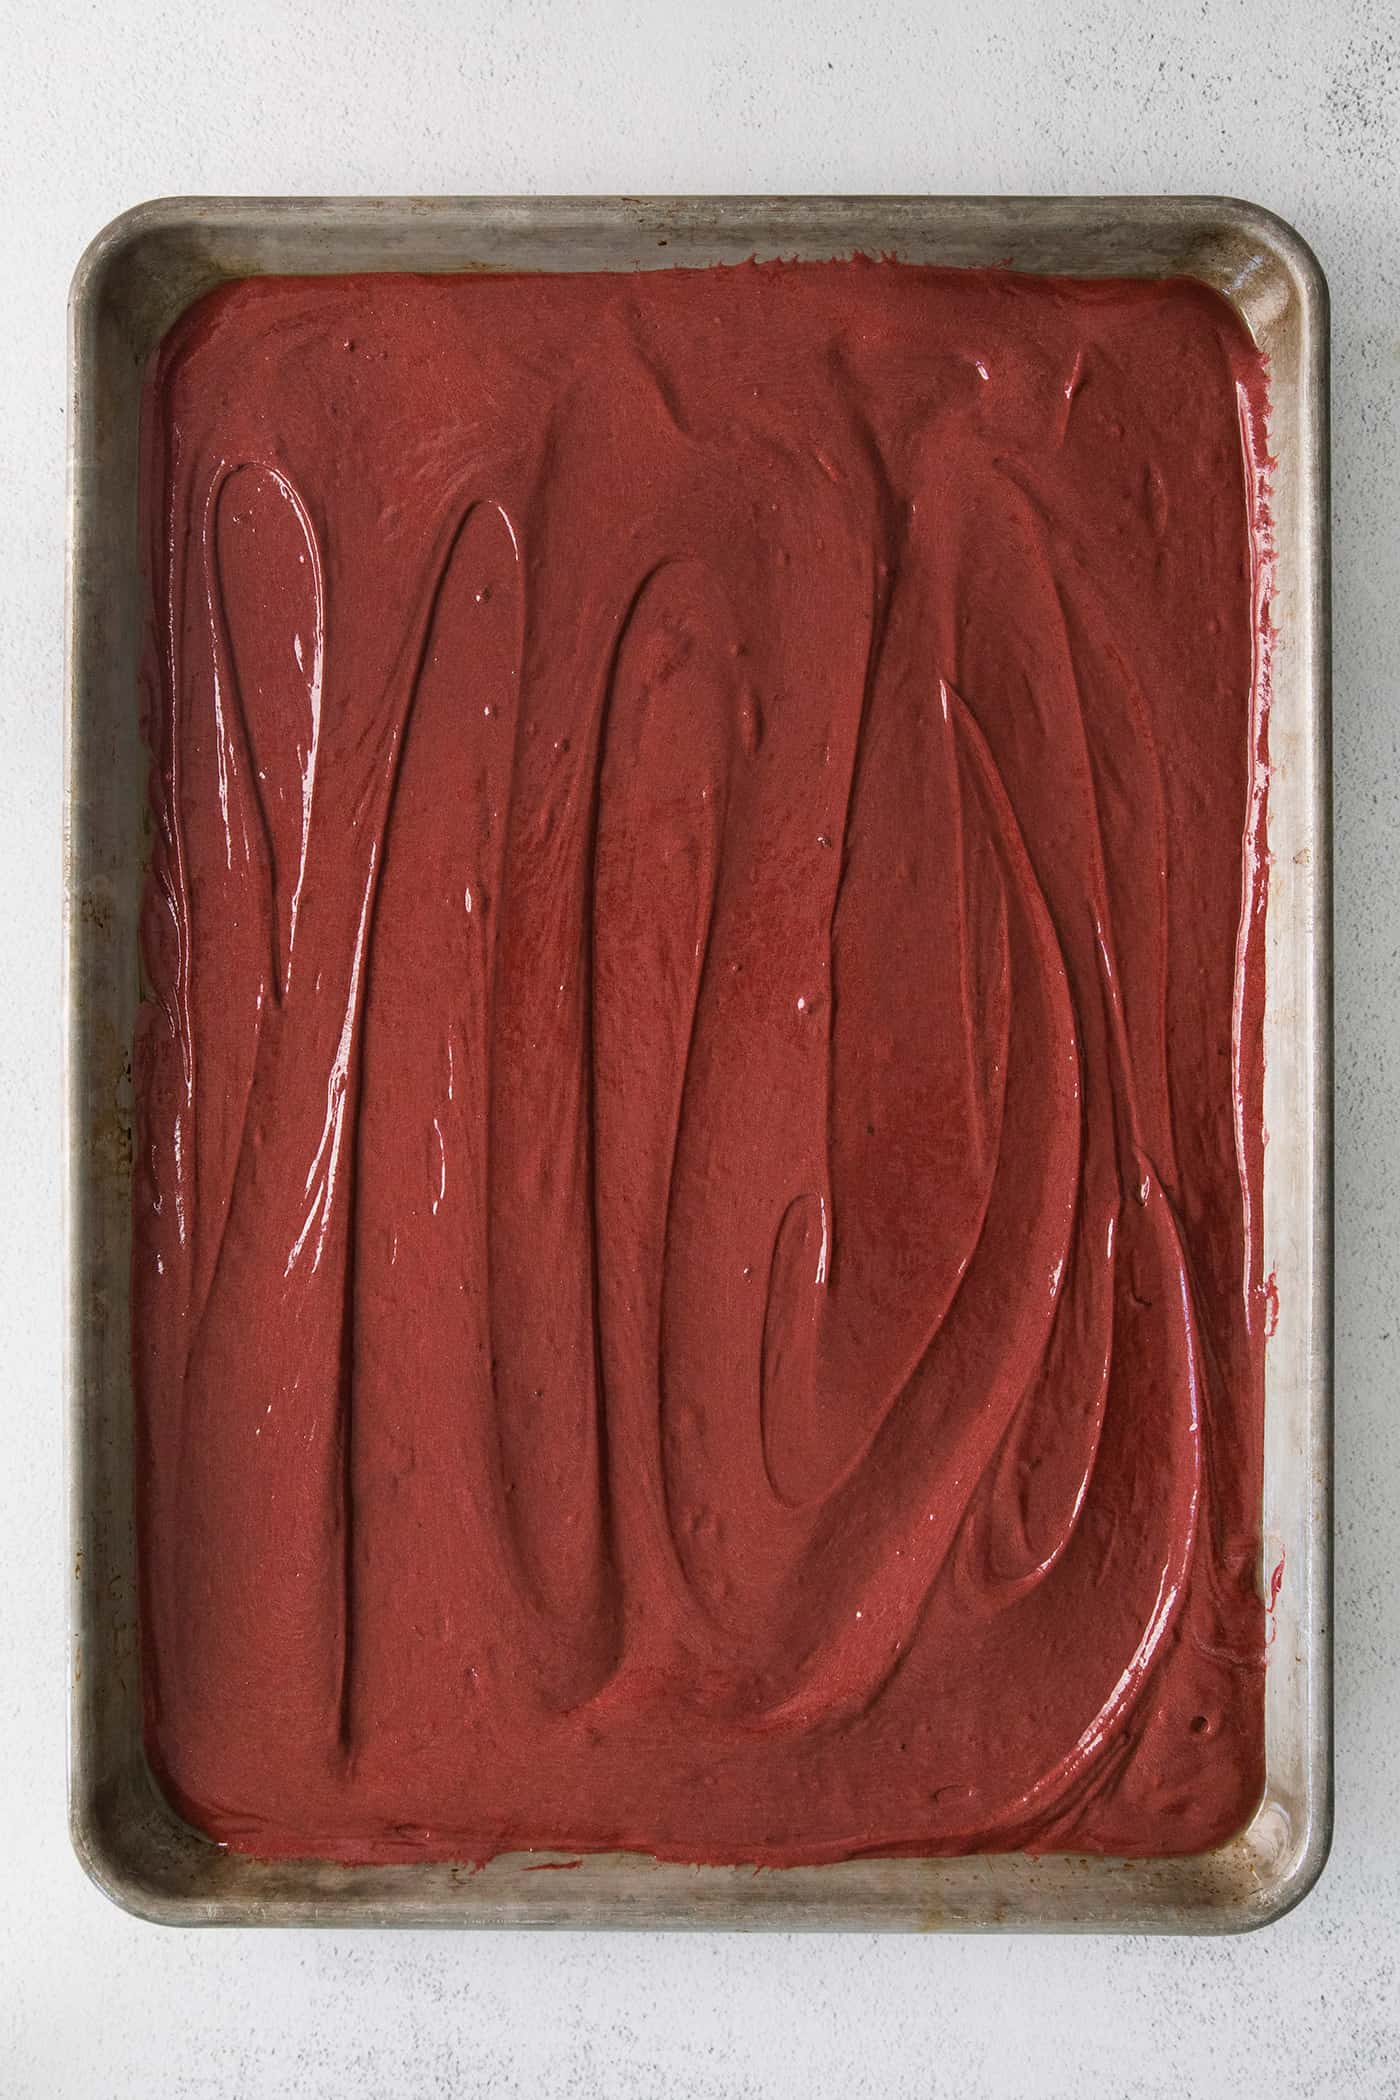
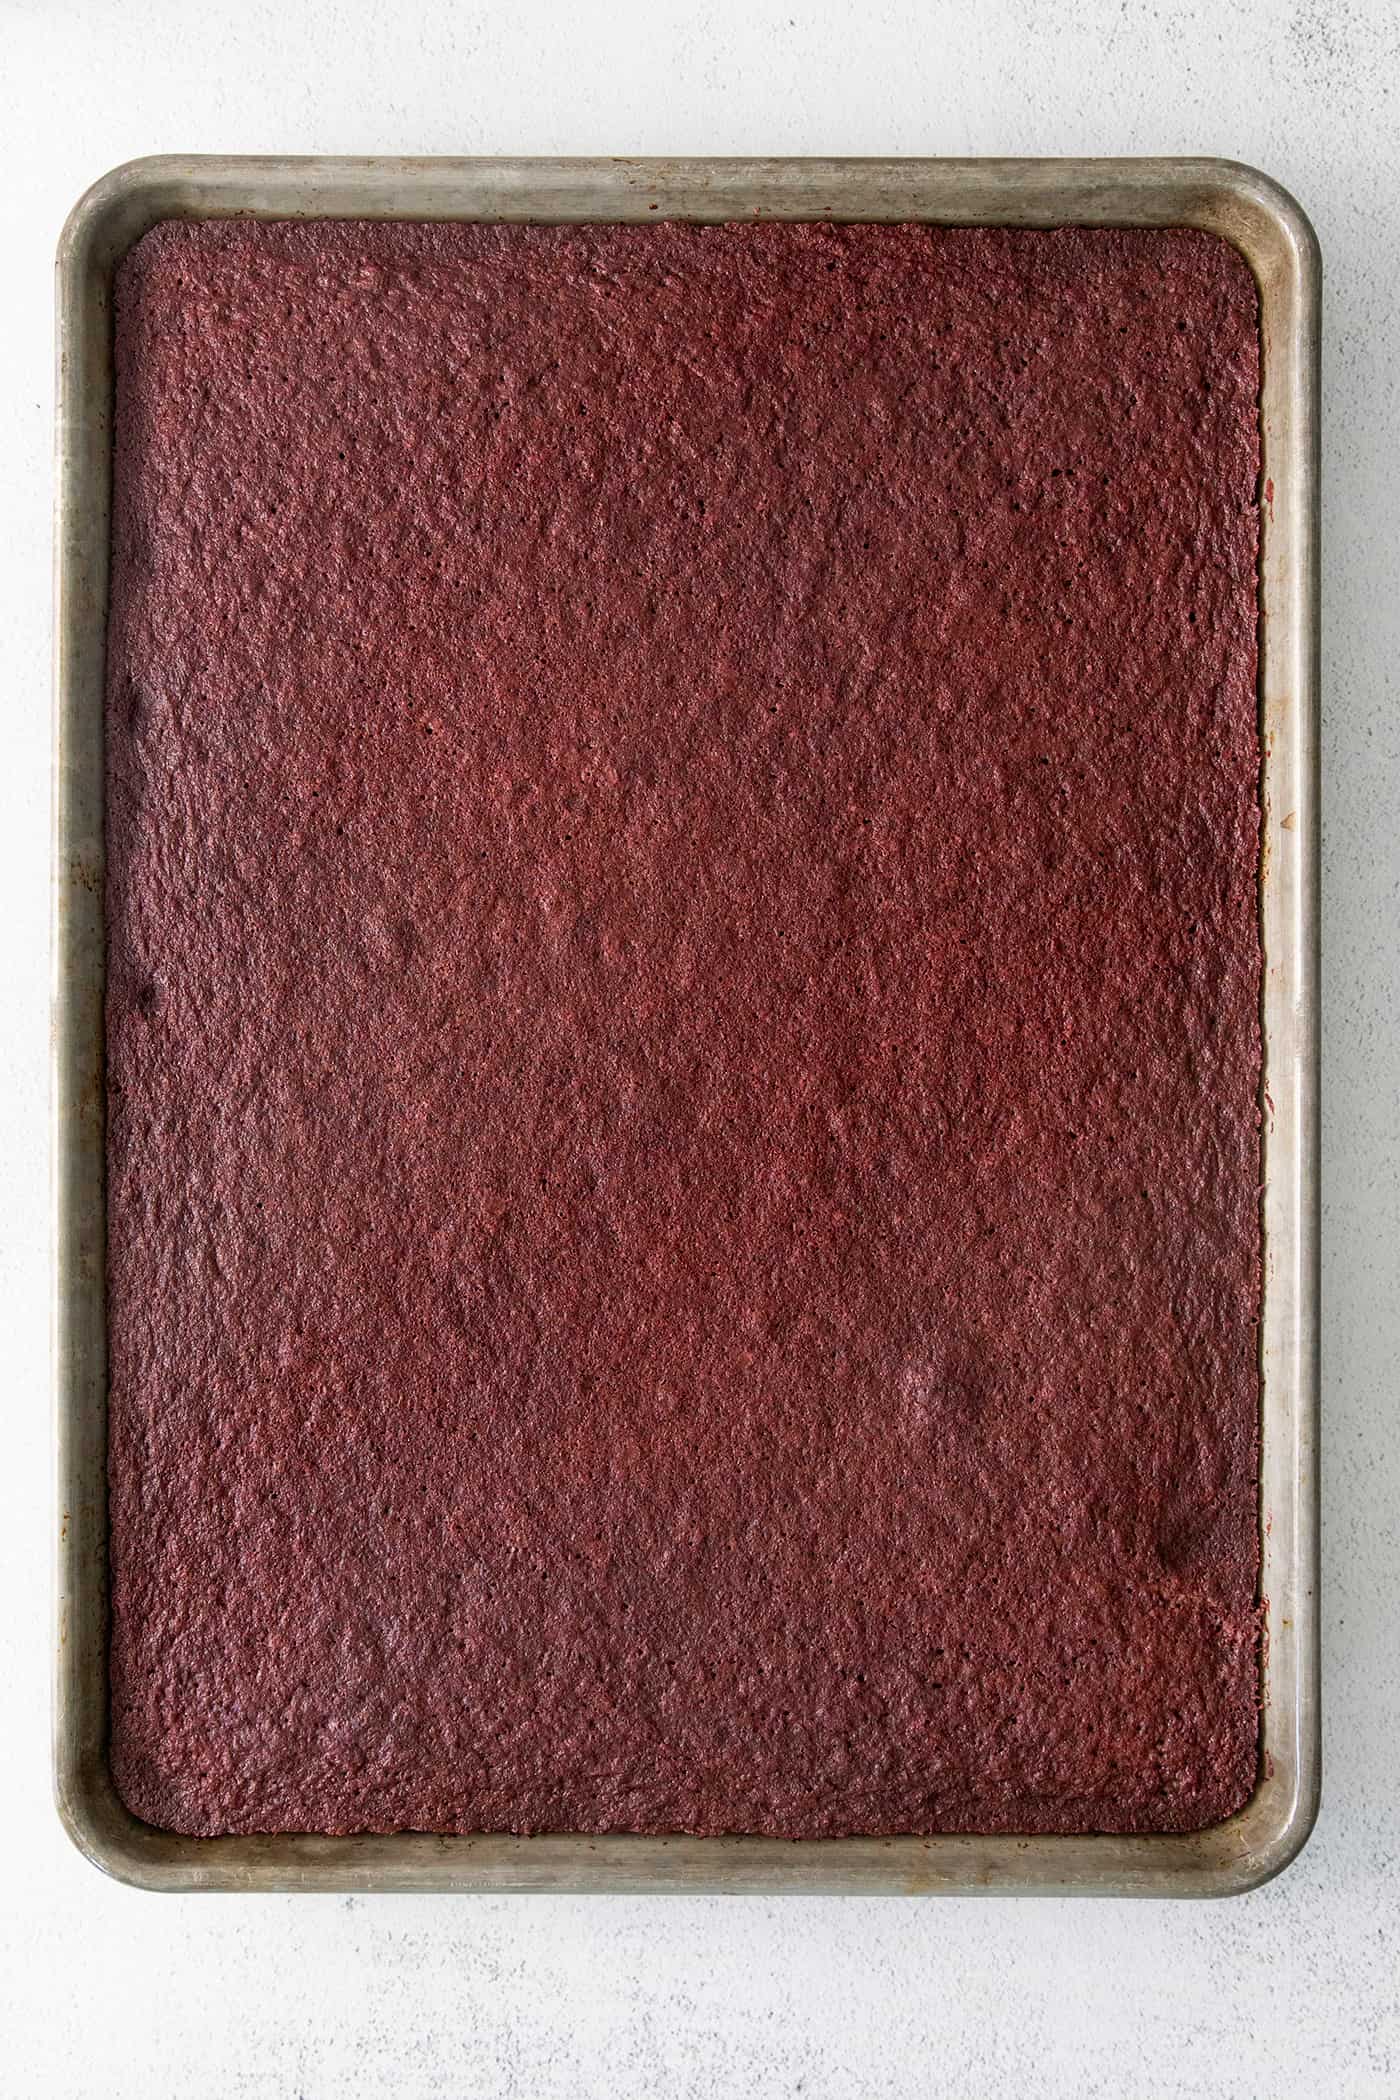
- Bake. Transfer the batter to a large rimmed pan. Bake for about 20 minutes. Allow to cool completely.
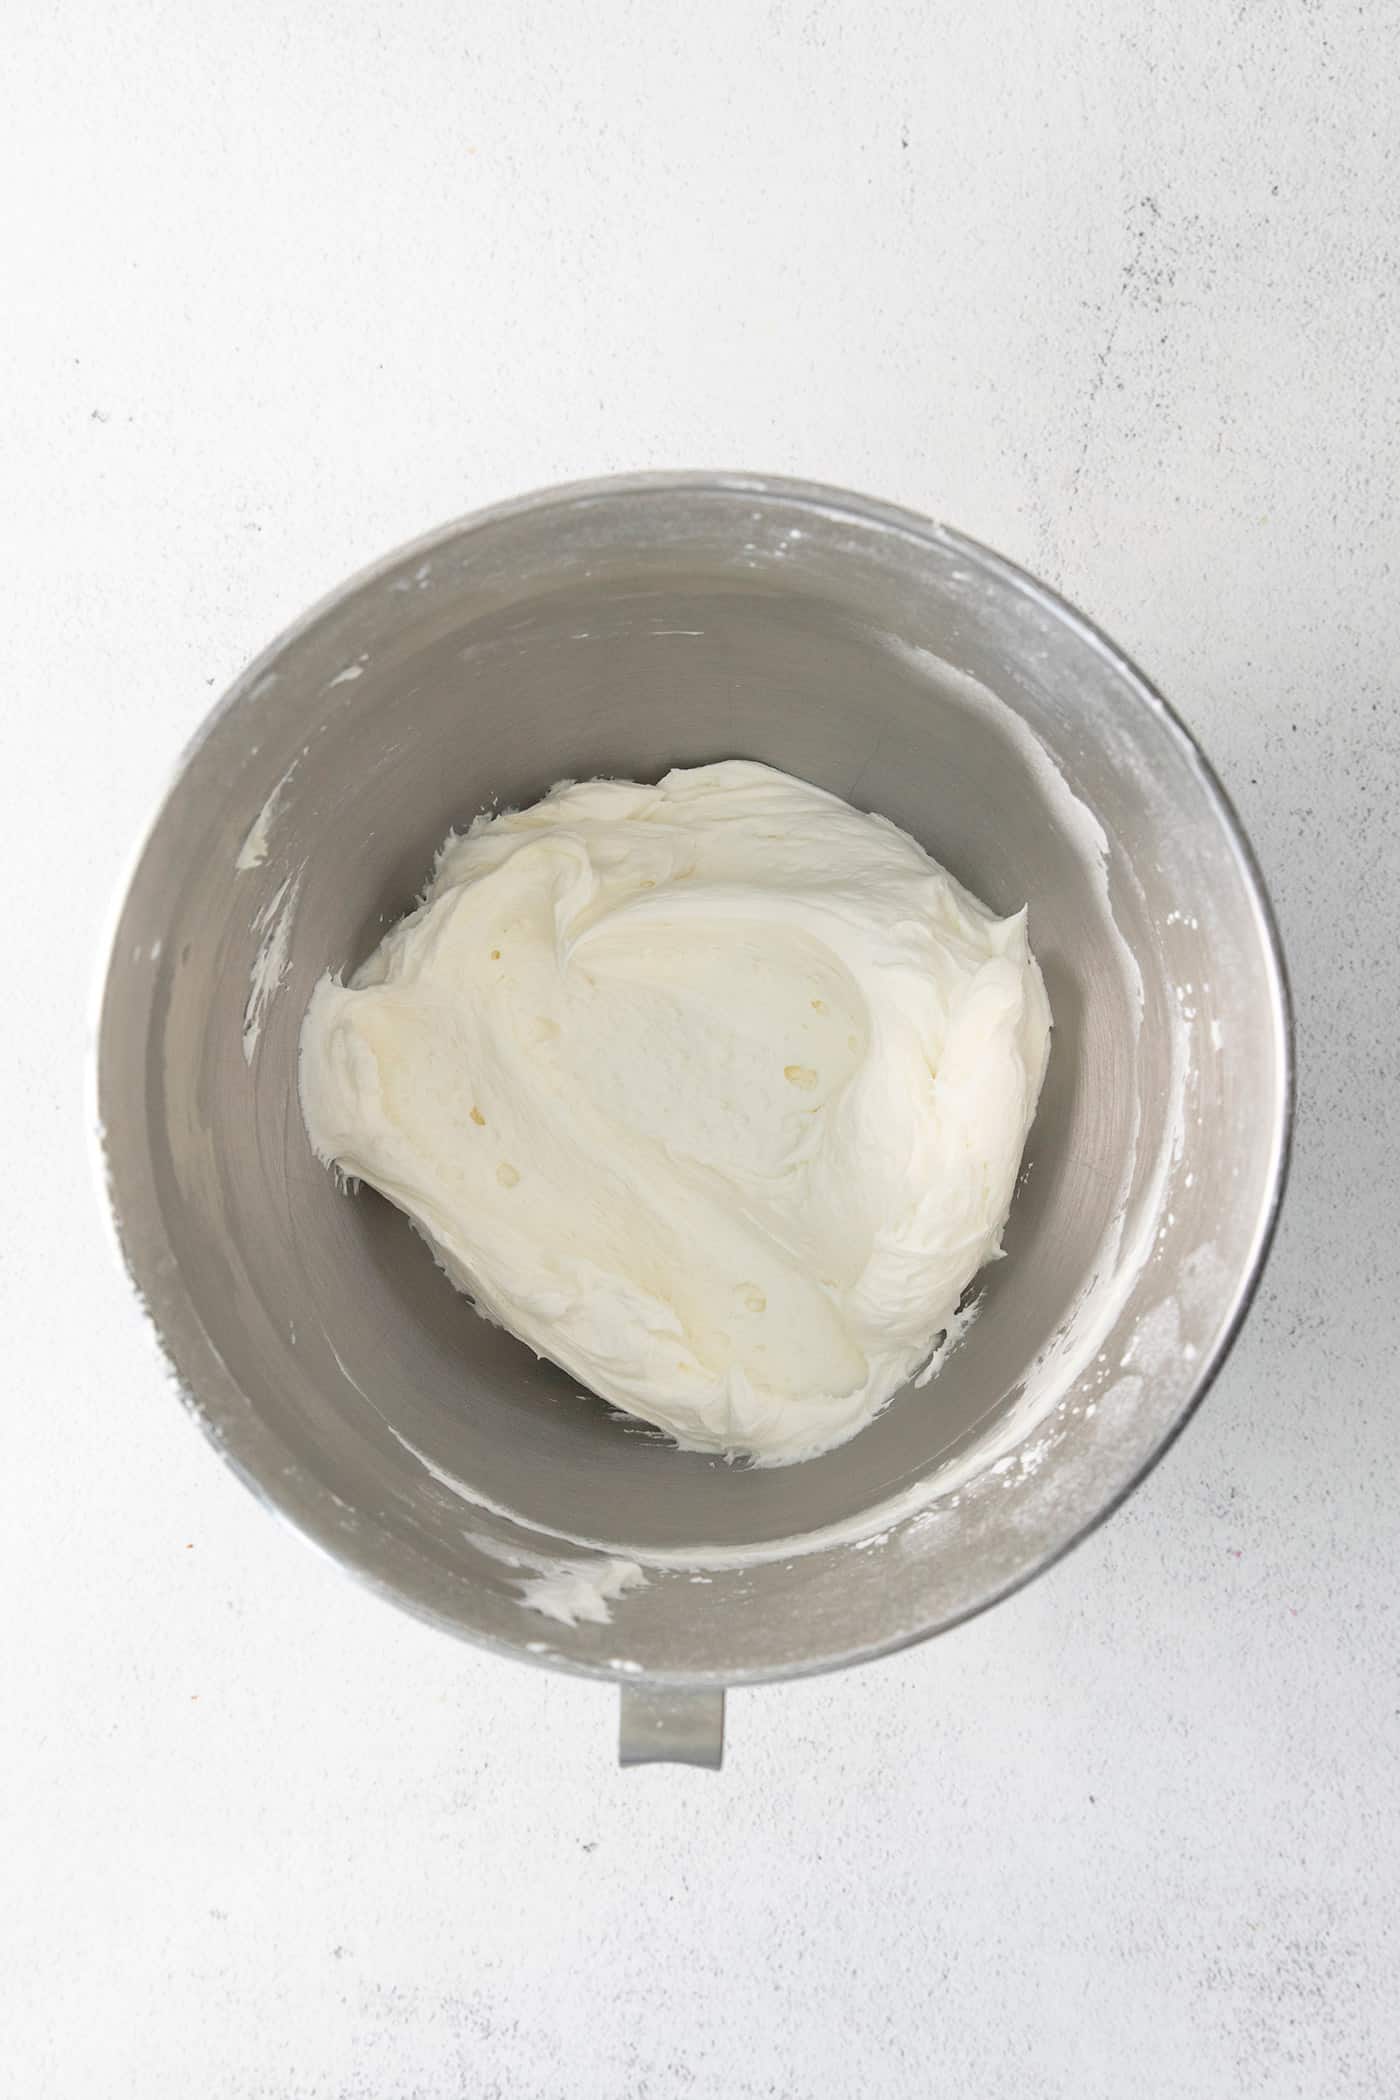
- Make the frosting. Beat the butter and cream cheese until well combined, then slowly add the powdered sugar and vanilla. Beat until light and fluffy and irresistible!
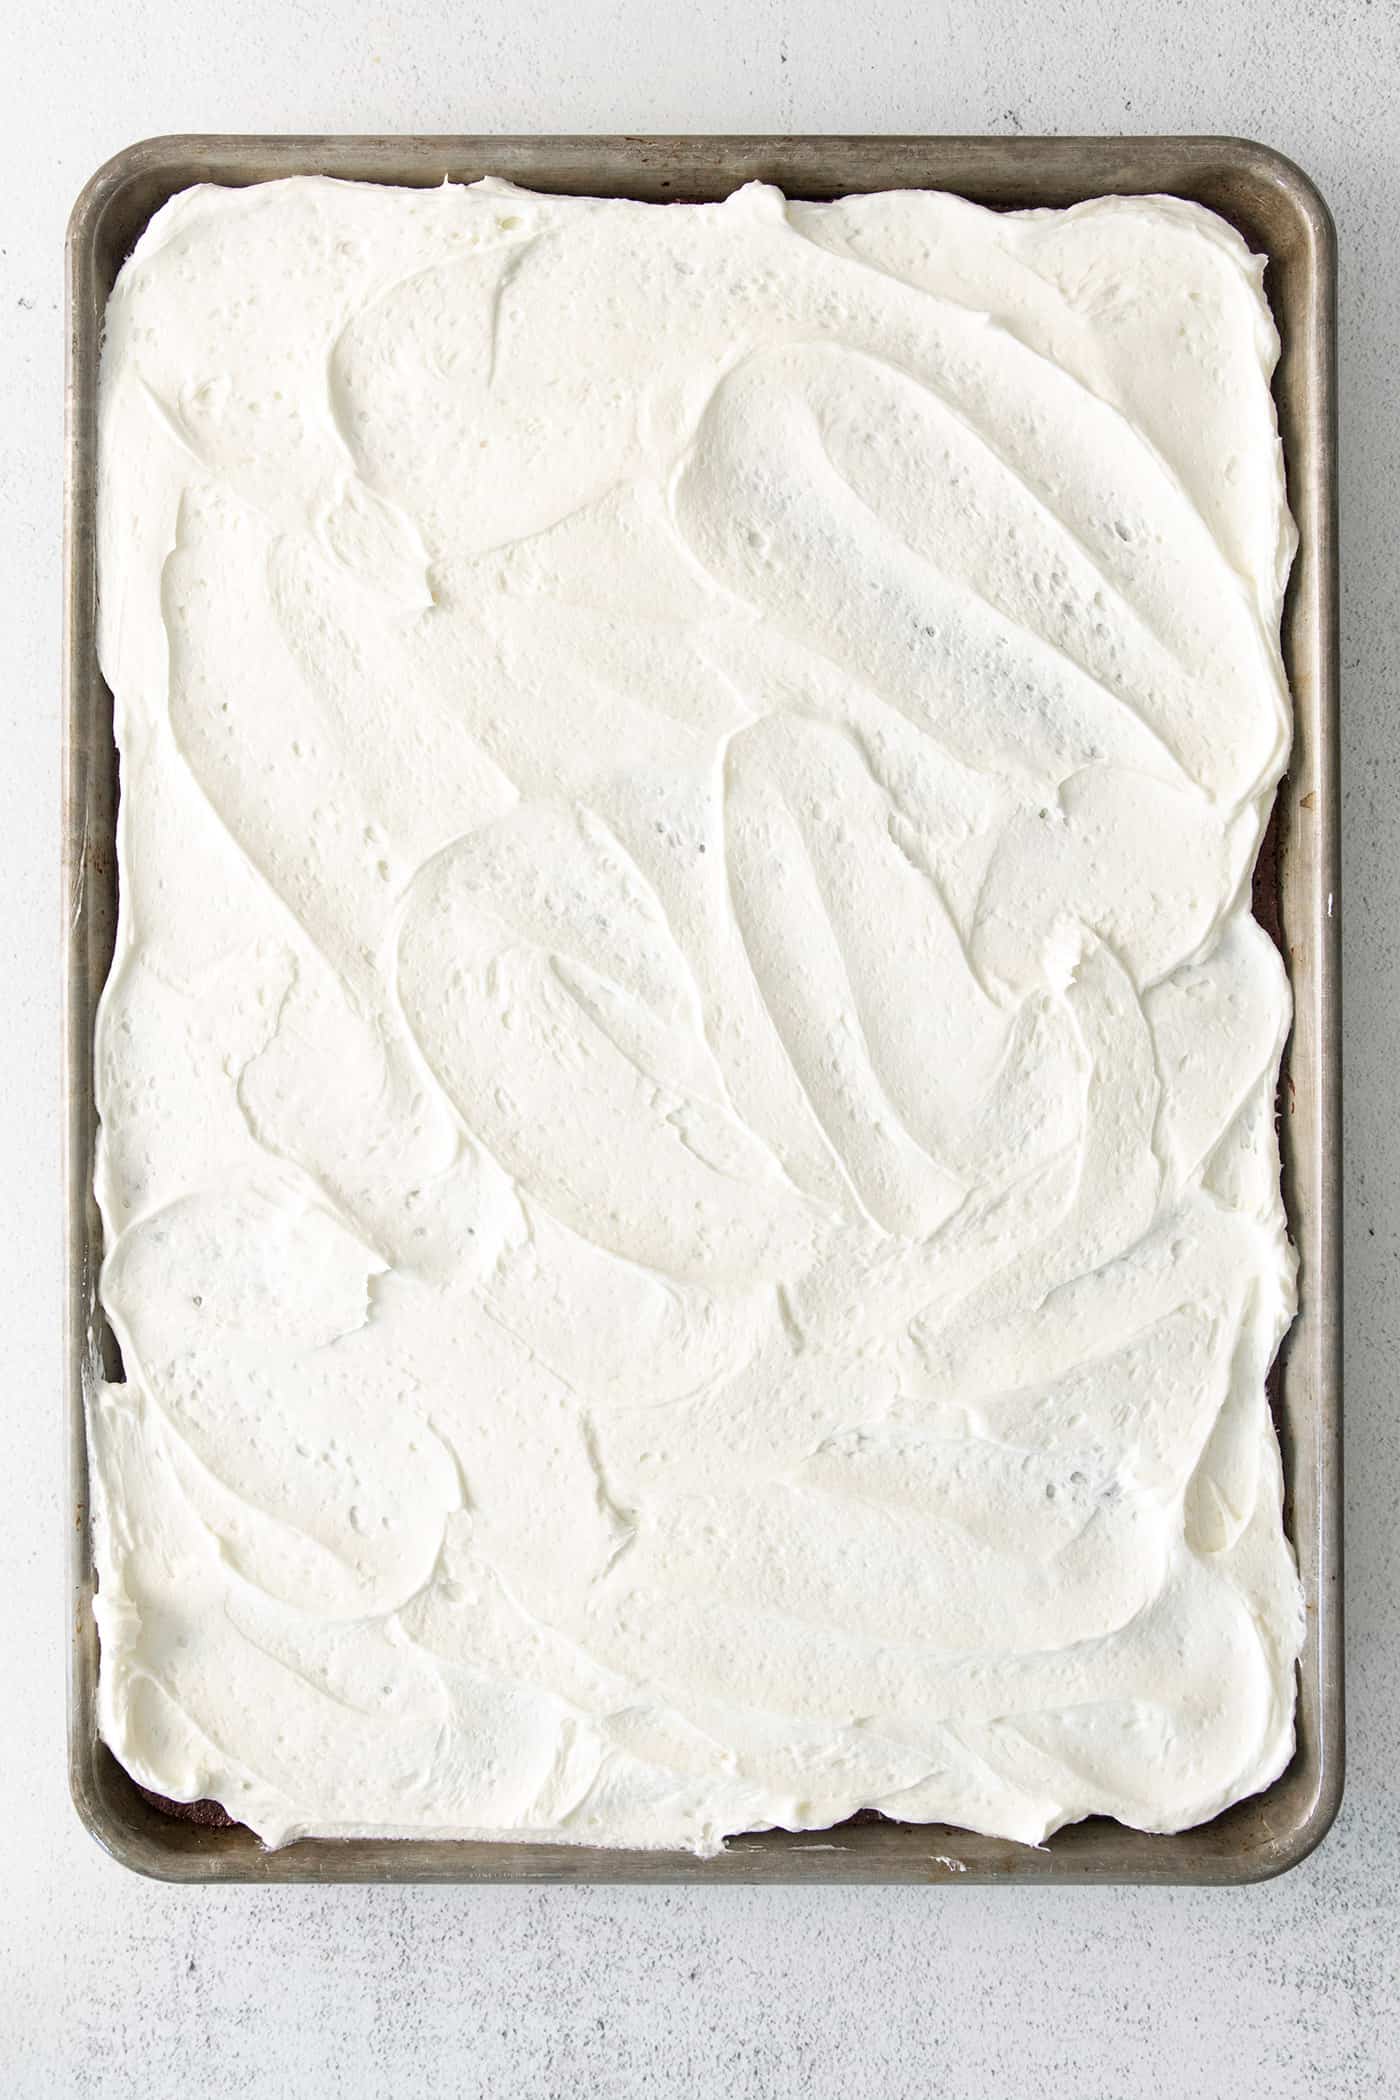
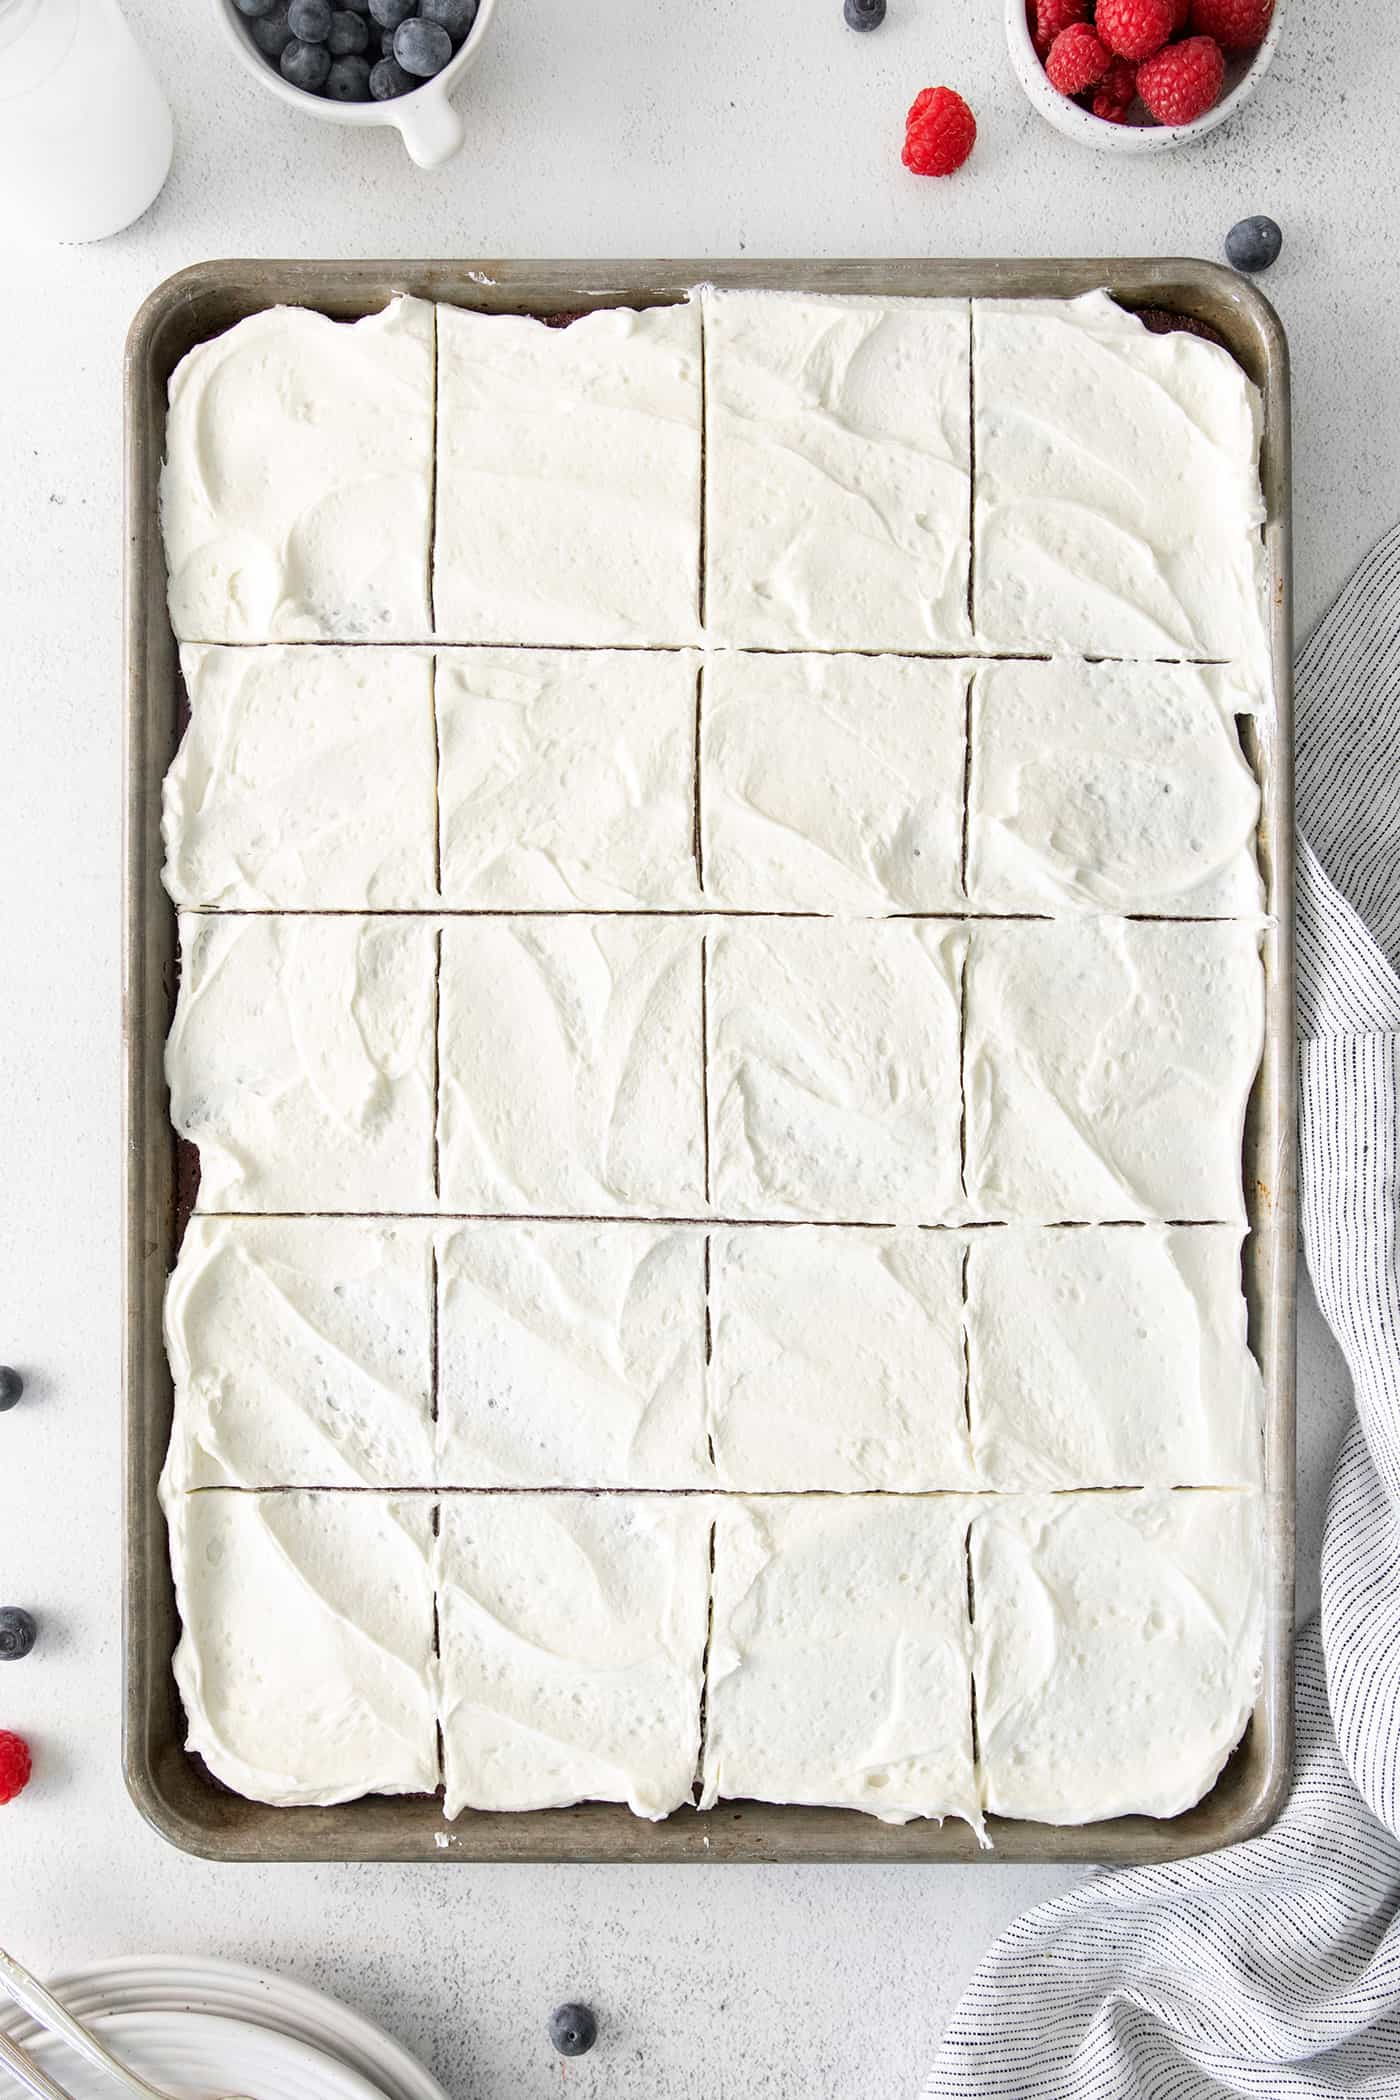
- Decorate the cake. Spread the frosting over the cake and garnish with fresh berries. Enjoy!
Tips for Success + Variations
First time making homemade sheet cake? No worries, these tips will help you out!
- Don’t overmix. Beat the ingredients just until combined and scrape down the edges of the bowl gently to fold in all of the ingredients.
- Don’t skip the buttermilk. Buttermilk is key to achieving the moist texture, tangy flavor, and red color of red velvet cake. Replacing it with regular milk will affect texture, taste, and color – please, just stick with buttermilk for the best red velvet cake experience. You can make your own buttermilk substitute by adding 2-1/2 teaspoons vinegar or lemon juice to a liquid measure, and then adding whole milk to equal 3/4 cup of buttermilk – give it a stir and let it sit for 5 minutes, then use.
- What kind of food coloring? I like to use gel food coloring (I really like the Americolor brand) because it’s more concentrated, which means I can use less of it than liquid food coloring. Plus it doesn’t add a huge amount of extra liquid to the batter. If you use liquid food coloring, you will need to use more.
- Allow the cake to cool completely. Be sure to let the cake cool completely before adding the frosting…otherwise, that creamy, fluffy frosting can get melty and lose its fabulous texture.
- Chill the cake. I’m a huge fan of eating chilled red velvet cake. I like the firmer, cold texture of the cream cheese frosting, plus I think the frosted cake gets a bit more moist and dense when left to sit in the refrigerator for awhile.
- Add a mix-in or two. I’m a huge fan of adding espresso powder to chocolate cake – a little bit would be beautiful in this cake. Stir some chocolate chips or crushed nuts into the batter, or sprinkle them over the frosting. If not adding berries to the top, you could add a simple dusting of cocoa powder.

Serving Suggestions
Red velvet sheet cake is perfect for big gatherings. Depending on the number of guests, I can easily cut enough pieces to serve 20 to 24 people.
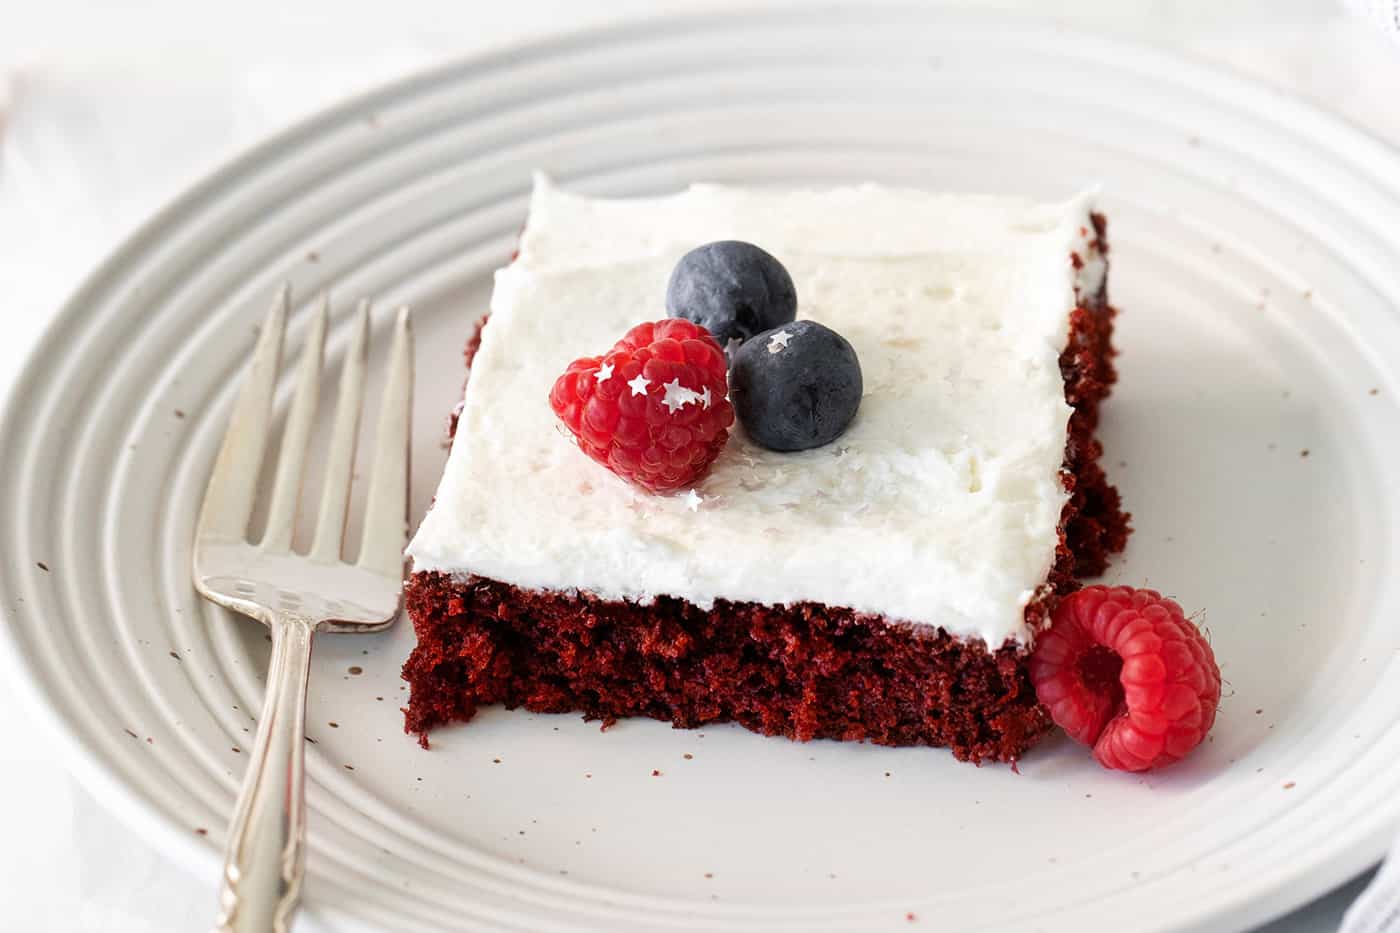
I also like to top this cake with some fresh berries just before serving, for a pop of fresh color and flavor. It’s super fun to use blueberries and raspberries or strawberries – when combined with the white frosting, it’s a red-white-and-blue dessert. And for even more fun, add some star sprinkles over the berries. It’s a truly patriotic celebration for Memorial Day and the 4th of July!
How to Store Leftovers
- How to store leftovers. Unfrosted red velvet cake can be kept on the counter for up to 3 days. Once frosted, it must be refrigerated. It will keep well, covered in the fridge, for up to 4 days. And I actually PREFER to eat this cake when it’s cold anyway!!
- Can I freeze this? Homemade red velvet cake can be frozen, frosted or unfrosted, for up to 3 months (without fresh fruit decoration on top). Allow to cool completely, then place in a freezer-safe container. Wrap pan with a layer of foil, for extra measure. Thaw overnight in the fridge before serving.
More Cake Recipes:
- Chocolate Wacky Cake
- Sour Cream Coffee Cake with Cinnamon Ripple
- Pumpkin Layer Cake
- Marble Cake
- Grasshopper Cake
Like this recipe? Save it to Pinterest!

Red Velvet Sheet Cake
Ingredients
For the Cake
- 2½ cups cake flour
- 1 teaspoon kosher salt
- ¼ cup cocoa powder
- 1½ cups granulated sugar
- ½ cup 1 stick unsalted butter, softened to room temperature
- 1 cup vegetable oil
- 2 large eggs
- 1 tablespoon pure vanilla extract
- Red gel paste food coloring adjust to your liking – see note below
- 1 cup buttermilk
- 1½ teaspoons baking soda
- 2 teaspoons white distilled vinegar
For the Frosting
- ¾ cup 1½ sticks unsalted butter, softened to room temperature
- 4 ounces cream cheese softened to room temperature
- 3 cups powdered sugar
- 1 tablespoon pure vanilla extract
- Fresh raspberries and blueberries and star sprinkles, optional garnish
Instructions
- For the cake: Preheat oven to 350° F and lightly spray an 18" x 12" rimmed sheet pan with nonstick spray.
- In a medium bowl, whisk the flour, salt, and cocoa powder to combine.
- In the bowl of a stand mixer, fitted with a paddle attachment, beat the sugar and butter on medium speed for 2-3 minutes, or until light and fluffy. Scrape down sides of bowl as needed.
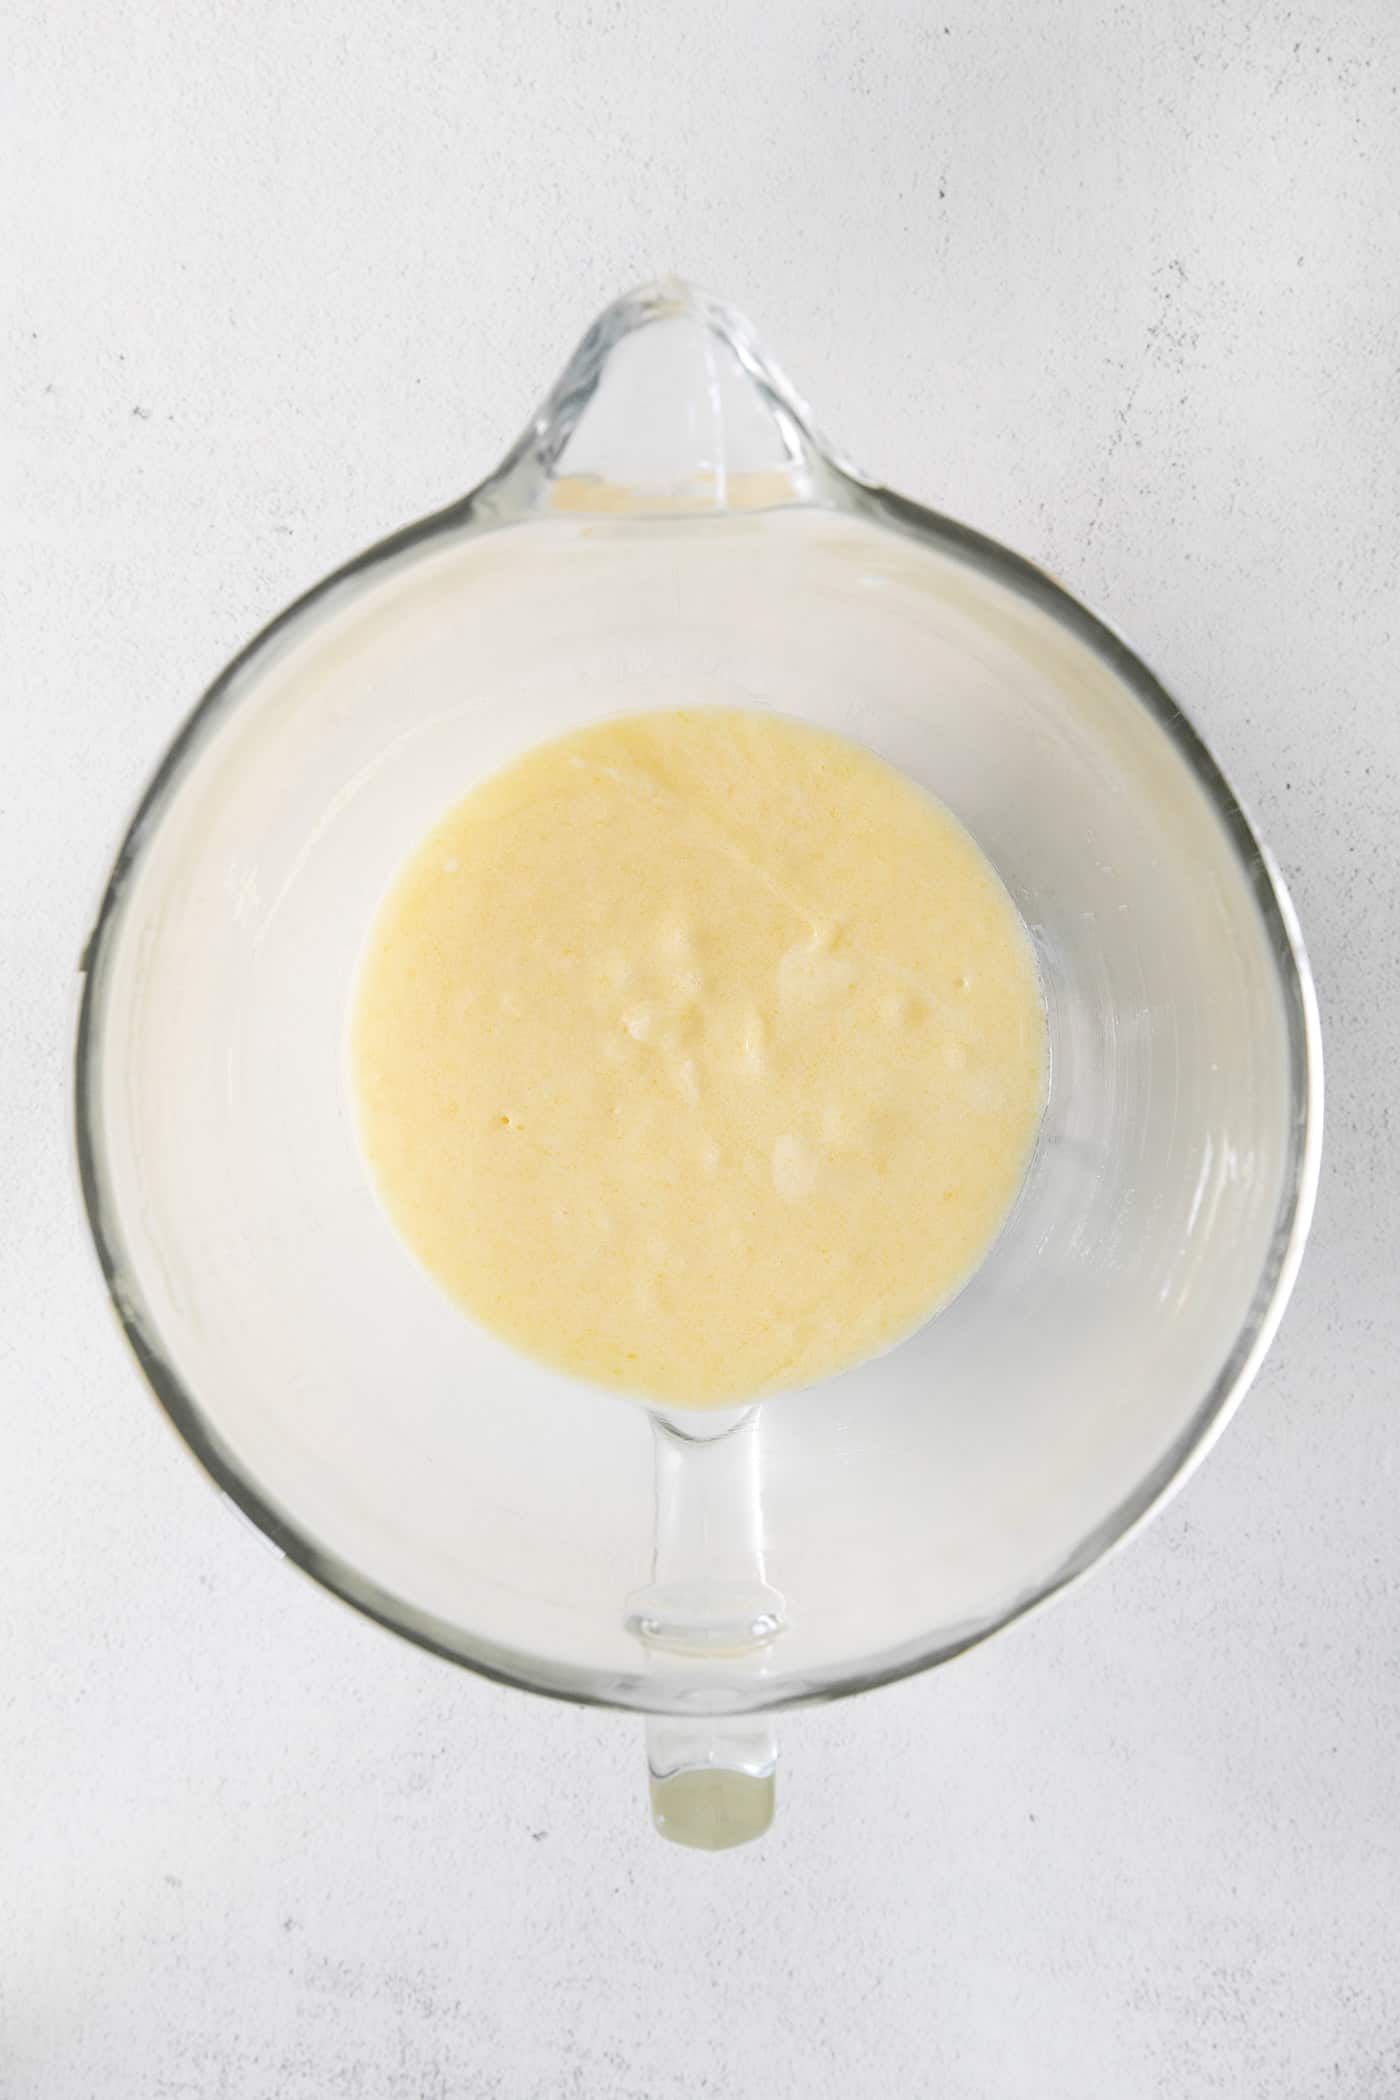
- With mixer on low speed, slowly drizzle in the vegetable oil, followed by the eggs, one at a time. Then add the vanilla and mix again.
- Add food coloring (see notes) and mix just to combine.
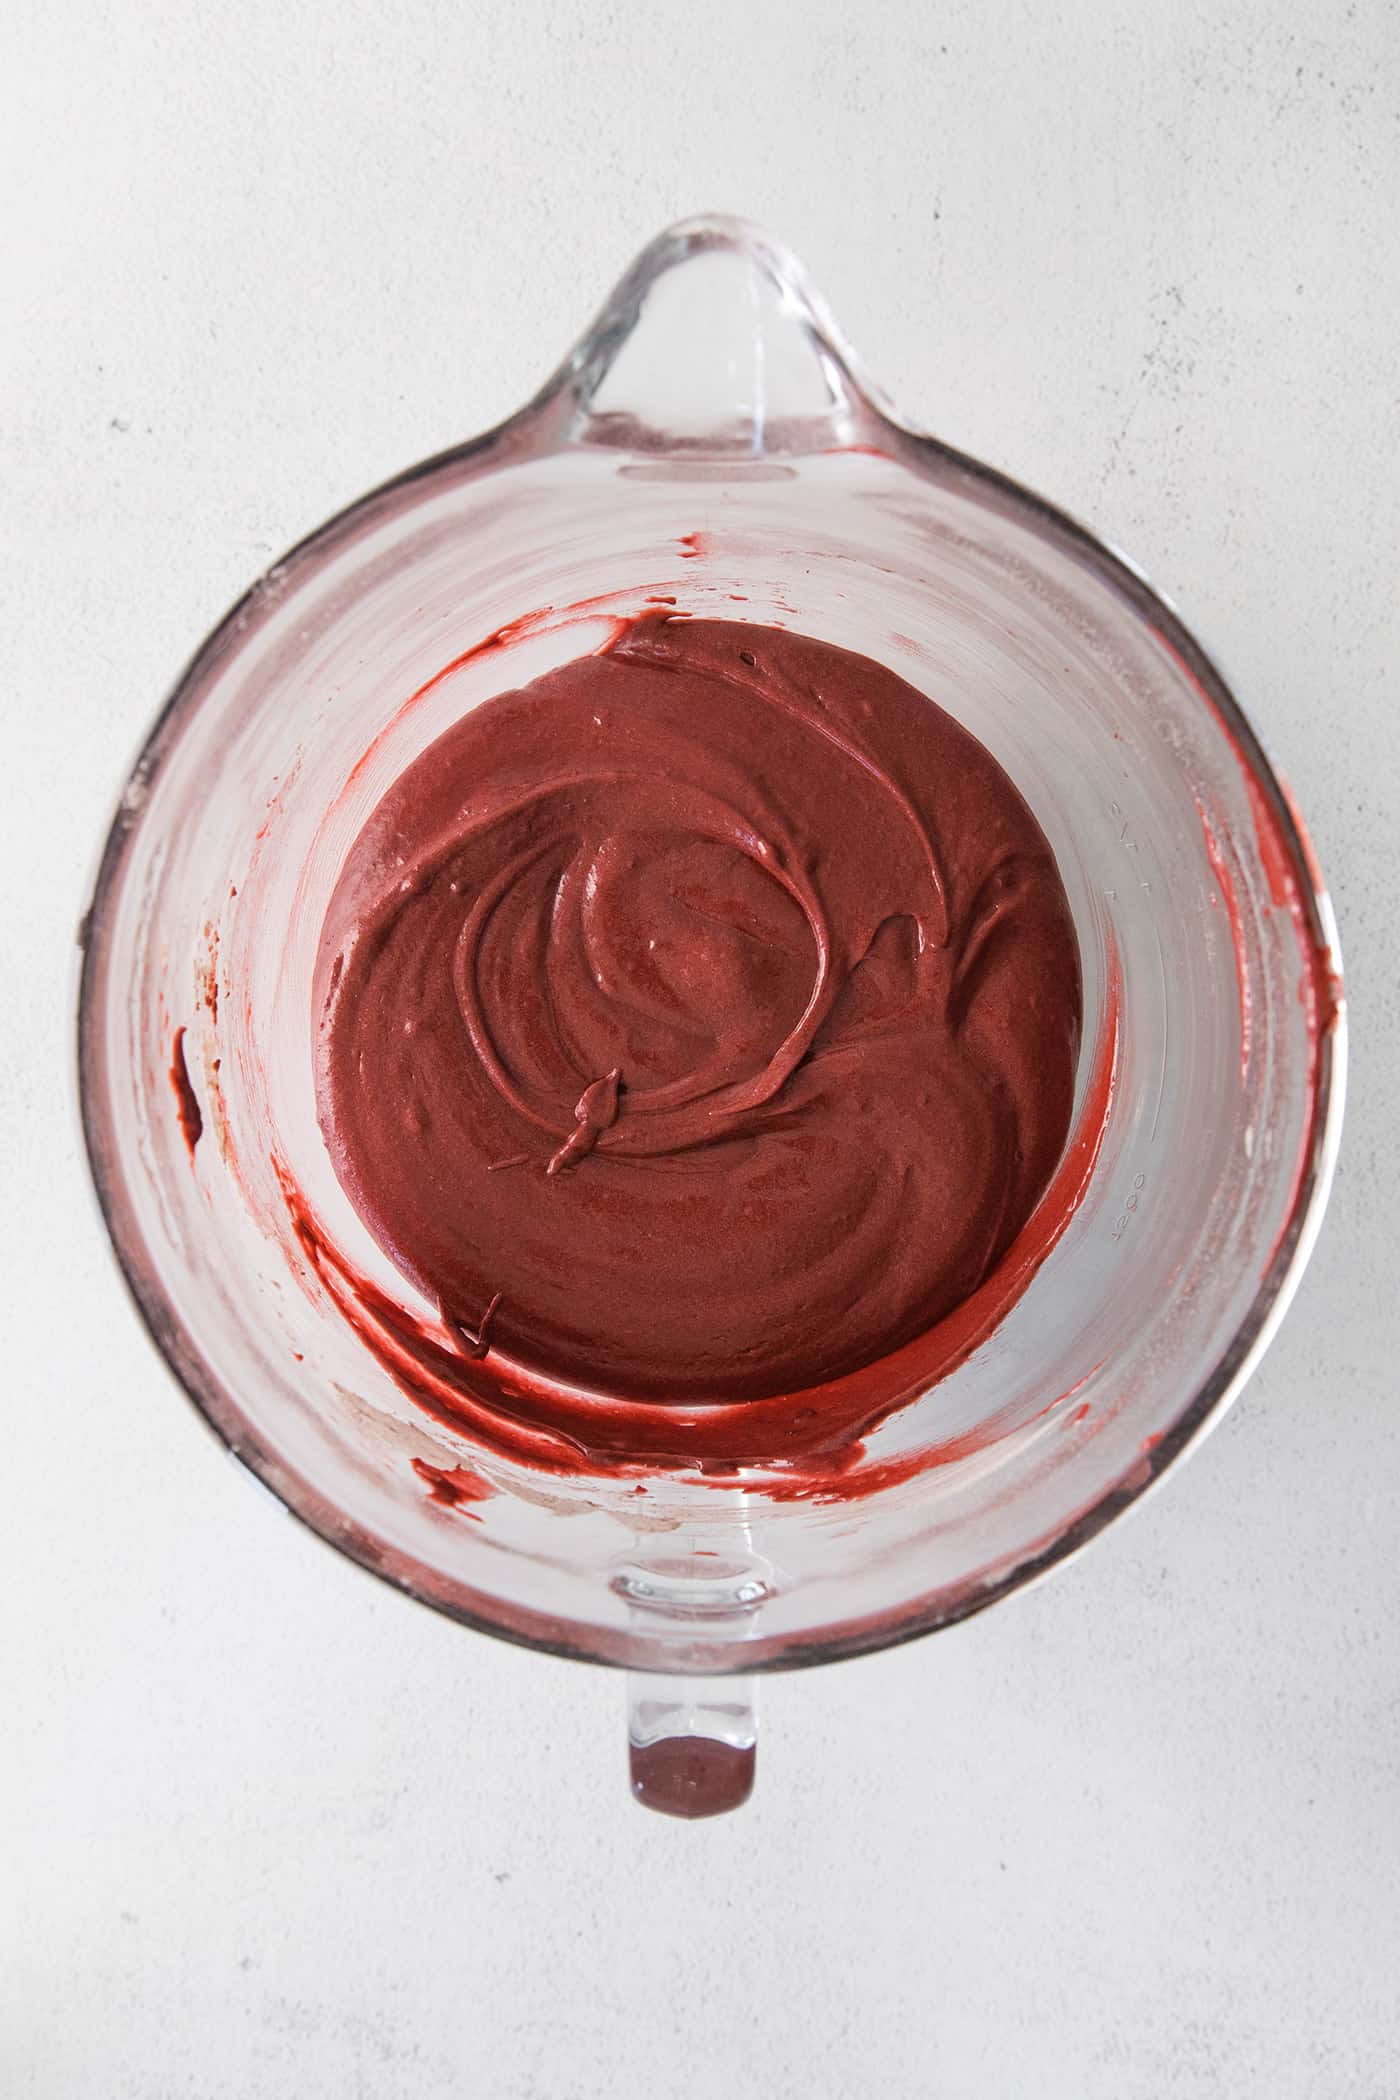
- With mixer on low speed, add ⅓ of the flour mixture, then ½ of the buttermilk, another ⅓ of the flour, the last ½ of the buttermilk, and finally the last ⅓ of the flour.
- In a small bowl, whisk together the baking soda and vinegar. Add to the batter and then beat for 10 seconds, just to combine.
- Transfer batter to the prepared pan and spread into a smooth layer. Bake for 17-20 minutes, or until a toothpick inserted into the center comes out just barely clean. Do not over bake.
- Place pan on a wire rack and allow it to cool completely before frosting.
- For the frosting: Add butter and cream cheese to the bowl of a stand mixer fitted with the paddle attachment and beat on medium speed until well combined.
- With mixer on low speed, slowly add powdered sugar and then the vanilla.
- Scrape down sides of bowl and then turn the mixer to medium speed. Beat until frosting is light and fluffy, about 2 minutes.
- Spread frosting (use as little or as much as you like) over cooled cake and garnish with fresh berries if desired.
- Enjoy immediately or place in refrigerator until ready to serve. Store any leftovers in an airtight container in the fridge for up to 4 days. (I actually prefer to eat this cake at least slightly chilled.)
Notes
Nutrition Information:

Can this be made in 9 X 13 pan with extended cook time?
Hi Lorraine – I’m guessing that would work, but I have not tried that. You might also like to look at this red velvet cake recipe: https://www.afarmgirlsdabbles.com/red-velvet-cake/
5 stars