
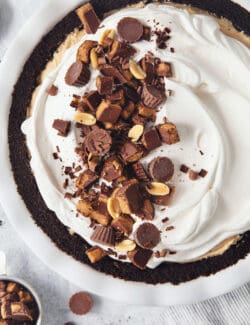

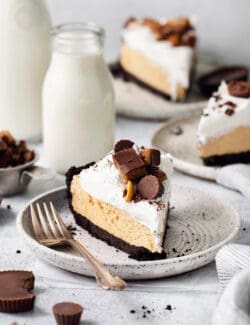
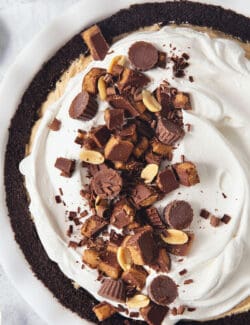
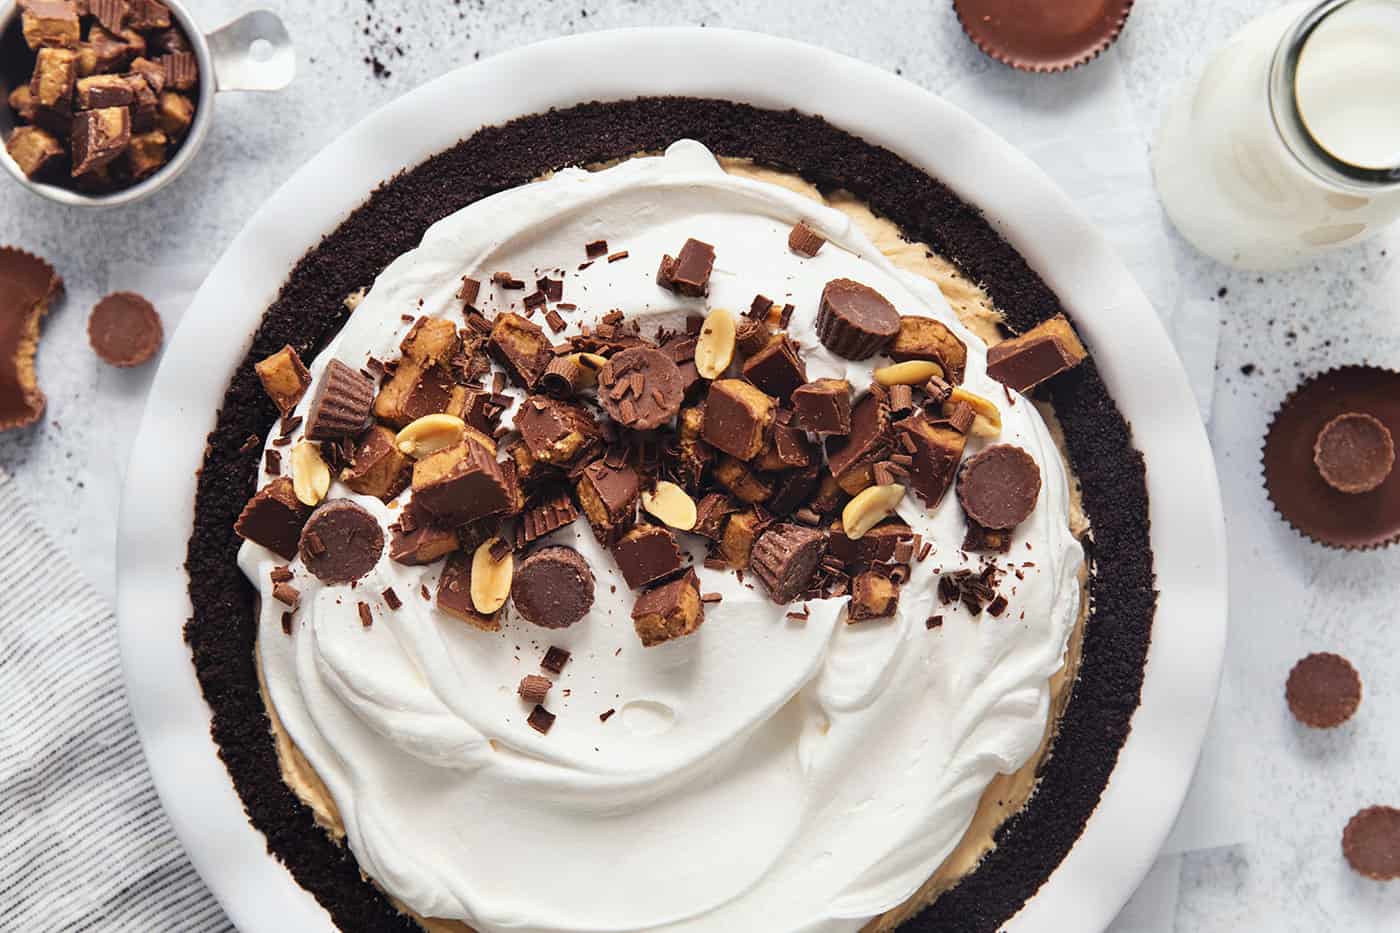
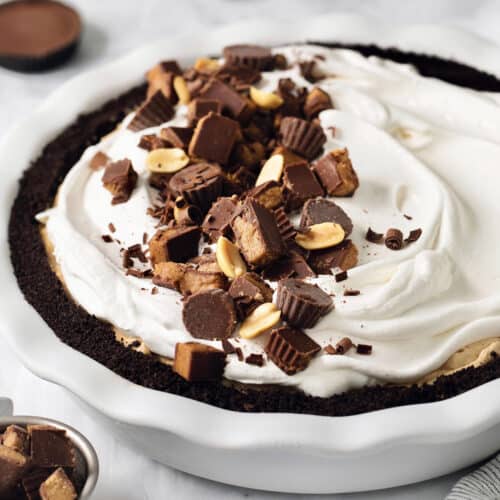
This no-bake Reese’s Pie features a crisp, buttery Oreo crust and a rich and creamy peanut butter filling finished with fluffy whipped topping and chopped Reese’s cups. Serve this easy pie chilled from the fridge or store it in the freezer for a delightful texture that’s similar to an ice cream cake!

No Bake Reese’s Pie Recipe
This decadent Reese’s Pie is loaded with, you guessed it, the beloved PB + chocolate combo of Reese’s peanut butter cups! From the crisp, chocolatey Oreo cookie crust to the creamy peanut buttery filling, you’re going to love this sweet treat. Plus, it’s a no-bake dessert that’s so easy to make. Our family likes to eat it straight from the freezer, for an ice cream cake-like texture, but you can store it in the fridge if you prefer it soft and creamy!
Why You’ll Love This Reese’s Peanut Butter Cup Pie
My family could give you more than three reasons why they think this pie is the bomb, but I’ll keep it short and sweet. Here’s why you’ll love this recipe for Reese’s peanut butter cup pie!
- That chocolate + peanut butter combo! If you’re a fan of this classic combination of flavors, then this is the obvious reason why you should make this pie. It’s a creamy, dreamy PB + chocolate dessert!
- No-bake. There’s always a place for no-bake desserts in our kitchen. Check out other recipes that don’t require turning on the oven, including no-bake pumpkin icebox cake or no-bake chocolate peanut butter pie bars, or our family’s favorite chocolate peanut butter Ritz cookies for more inspiration.
- Quick. You only need about 20 minutes to assemble this Reese’s pie, and then the fridge or freezer will do the rest of the work of chilling it.

What You’ll Need
Below, I’ve outlined the ingredients you’ll need to make this Reese’s pie recipe. Scroll down to the printable recipe card at the end of this post for the exact ingredient amounts.
- Oreo cookies – Oreos and butter form the simple, no-bake crust.
- Butter
- Cream cheese – Use full-fat, block cream cheese to give the pie structure, a creamy texture, and a tangy flavor.
- Creamy peanut butter – Use classic peanut butter rather than an all-natural peanut butter, for the best texture.
- Powdered sugar – This adds sweetness with a fluffy, extra-creamy texture.
- Vanilla extract – Use pure vanilla extract for the best flavor.
- Salt – I love a little bit of salt contrast with anything chocolate & peanut butter!
- Cool Whip – This lends stability to the peanut butter filling, while incorporating a fluffy texture. Plus it’s an easy topping to the pie. It freezes well, too, if you want to store this pie in the freezer!
- Reese’s cups – It can’t be Reese’s pie without Reese’s peanut butter cups. Chopped Reese’s cups add even more peanut butter and chocolate flavor, plus an extra element of fun!

How to Make Reese’s Pie
This easy pie is a cinch to put together. Follow along with my photos below to give you an idea of how to make it. Find the detailed instructions in the recipe card lower down.

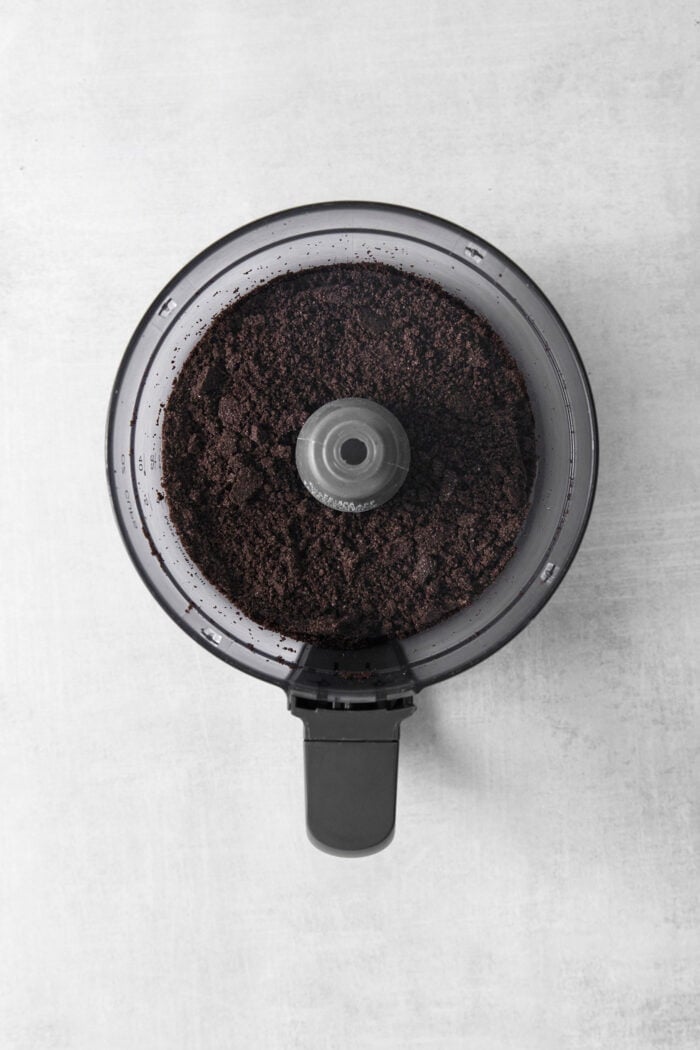

- Chop Oreos. Process the Oreos in a food processor, add the melted butter, and process again.
- Make Oreo crust. Press the Oreo mixture into a greased pie pan and chill it while you make the filling.


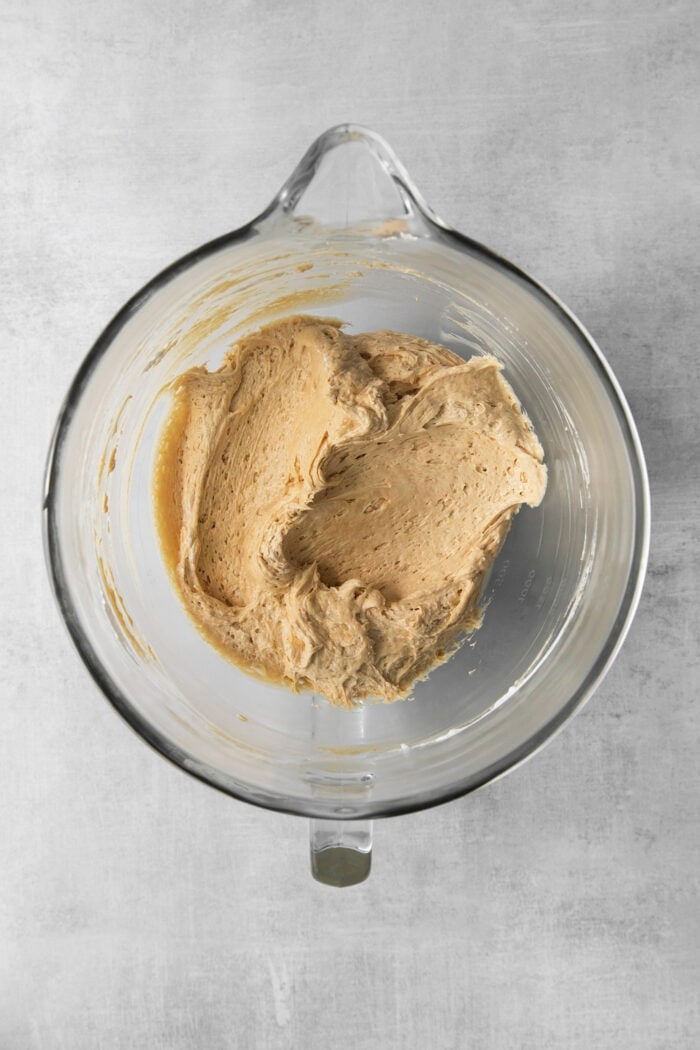
- Make peanut butter filling. Mix the cream cheese and peanut butter until smooth. Then mix in the powdered sugar, vanilla, and salt. Finish by folding in the whipped topping.


- Add filling. Spread the peanut butter filling evenly over the crust.
- Top with Cool Whip. Spread the whipped topping over the peanut butter filling.
- Finish. Sprinkle chopped Reese’s cups over the top of the pie, then freeze the pie for 1-2 hours to set. Keep the stored in the freezer for a frozen set (much like ice cream cake) or transfer to the fridge for a soft and creamy set.

Tips for Success
Check out my tips below to help you make the best Reese’s peanut butter cup pie. Hint: the freezer is your friend!
- No food processor, no problem. If you don’t have a food processor for crushing the Oreos for the crust, just place the cookies in a ziploc bag and smash them with a rolling pin.
- Use room-temperature cream cheese. Make sure to bring the cream cheese to room temperature softness on the counter before incorporating it into the filling. This ensures that the filling will be smooth and creamy, without any lumps.
- Sift the powdered sugar. If you want to be absolutely sure to have no lumps in the peanut butter filling, then sift the powdered sugar first. (With soft, fluffy powdered sugar, I don’t find this to be a necessary step.)
- Don’t use all-natural peanut butter. I mentioned this above in the ingredients list, but it’s important to use a creamy peanut butter like Jif or Skippy. Stay away from all-natural ones because the oil can separate and cause the filling to not set up as nicely.
- Add a real whipped cream topper. If you’d like to opt for real whipped cream on top of the pie, simply leave off the Cool Whip topping. Then top individual pieces of pie with dollops of freshly whipped cream and chopped Reese’s cups.
- Add a little extra chocolate. For an extra-decadent touch, drizzle some homemade hot fudge sauce over the top of the finished pie.
- Freeze it. Our favorite way to eat it! My family likes to eat this pie straight from the freezer, where it takes on the texture of an ice cream cake. To do this, simply store the pie in the freezer for another 1-2 hours past the detailed freezing time. Serve it frozen and store any leftover pie in the freezer.

Proper Storage
You can store this Reese’s pie in the fridge or freezer depending on the texture you prefer. Here’s how to store this pie:
- Fridge – Store in an airtight container, or cover the pie with foil, and store it in the fridge for up to 5 days.
- Freezer – Store the pie in an airtight container in the freezer for up to 3 months. You can also slice the pie before you place it in the freezer to make serving easier later on.
More Peanut Butter Desserts
Reese’s Pie
Ingredients
- 24 regular chocolate Oreo cookies
- ¼ cup unsalted butter, melted
- 8 ounces full-fat cream cheese, softened
- 1 cup classic creamy peanut butter (not all-natural)
- 1 cup powdered sugar
- 1 teaspoon pure vanilla extract
- ¼ teaspoon Morton kosher salt
- 2 containers (8 ounces each) Cool Whip whipped topping, thawed
- ½ to ⅔ cup chopped Reese’s cups
Instructions
- Lightly pray a 9” pie pan lightly with nonstick baking spray and set it aside.
- Add the Oreos to a food processor and pulse until they form a fine crumb, about 30 seconds. Add the melted butter and pulse again until the butter is evenly distributed and the mixture resembles wet sand.
- Transfer the Oreo mixture to the prepared pan and press it into an even layer on the bottom and sides, about 1/4” thick. Use a flat-bottomed measuring cup or glass to press evenly. Place the crust in the freezer to chill while you make the filling.
- Add the softened cream cheese and peanut butter to the bowl of a stand mixer fitted with the paddle attachment. Beat on medium speed until fully combined and no lumps remain.
- Next add the powdered sugar, vanilla, and salt. Mix again until the powdered sugar is fully incorporated.
- Add one container of whipped topping to the peanut butter mixture and gently fold it in with a rubber spatula.
- Spread the peanut butter layer over the chilled crust.
- Then very gently spread the remaining container of whipped topping over the top of the peanut butter filling.
- Sprinkle chopped Reese’s cups (or peanuts or chocolate shavings – whatever you want to garnish the pie with) over the top.
- Freeze the pie for 1-2 hours, until set, and then move it to the fridge. Served from the fridge, the pie will be chilled, soft, and creamy. If you like the texture of ice cream cake, store the pie in the freezer and freeze for another hour or more. Our family prefers to eat this pie frozen, but you can store it in the fridge for a softer texture.

get new posts via email: