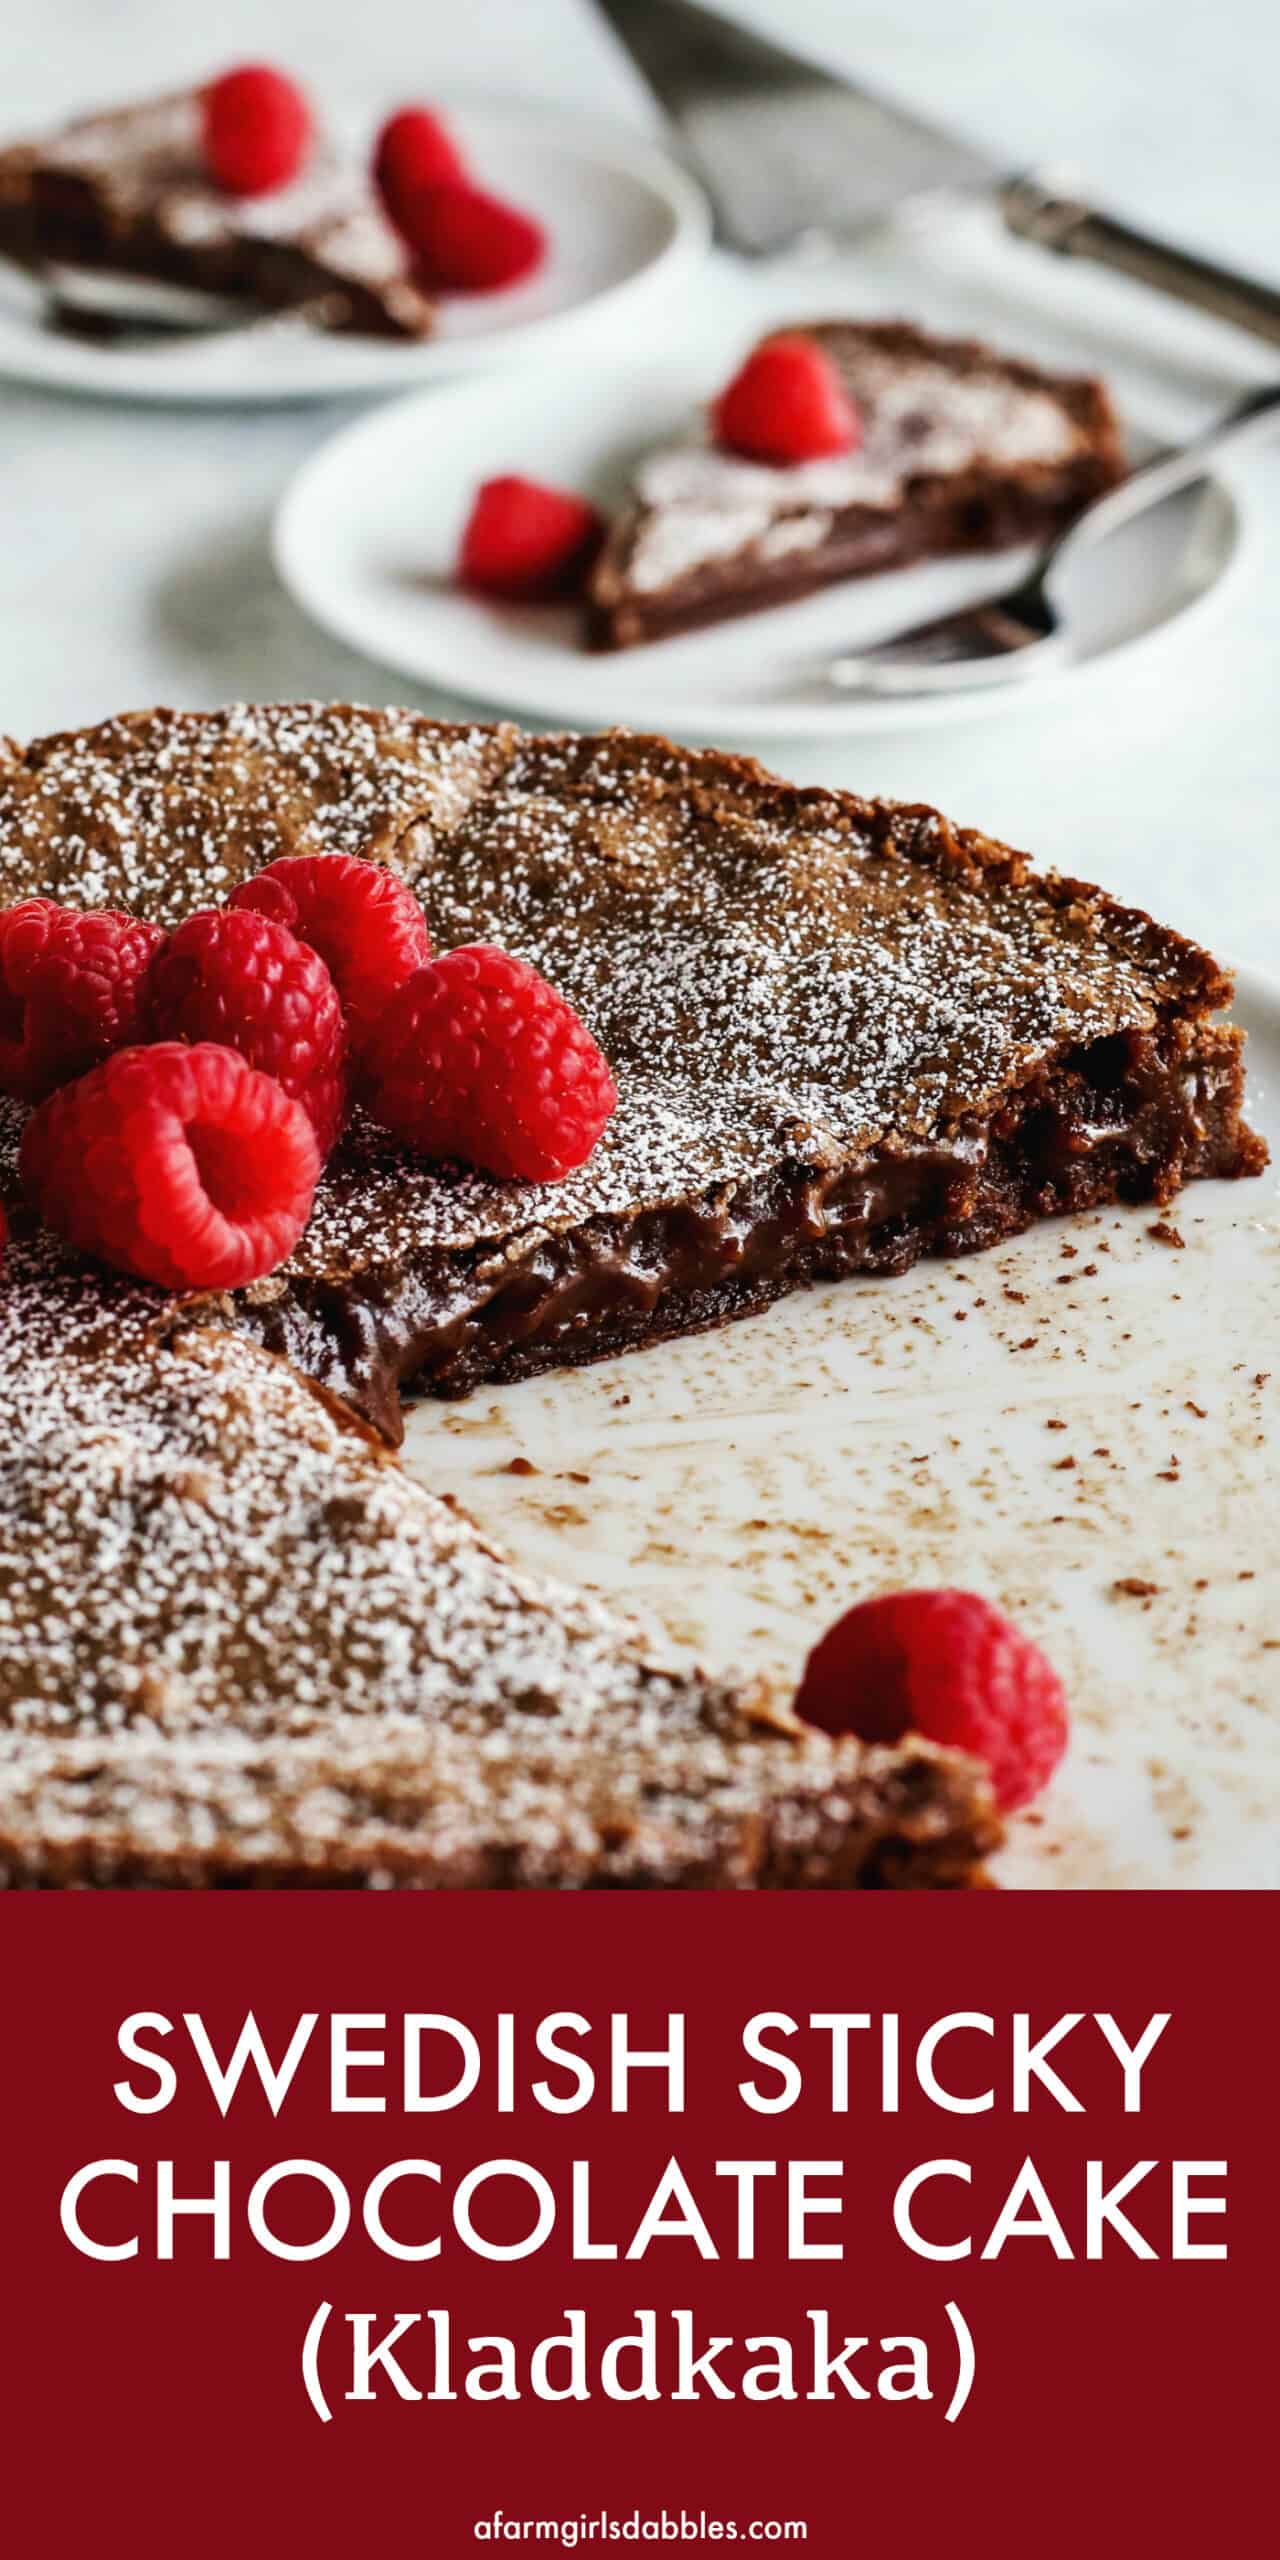
Swedish Sticky Chocolate Cake (Kladdkaka) is an easy dessert with few ingredients. It’s gooey on the inside with a delicately crunchy top. Simply delightful!
Kladdkaka
A few months ago I made a trip to IKEA, looking for a couple furniture pieces to outfit a revamped space in our basement. I purposefully planned my stop over the lunch hour so I could enjoy some Swedish meatballs in their cafe. But of course!
You know the drill. Grab a tray and walk through the cafeteria line to collect your precious plate of Swedish meatballs with mashed potatoes and lingonberry sauce. Well, this time the dessert case caught my eye. Those pieces of fudgy, gooey chocolate cake were staring back at me, irresistible. I had to try one.
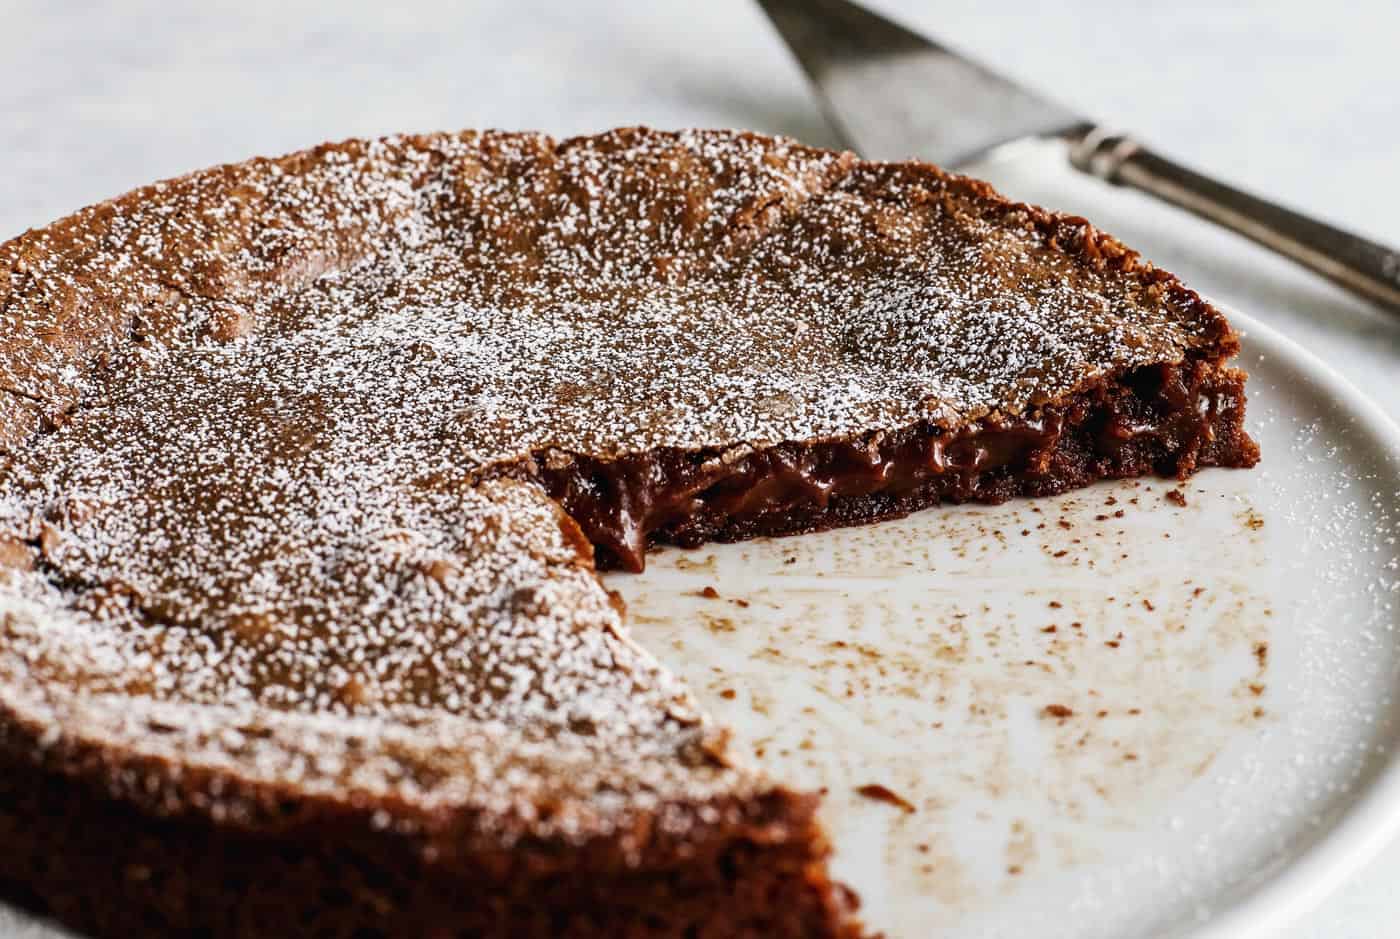
With just one bite of that luscious, dense chocolate cake, I was smitten. It had a sticky, rich interior with a thin, delicately crunchy outer layer.
You know me…I had to find out how to make this Swedish cake at home!
For the past month or so, our kitchen has been fashioned into some kind of crazy Swedish chocolate baking experiment. We ate cake after cake after cake, and gave cake to neighbors. We had chocolate cake oozing from our pores. But with each tweak, I inched closer to my goal.
Now I’m happy to share this PERFECT Swedish Sticky Chocolate Cake – known as Kladdkaka in Sweden – in honor of our youngest daughter’s birthday. Today Tessa turns thirteen! And this blog also turns ten today! Can you believe it? I’ve been sharing recipes here for TEN years!
This kladdkaka recipe is an easy dessert with few ingredients, and it’s loaded with chocolate joy. Eat it chilled for a more fudge-like experience, or warm or at room temperature for sticky, gooey fun. I hope you like it as much as we do!

photo credit: rana.monet
My Girls Are the Queens of Easy Chocolate Desserts
Tessa and her older sister Hatti can often be found in the kitchen, mixing up some kind of chocolate treat.
They are the Queens of Easy Chocolate Desserts.
In regular rotation are Chewy Chocolate Chip Cookie Bars, Gooey Chocolate Mug Cake for Two, S’mores Pie, and Edible Cookie Dough. Tessa has even been known to package up that chocolate chip cookie dough and gift it to her friends during school lunch!
Happy Birthday to our sweet Tessa!
What is Kladdkaka?
Kladdkaka is Swedish for “sticky cake”.
In Swedish, kladdig means “sticky” and kaka means “cake”. One of many traditional Swedish desserts, this chocolate cake recipe uses relatively little flour in relation to its quantities of butter, sugar, and eggs.
Kladdkaka is a Fika Tradition
In Sweden, fika is a daily break that traditionally involves coffee and treats. It’s an important part of Swedish culture, an intentional time set aside to relax and catch up with friends and colleagues. I’ve never been to Sweden, but I’m told that wedges of kladdkaka can be found at most every coffee shop for this fika time.
Our family visited the American Swedish Institute during the Christmas season a few years ago. If you’ve never been there, I highly recommend a visit to tour the historic Turnblad Mansion & Osher Gallery. Plan to eat at FIKA Cafe, which offers beautiful Nordic cuisine that is definitely a step up from that of IKEA’s!
This kladdkaka recipe is by no means a family recipe, or even a tradition that I was familiar with until my experience at IKEA. However, I want to add that Blake’s side of the family tree does have Swedish roots. His grandfather (his mom’s father), Vernon Anderson, was 100% Swedish. All other blood in Blake’s line is Norwegian, and one Norwegian recipe tradition that has been passed down by Blake’s mom is Rømmegrøt. We make it during the holidays.
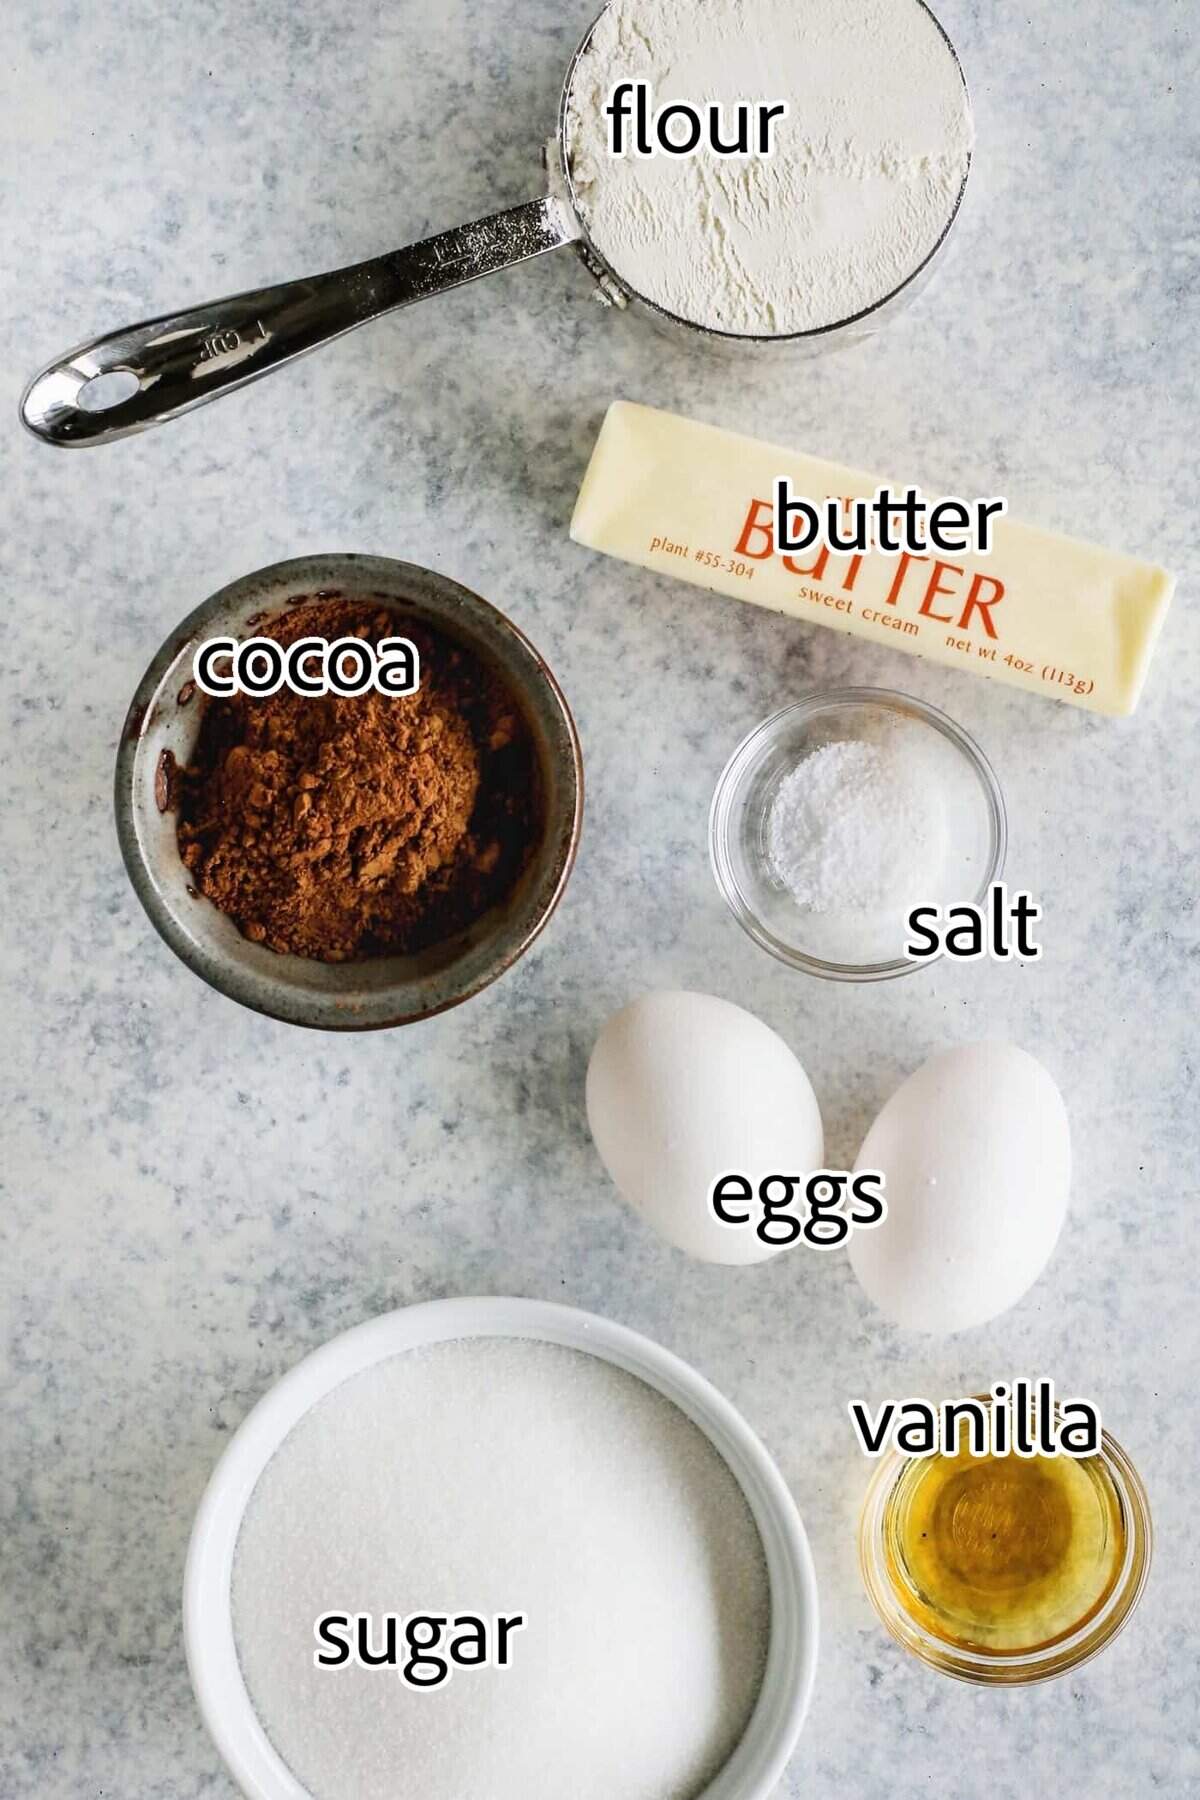
Kladdkaka Ingredients
This dessert’s ingredient list is ultra simple, with basic pantry items:
- flour
- butter
- cocoa powder
- salt
- eggs
- sugar
- vanilla extract
How to Make Kladdkaka
Simply melt the butter in a saucepan and stir in the rest of the ingredients to make a thick batter. Spread the batter in a round cake pan and bake for about 25 minutes at 350° Fahrenheit. Let cool for an hour. Then turn the cake out onto a plate and dust with powdered sugar.
That’s it!
How to Grease and Flour a Pan with Cocoa
You could use a springform pan with removable sides for this recipe, but my goal was to have a simple cake that could be inverted onto a cake stand.
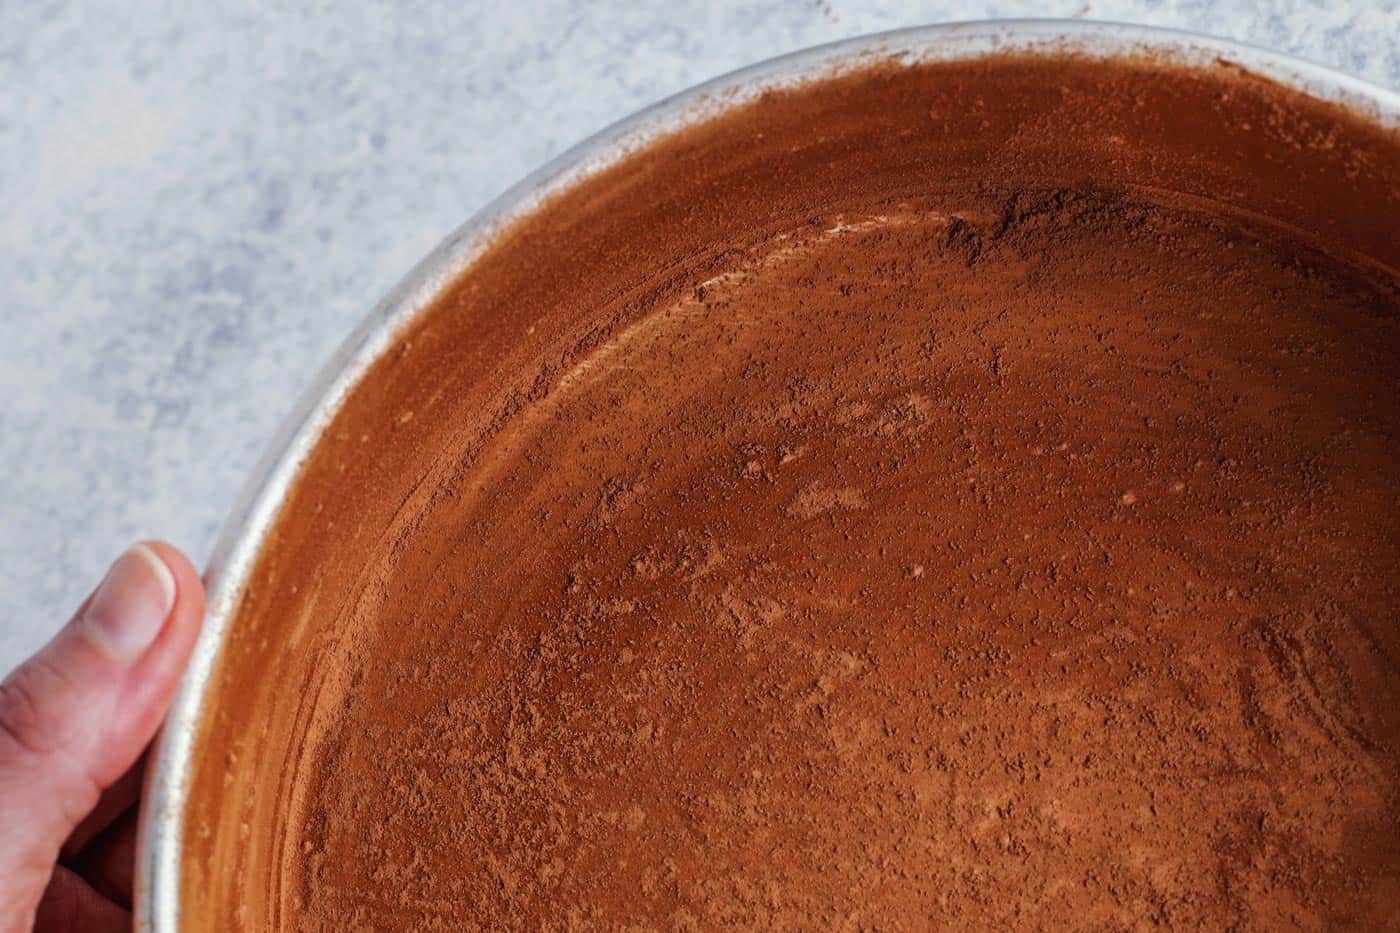
So I created this recipe with an 8″ round cake pan, using a simple grease-and-flour pan preparation for easy non-stick cake removal. And because this is a chocolate dessert, I swapped out the usual flour for cocoa powder. This eliminates any traces of white flour on the cake and adds more chocolatey richness.
Here’s how I prepare the cake pan:
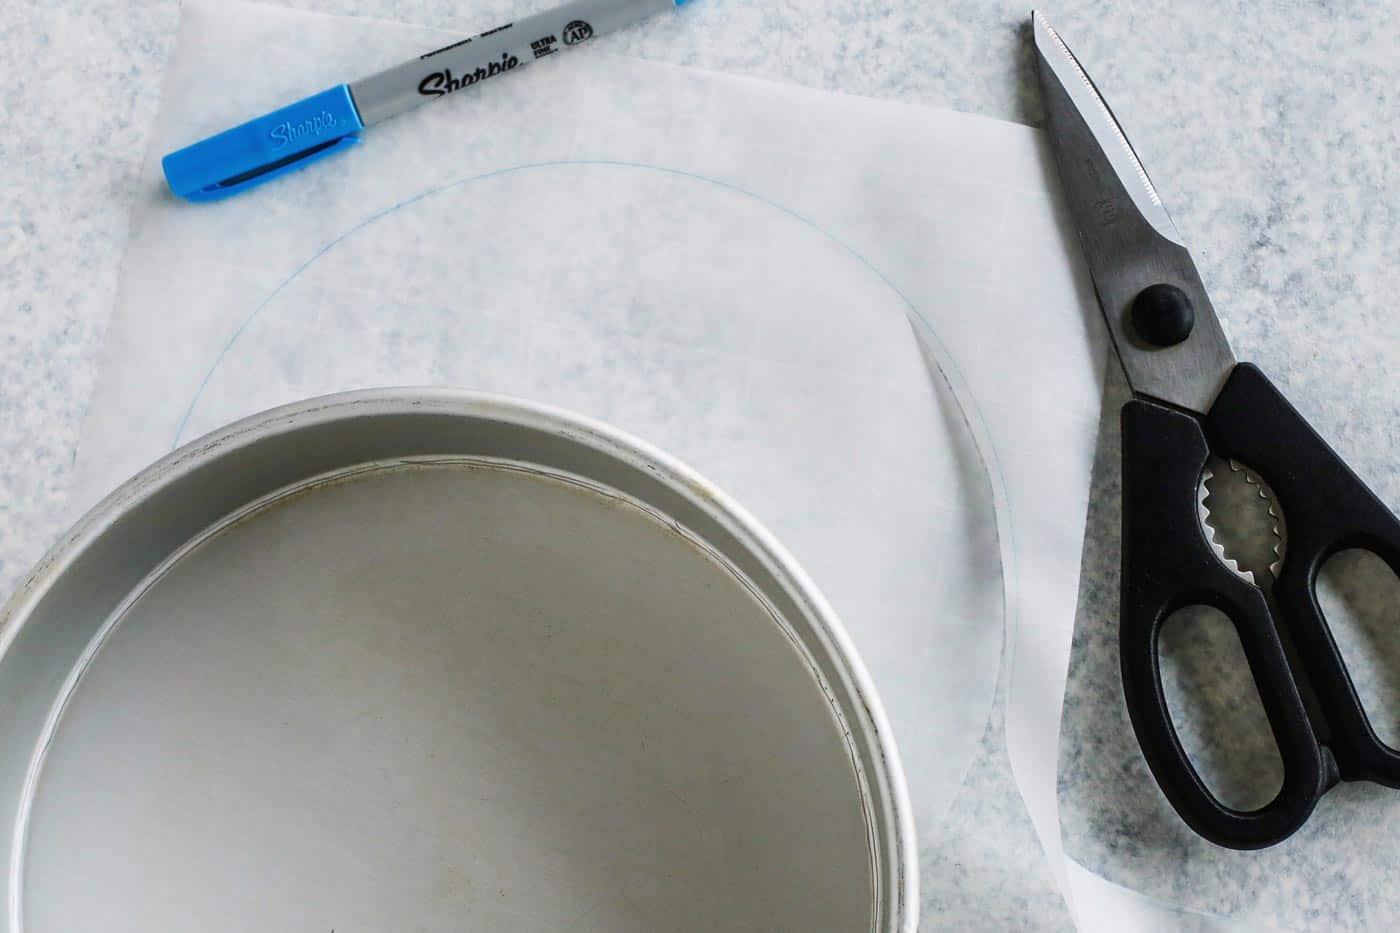
First, cut a piece of parchment paper to fit inside the cake pan. To do this, set the cake pan on the parchment and trace around its perimeter. Then cut out the parchment circle, about 1/4″ to the inside of the traced line. This will ensure that the circle will fit on the inside of the cake pan.
Next rub the inside of the pan with a thin coat of butter. Get the butter everywhere, including the bottom and the sides. Place the parchment paper circle in the bottom of the pan and rub another thin coat of butter over the top of the parchment.
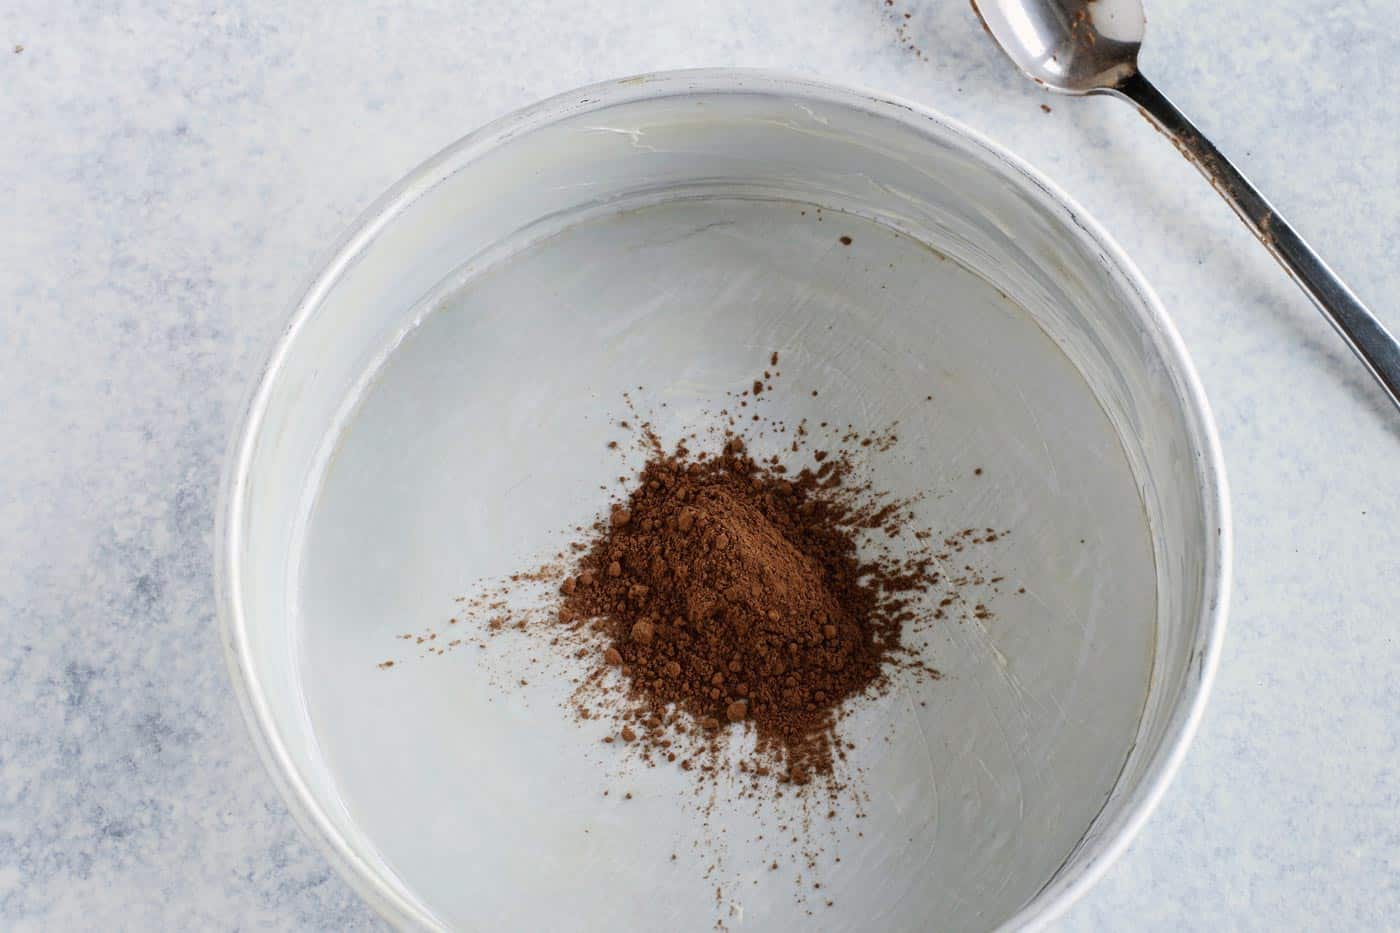
Then spoon in a bit of cocoa.
Finally, tap and tilt the pan to distribute the cocoa across the bottom and sides. I recommend working over the sink to catch any spillage.
The cake bakes up perfectly with this pan method.

How to Serve Kladdkaka
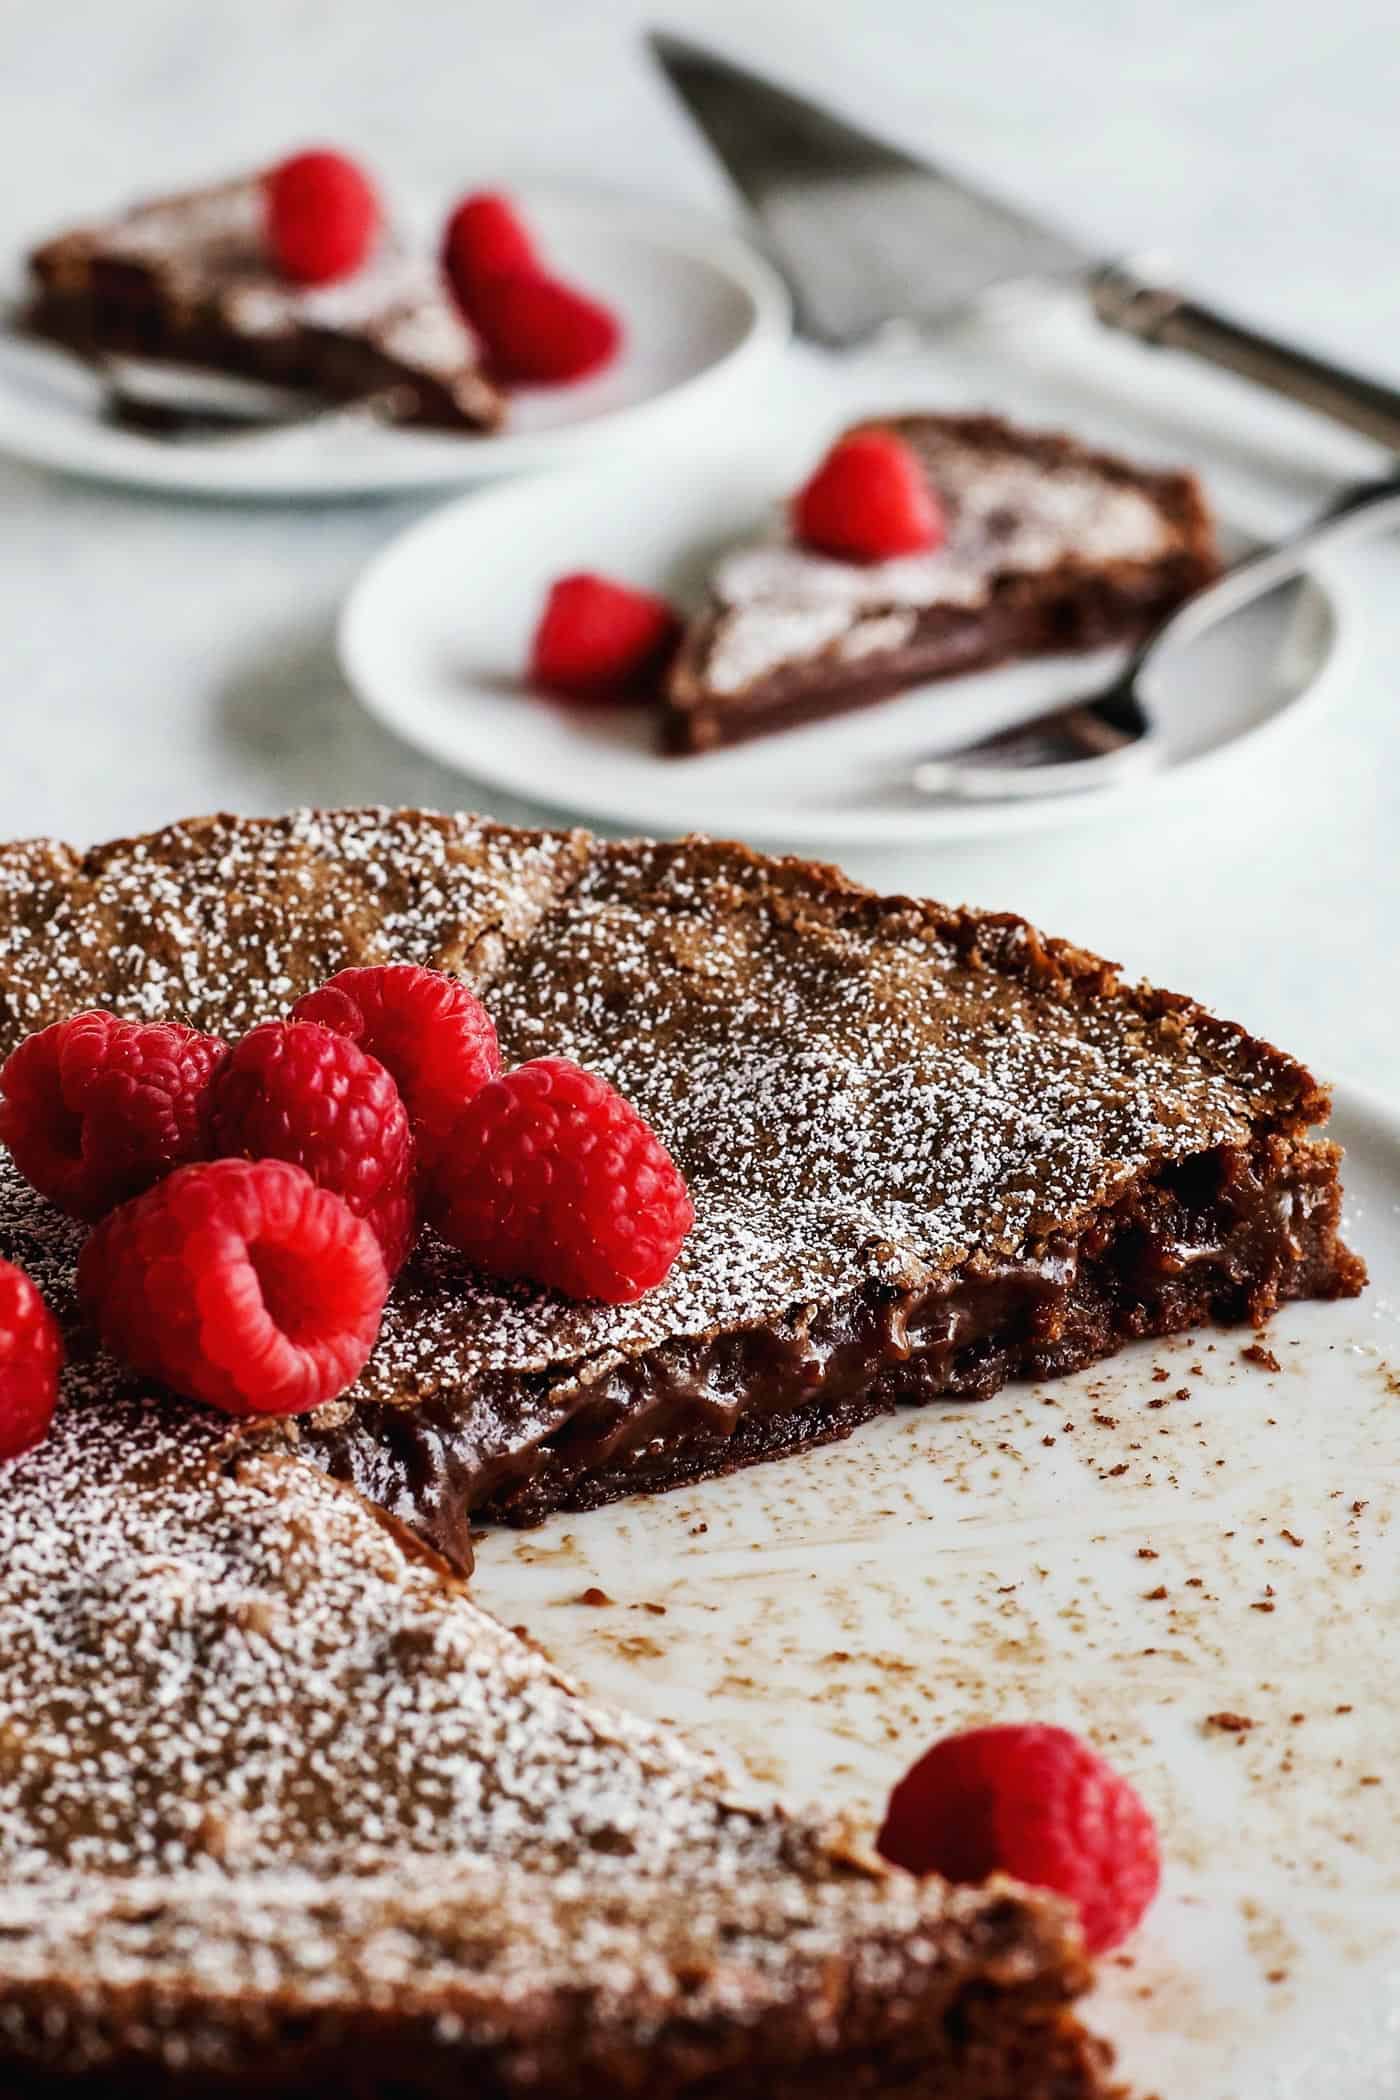
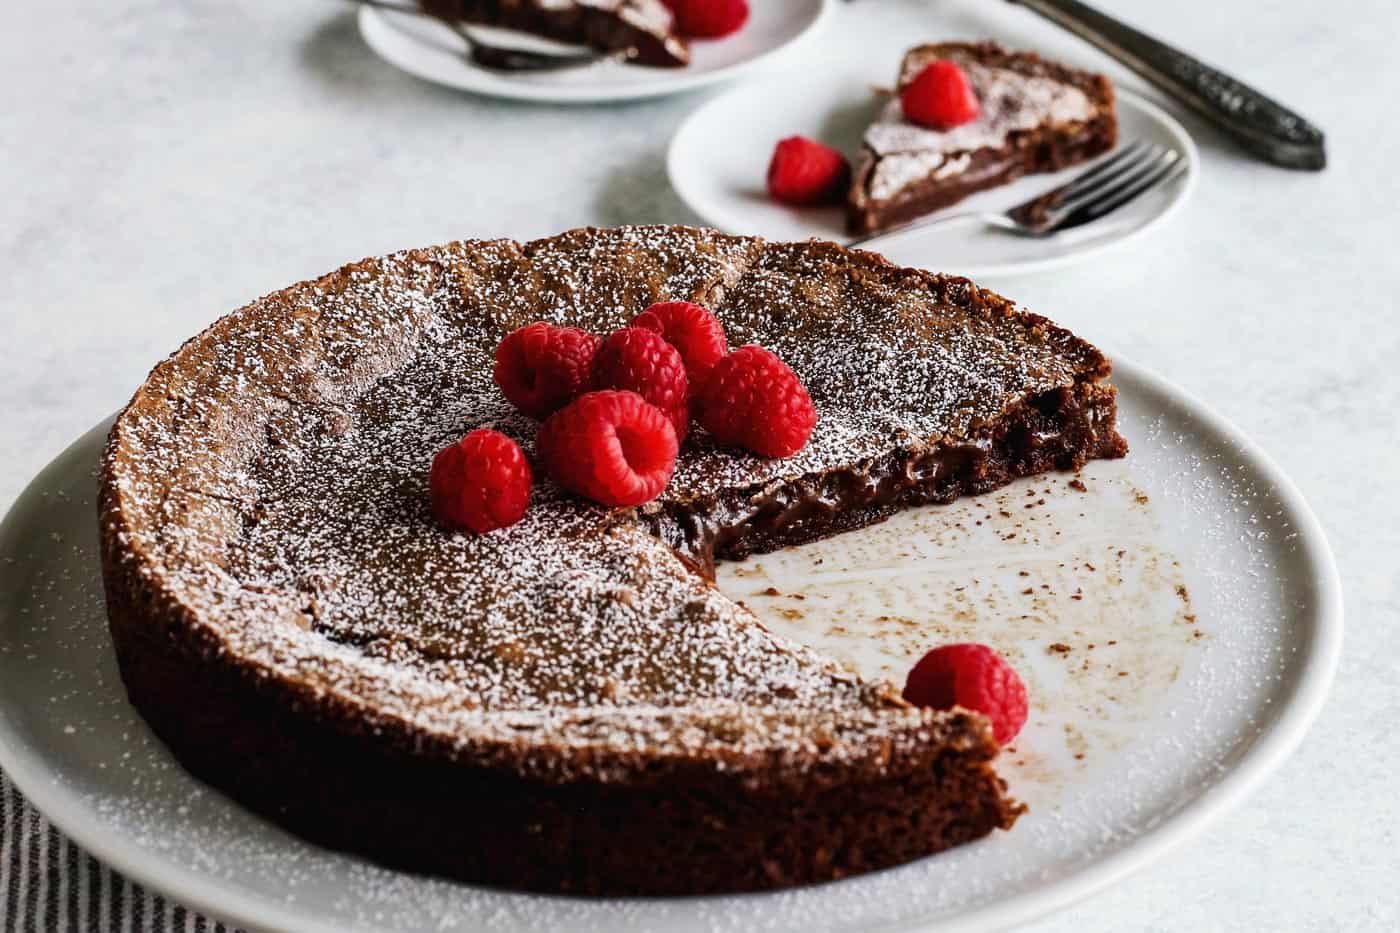
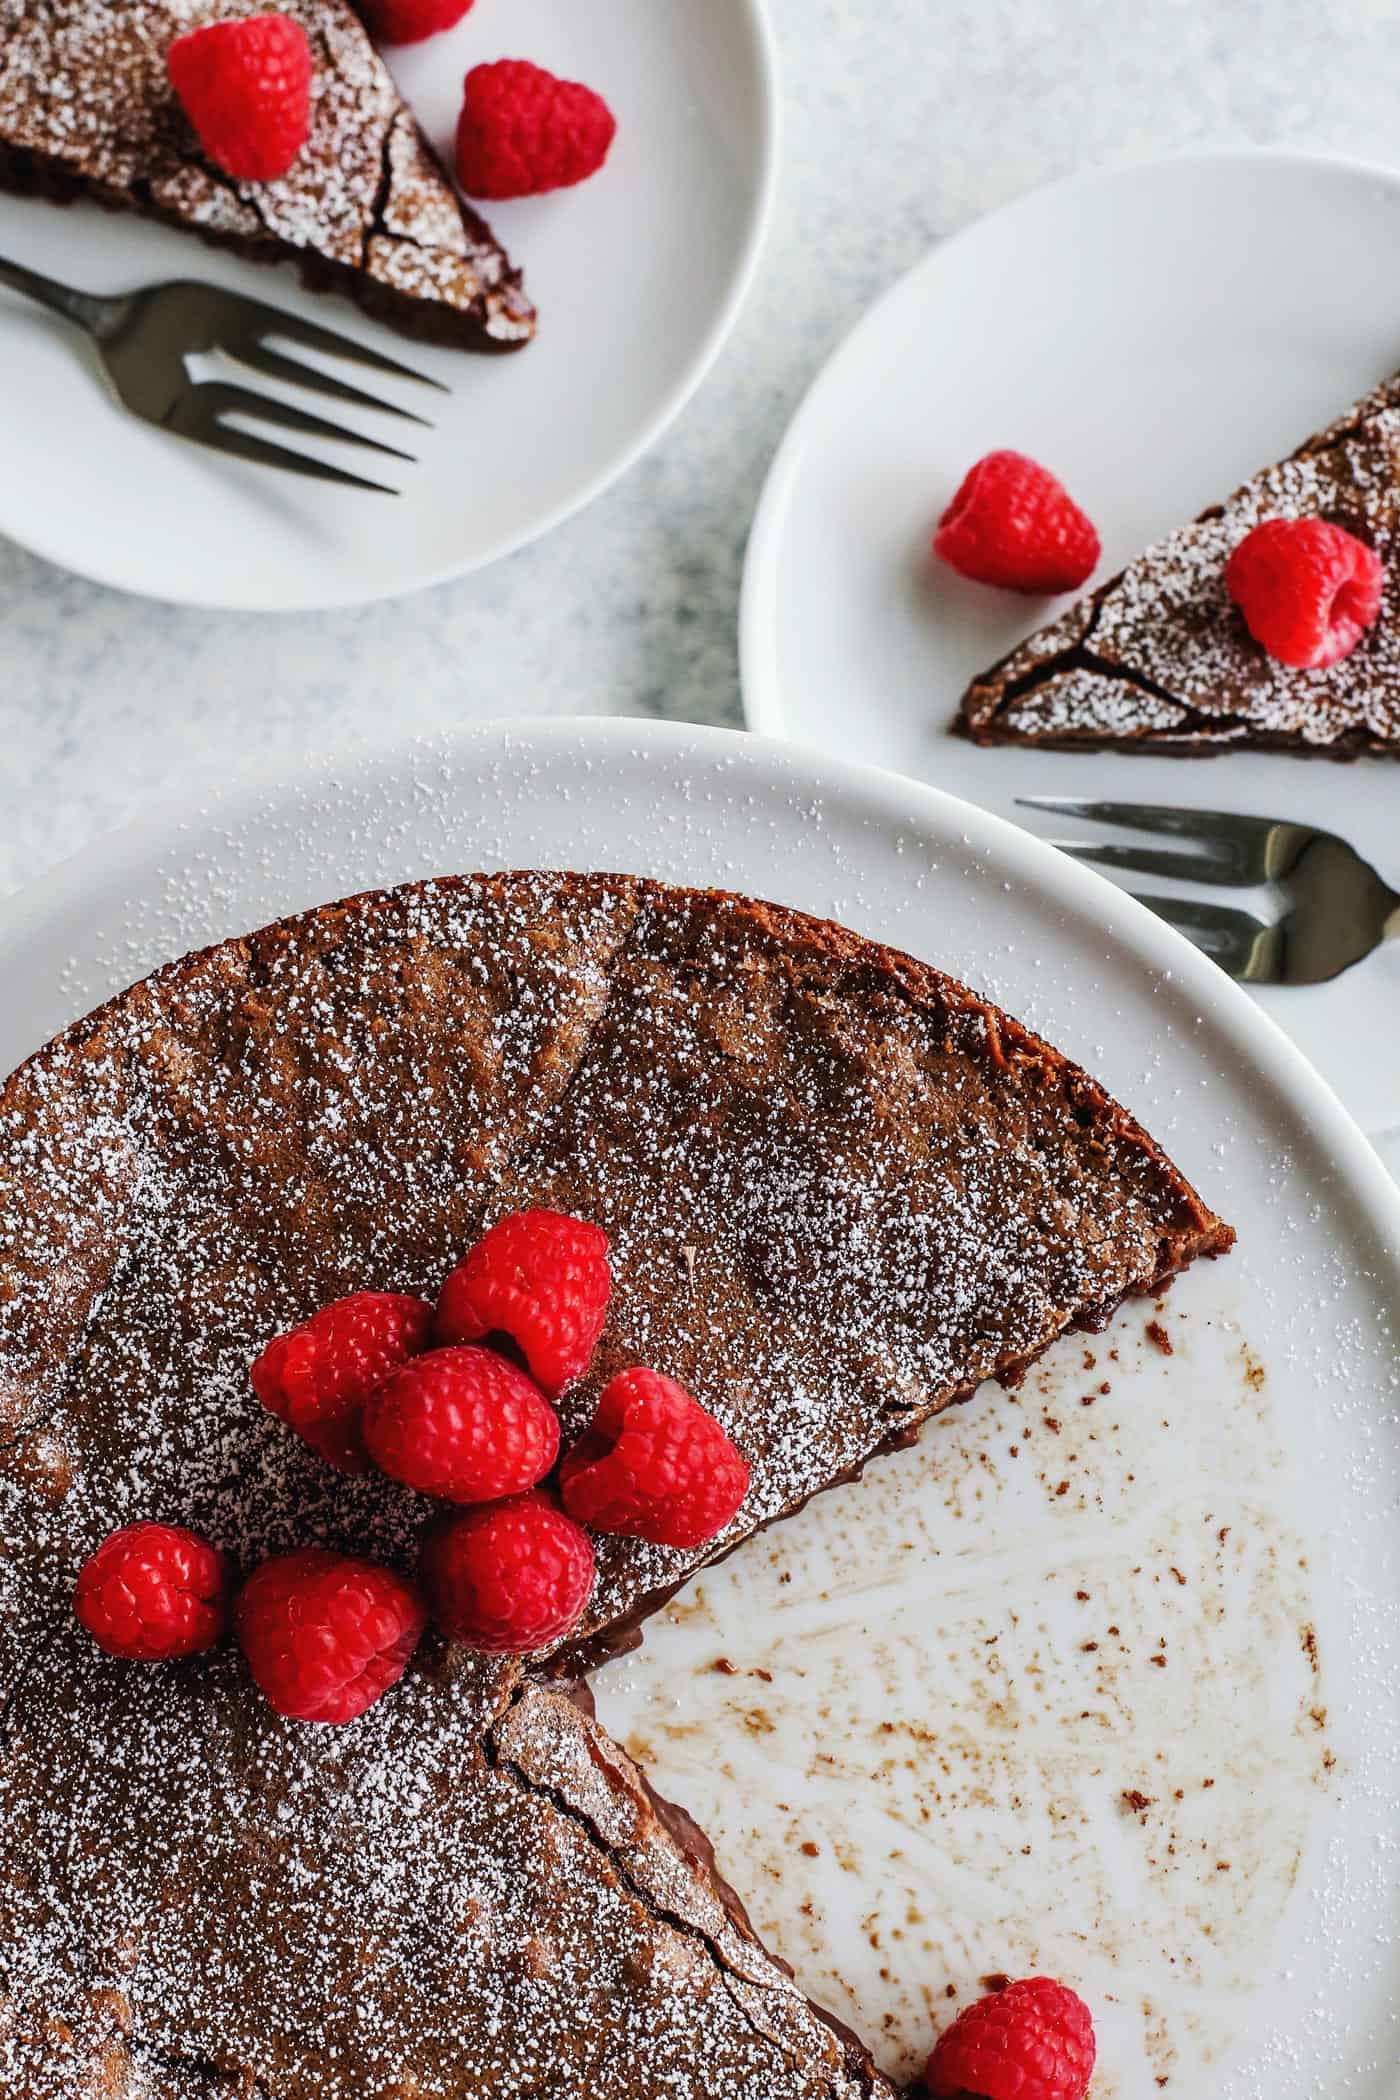
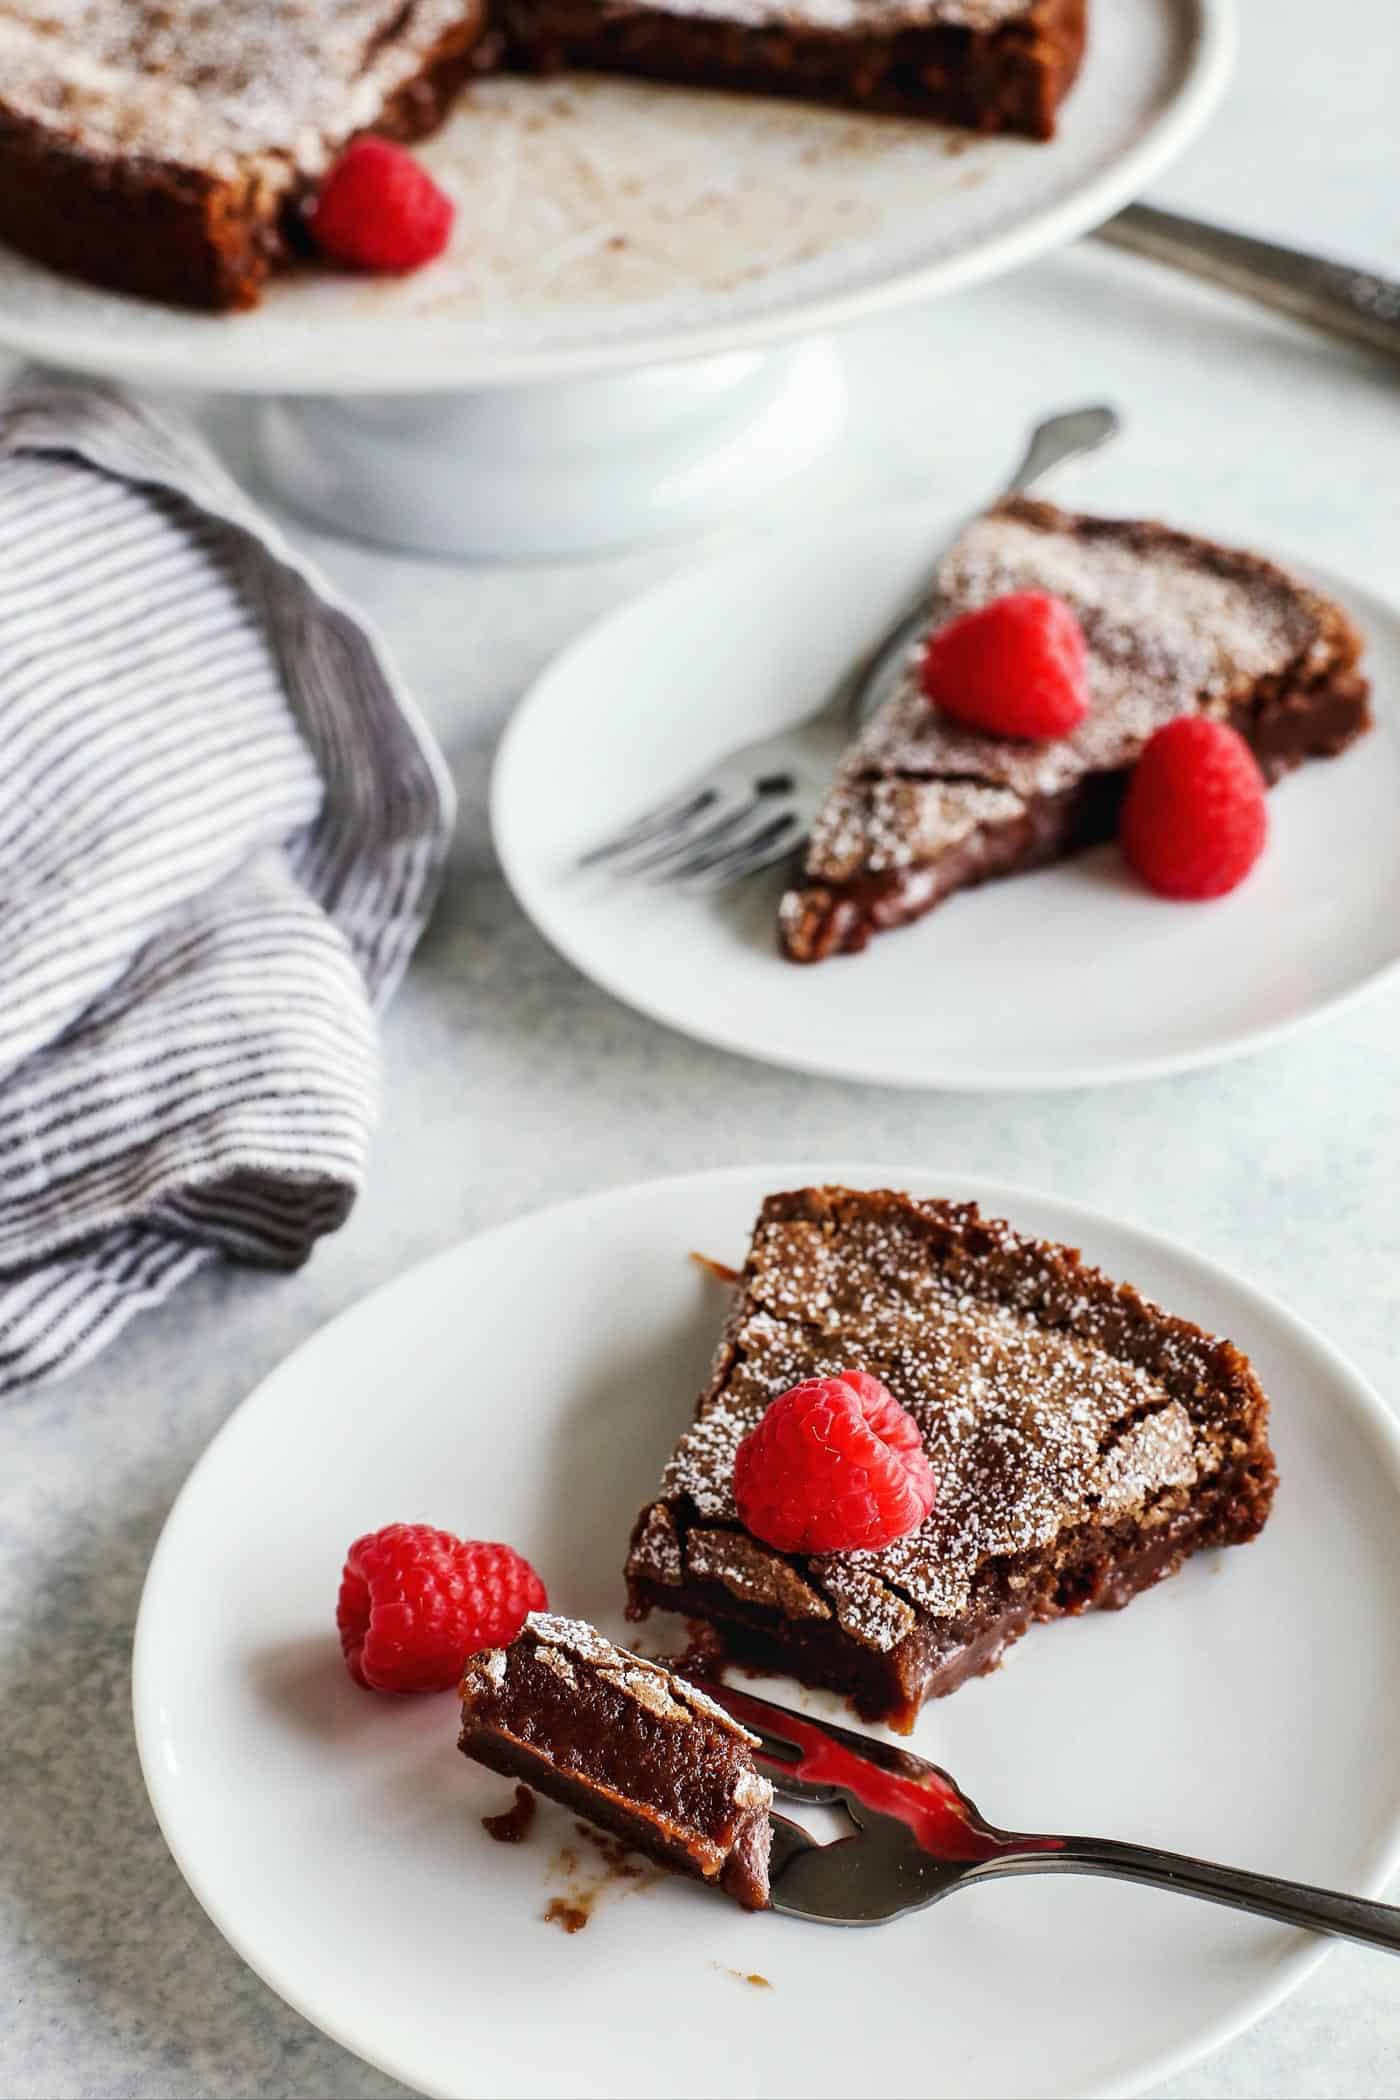
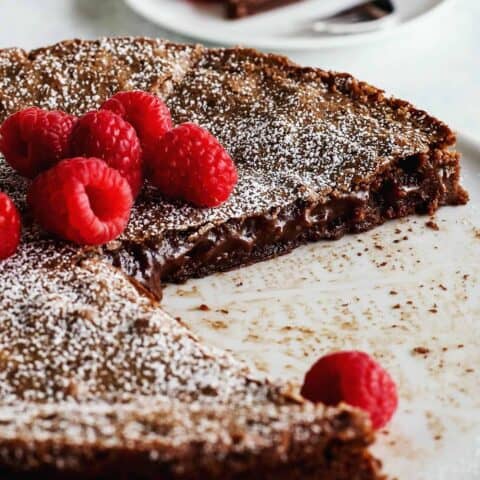
After the cake cools for an hour, invert it onto a serving platter. Dust with powdered sugar if you like.
Serve it sweet and simple, in all its sticky, gooey chocolate cake glory.
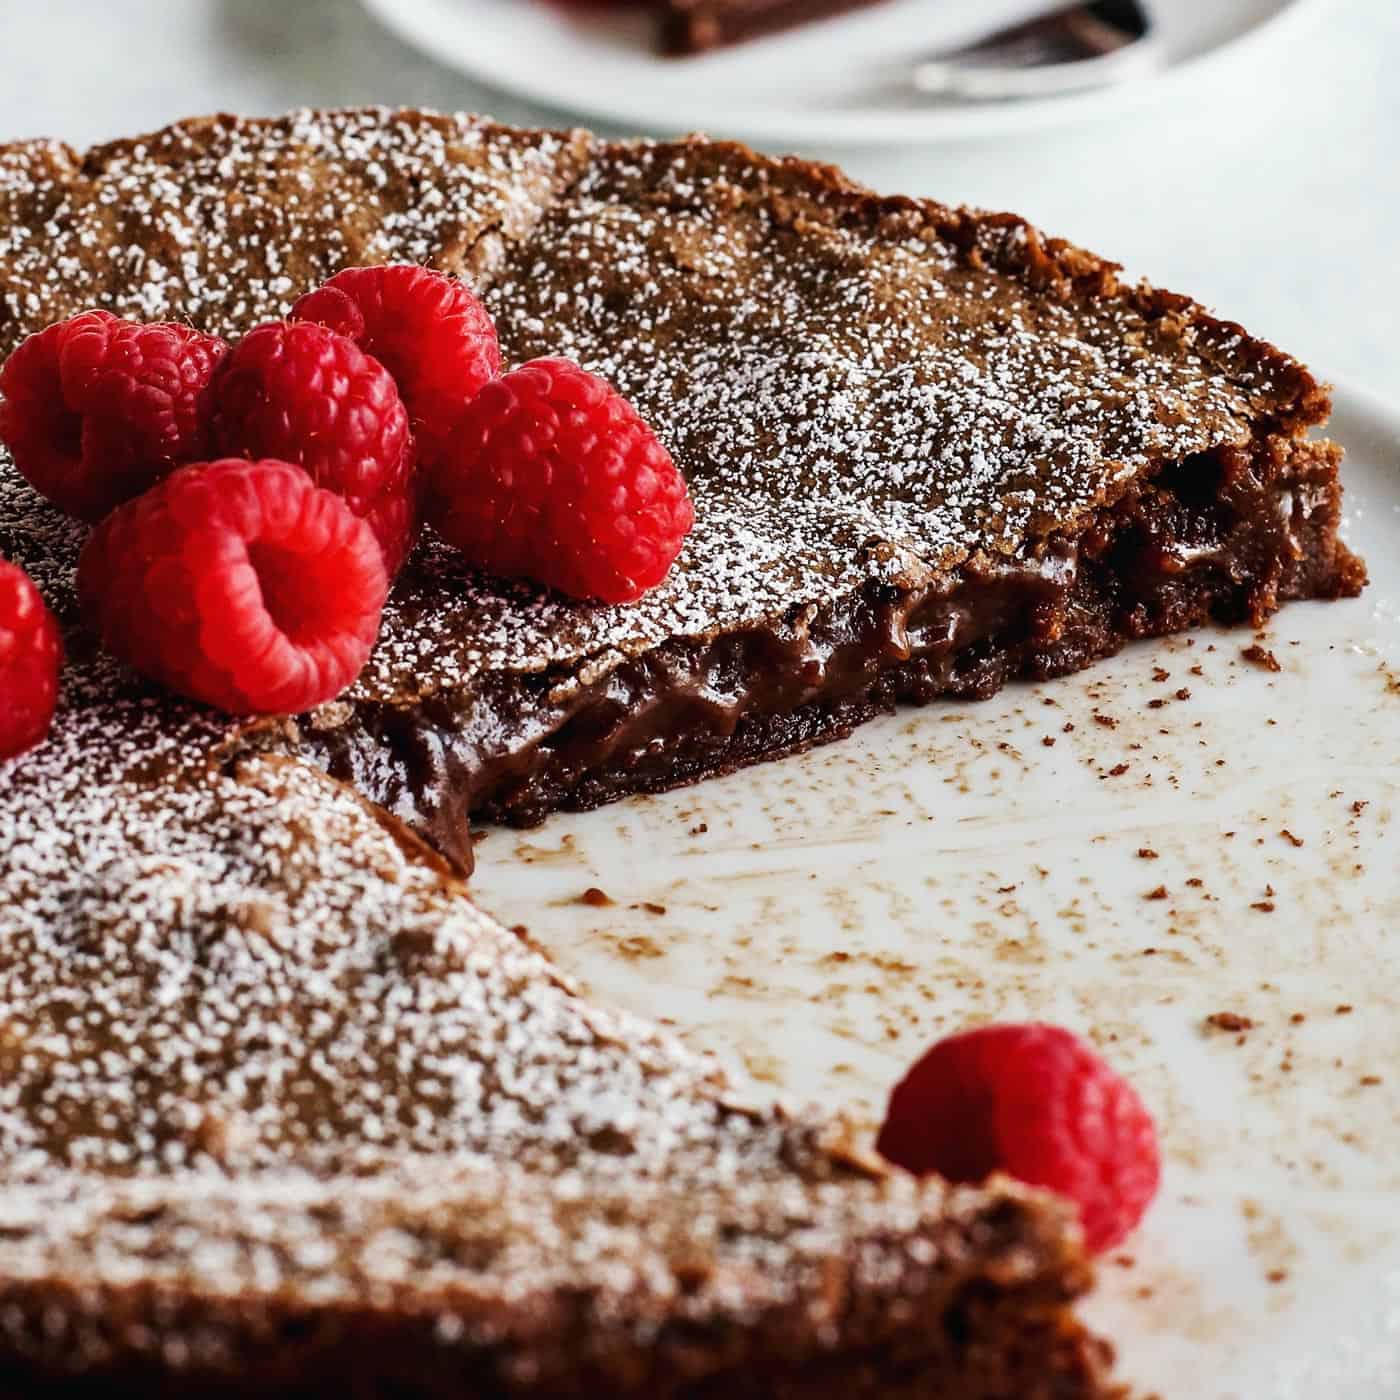
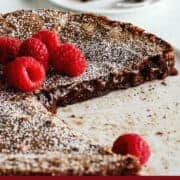
Or top the dessert with fresh raspberries, my absolute favorite.
Also feel free to add dollops of freshly whipped cream or scoops of vanilla ice cream, because these could never be bad choices!
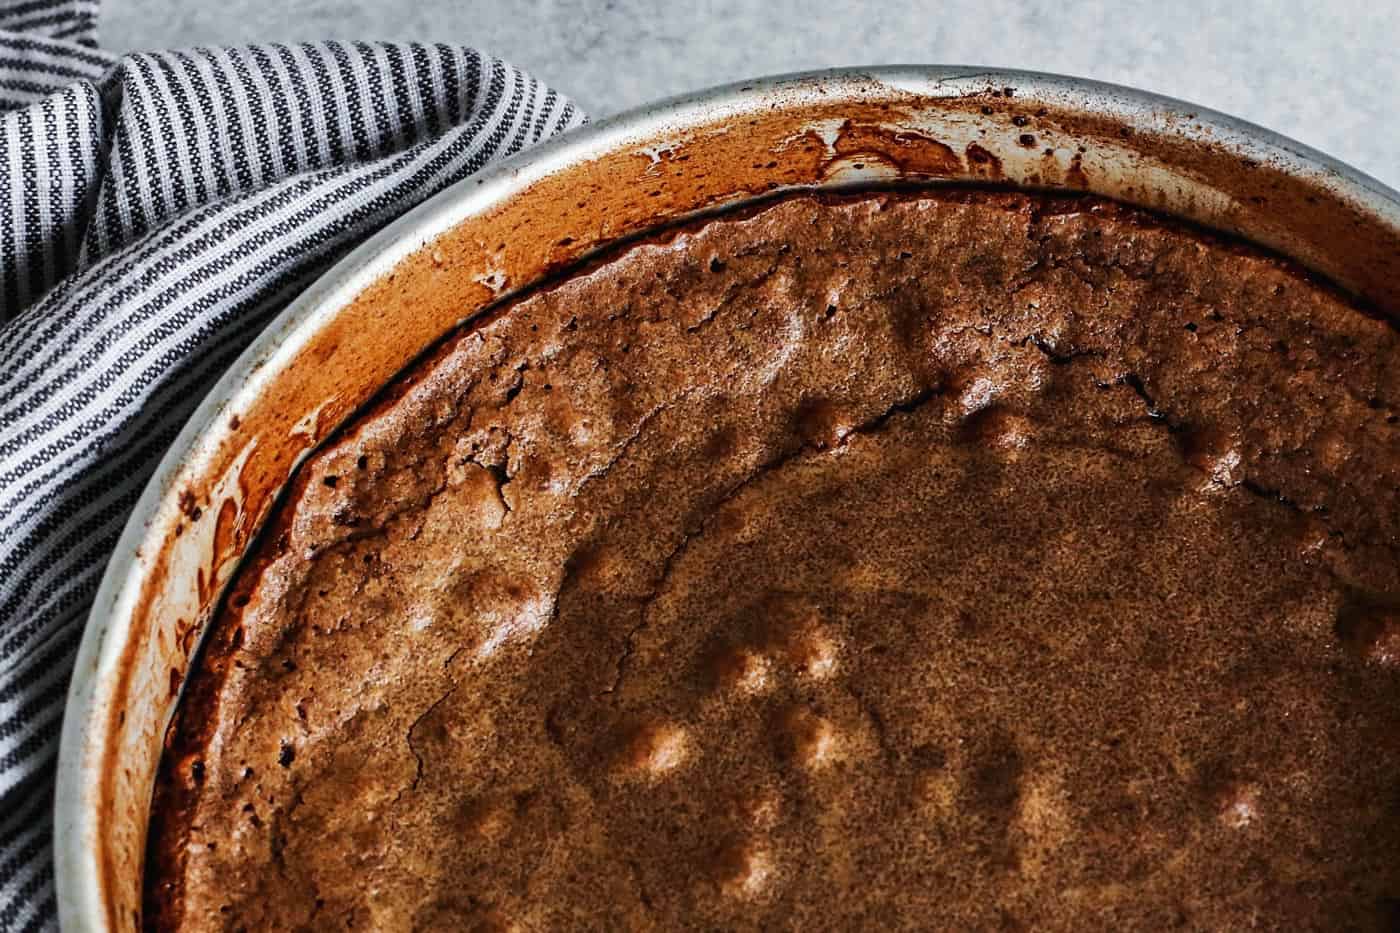
Notice how the top of the cake cracks a bit when it’s cut? That’s what you want. This means that the cake has a thin, crackly top. It’s the most wonderful contrast to the gooey interior.
We baked MANY chocolate cakes to get this recipe just right. And I can say it was worth every single, delicious bite!
Like this recipe? Save it to Pinterest!
Here are a few more Swedish desserts for you:
- Prinsesstårta – Swedish Princess Cake from ScandiKitchen
- Äppelkaka – Swedish Apple Cake from Home Sweet Sweden
- Pannkakor – Swedish Pancakes from Lost in a Pot
Swedish Sticky Chocolate Cake (Kladdkaka)
Ingredients
- ½ c. unsalted butter plus 1/2 T. for preparing the pan
- 6 T. cocoa plus 1 to 2 T. more for preparing the pan
- 1 c. all-purpose flour
- 2 large eggs gently whisked
- 1-1/2 c. sugar
- ⅛ tsp. kosher salt
- 1 T. pure vanilla extract
- powdered sugar optional for sprinkling over the top
Instructions
- Preheat oven to 350° F.
- In a medium saucepan over medium heat, melt the butter. Remove from heat to cool a bit.
- While butter is melting and then cooling: Prepare an 8" round cake pan by first buttering the bottom and sides. Line bottom of pan with parchment paper, and then butter top of parchment paper. Add extra cocoa powder to the pan, and then tilt it about, allowing cocoa to distribute over the butter and cover the entire interior of the pan. Invert pan over the sink and tap it gently with your hand to remove any excess cocoa. Set pan aside.
- Sift flour, cocoa, and salt into a medium bowl and then whisk in the sugar.
- Add cocoa mixture to melted butter in saucepan. With a sturdy spatula, stir gently until halfway incorporated. Add whisked eggs and vanilla. Stir gently to bring all ingredients together. Transfer mixture to prepared cake pan.
- Bake on lower oven rack for about 25 minutes, until the top is set but the center is still gooey. The top should be firm, but crack under light pressure from your finger. We bake this cake exactly 24 minutes for it to be perfectly set with a sticky/gooey interior. You may need to experiment with timing to achieve this perfect texture, as oven temperatures and baking equipment varies. Once you know how your oven reacts, you will know the perfect length to bake it going forward.
- Remove pan from oven and let cool on a rack for 1 hour. Run a butter knife between the pan and the cake to loosen it. Invert onto cake plate. (See note below.)
- Dust cake top with powdered sugar, if desired. Serve cold for a more firm and fudgy texture. Or serve slightly warm or at room temperature for a sticky/gooey texture. Top individual slices with fresh berries, whipped cream, and/or ice cream, if desired.

This recipe is amazing! The cake turned out so rich and chocolaty.
Do you think I could layer a jar of lingonberry preserves over the top of the cake?
I love how easy this recipe is, but it’s also not boring! Rather than being a plain chocolate cake it’s hard on the outside and melt-in-your-mouth in the inside! I’ll be making this every month now
is T tablespoon or teaspoon?
My Swedish Grandparents were farmers, as were my Swede-Norwegian Grandparents. They walked in the mud and more, getting their feet sticky with mud and you-know-what. Clod Cake is absolutely delightful and your recipe is almost exactly the same I have. It’ll eat most deliciously.
thanks for posting. I’m subscribing now.
I am my father’s boy-son.
This recipe is a winner! Thank you for sharing!
Made for Christmas 2020 and everyone loved it. A small slice is just the perfect amount of sweet after a big dinner!
I only had a 9-inch springform pan, so I cooked it for a little less (I think 22 minutes), and it was perfect–could’ve even pulled it at 20 or 21 minutes but no complaints.
hi love this recipe, really easy and tasty! but the top of my cake didn’t crack or crispy, may i know what the reasons might be? thank you again for this wonderful recipe!
Just WOW! This swedish cake is so chocolaty, I can’t keep my eyes off this delicious cake…. Wanna try it soon..
Thank you for the recipe, can’t wait to try this, sounds perfect for a afternoon.
Great recipe!! Baked for 25 minutes, which made it more fudgy. Will try with cool whip and strawberries. My husband never ate cake without frosting until now! Love your recipes!!
Yay! So glad you liked! And your husband – that makes me smile about not eating cake without frosting until this. Thank you so much for sharing.
This looks so good. Can’t wait to try it out. Just thinking I could eat the whole thing!!
You will LOVE this!!!! xo