
Our kitchen comes alive when homemade marshmallows are mentioned. We’re talking singing and dancing and smiles so wide they threaten to swallow us whole. (Well, from us girls, that is!)
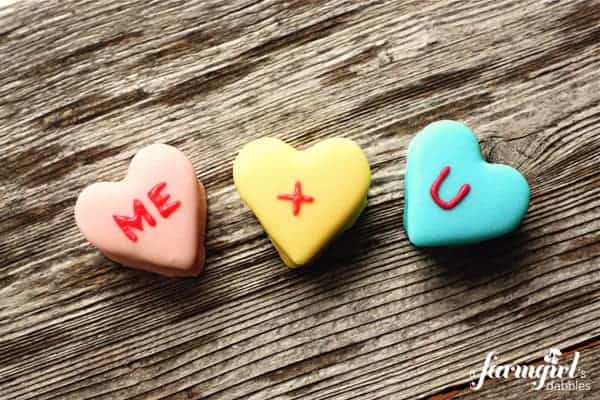
Where I was once intimidated by the whole process, making marshmallows at home is nothing short of pure joy for me now. It is super easy. Super fun. And the delicious chewy sweetness is better than any you could bring home from the store. We make them plain and simple, cut like bunnies and dipped in chocolate, and now…these fun and fabulous Marshmallow Conversation Hearts!
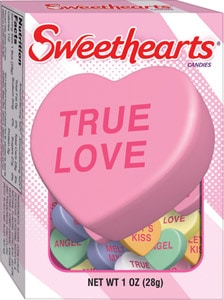
It was fun to read up on the history of Sweethearts Conversation Hearts, and how the sayings have changed over the past century. Such an icon of Valentine’s Day, over 8 billion of these little candies are created annually. Production starts just after Valentine’s Day each year and runs to mid-January of the following year. Then they completely sell out in just 6 short weeks…that’s about 100,000 pounds of little colored hearts every day!
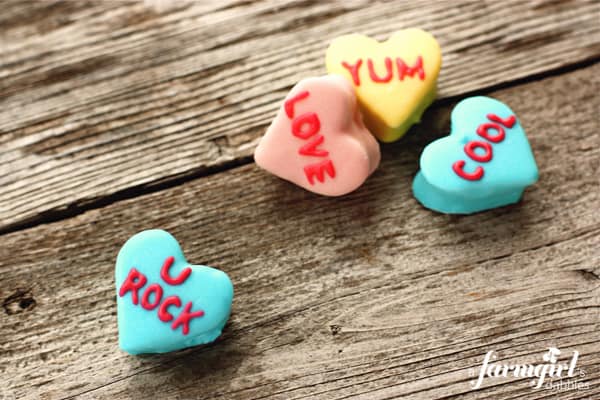
Even if you don’t want to take the time to produce a batch of your very own marshmallow conversation hearts, I would love to encourage you to at least give homemade marshmallows a shot. Just take a look at my first plain and simple marshmallow post from one year ago. And if you want to indulge a bit more in this Valentine’s season, you could take it one step further with a heart-shaped cookie cutter, creating a feast of marshmallow hearts. They’re pretty darn cute floating in a mug of hot chocolate. I’m certain your friends and family would say, “U ROCK“.
Homemade Marshmallow Conversation Hearts
Ingredients
- for the marshmallows:
- powdered sugar for coating pan
- ⅔ c. water divided
- 3 1/4 oz. envelopes unflavored gelatin (found by the Jell-O at the grocery store)
- 1 c. granulated sugar
- 1 c. light corn syrup
- pinch of kosher salt
- 1 tsp. vanilla
- for the candy coating:
- 2 12- oz. bags white Wilton candy melts
- candy coloring – I used Wilton yellow red, and blue candy (not icing) coloring
- for the glaze icing for the letters:
- Please visit my very talented friend – Amanda from i am baker – for her glaze icing recipe and tutorial. She’s just so great at using this stuff and really is your best teacher. Just read my notes specific to this Marshmallow Conversation Hearts recipe in the Preparation section below.
- Wilton “no taste” red icing color Don’t use liquid food coloring.
Instructions
- Lightly spray the inside of an 9” x 13” pan with cooking spray. Generously coat with powdered sugar and set aside.
- Pour 1/3 cup of the water into the bowl of a stand mixer. Sprinkle the gelatin over the water and stir briefly to incorporate. Let stand for about 10 minutes, or until the gelatin has softened.
- In a saucepan, off the heat, combine the remaining 1/3 cup of water and the granulated sugar, corn syrup, and salt. Place the pan over medium-high heat. Clip a candy thermometer on the inside of the pan, making sure it doesn’t touch the bottom. Cook the mixture without stirring until it reaches 240°. Brush down the sides of the pan with a pastry brush, dipped in water, to gently wipe away any sugar crystals.
- With your mixer on low speed, very carefully add the hot syrup to the softened gelatin. Add the vanilla and increase the speed to medium-high. The mixture will start out clear, but quickly turns very white. Beat for about 8 minutes, or until the marshmallow gets very thick and sticky, and starts to pull away from the sides of the bowl, in string-like pieces. This will really give your mixer a workout.
- Spread the mixture into the prepared pan using a lightly oiled spatula. With wet hands, press the batter evenly into the corners of the pan. Just keep rewetting your hands to help with the stickiness. Set aside for at least 1 hour, or until the mixture is firm and cool.
- Run a wet knife around the edge of the cooled pan to loosen the marshmallow. Remove the marshmallow from the pan, onto a sheet of parchment paper.
- Dip your small heart-shaped cookie cutter (mine measures 1-3/8″ wide by 1-3/8″ tall) into a shallow bowl of water and then cut the slab of marshmallow into heart shapes. This is a sticky job, but just have patience. It’s worth it! It helps to dip the heart cutter into the water in between cuts. Repeat this process until the whole slab of marshmallow is cut.
for the candy coating:
- Divide the candy melts between 3 glasses. In the microwave, carefully melt the candy melts, taking special care to not let them scorch. It’s best to get the candy melts partially melted and then just stir them until they are completely melted. Then color each separate glass to your liking.
- Drop a marshmallow heart into the colored melted candy and dunk with a fork to completely coat. Pick the marshmallow up with the fork, allowing excess candy coating to drip off while lightly tapping the fork to coax more of the excess off. Then slide the fork out of the glass, scraping the underside of the tongs along the rim of the glass. This will scrape off any remaining excess candy coating, so you don’t have a pool of it form around your heart as it cools.
- Set the candy coated heart on parchment paper to cool and completely set up on your kitchen counter. After they are dry to the touch, they are ready to decorate.
for the glaze icing for the letters:
- Again, here’s the link to Amanda’s recipe and tutorial for her glaze icing. I only have a couple things to add, how I did things a little differently for these hearts…
- Use only a 1/2 tablespoon of milk, as little as possible. You want the glaze icing to be stiff, so the letters won’t spread too much. And do not add any lemon or other flavoring to the glaze icing. Color with the red icing color to your liking and then pipe on the letters with a tiny round Wilton #1 tip. I will admit that the lettering was a little tedious, and that I did have a bit of an issue with the glaze icing still wanting to spread, but I really like its finished glossy look. If you’re not up for working with this for the lettering, you might wish to consider a stiffer frosting.
Notes
Nutrition Information:

i’m planning on eventually trying to make a food item from a game, little star-shaped marshmallows- do you think it would be possible to make marshmallows almost-black? or if not, then a bright pinkish-red? i’m trying to decide whether i want to go for it and try colouring them, or just do a black and red candy coating!
Hello There. I discovered your blog the usage of msn.
This is an extremely neatly written article. I’ll
make sure to bookmark it and return to learn more of your useful information.
Thank you for the post. I will definitely comeback.
Those could not be any cuter!!! You have out done yourself my friend! :)
OK, I made them and they are great! They taste awesome. I’m not sure I can ever eat prepackaged marshmallows again. Then covering them with the coating…come on! It is pure goodness. At every step I kept saying I couldn’t do it, but it was actually very easy and worked just as you said. I’ll be making the chocolate ones for Easter. Thanks. I love it when a recipe turns out great. My kids will love them!
Yay! Thank you so much for letting me know…I’m so happy you liked them AND it sounds like you had fun doing it!! Warning, though…those chocolate dipped Easter ones are my absolute favorite. ;)
this is the best thing ever
It looks like the recipe that Amanda has is similar to a royal icing recipe. I make one that’s thick and uses meringue powder that can then be thinned. If you’d like that let me know and I’ll send it your way.
Sure, Vicki, I’d love to take a look at it. Please go to my “Contact” tab and send me a message. Thank you!!
OMG I am definitely trying these. Yours look so perfect. You really need a steady hand for the writing. I just love this. Did you use the beater bar or whisk attachment on your mixer? I can’t wait to make these. Thank you for sharing. You’ve inspired me.
Hi Vicki! I used the beater, not the whisk attachment. Have fun!!!!
My kids love marshmallows, what a great idea! I’d love for you to submit this to the M&T Spotlight http://www.makeandtakes.com/spotlight
Thanks, Sue! I just submitted to the Spotlight, thanks for the reminder!
These are so stinkin’ adorable!!
These homemade marshmallow conversation hearts are so precious! And looks like they’re super easy to make! Can’t wait to try them out! Our food lovers would love to hear about this on our community page! Check it out! http://bit.ly/wlZhX4
These are TREMENDOUSLY cool! My husband and I try and go homemade for Valentine’s Day and I think this just might be my gift this year. I love that you included a bit about heart candy history also!
These are adorable and really make me want to give making marshmallows a go. Quick question though. The Wilton candy coating comes in different colors. Is there a reason to use the white and color it yourself? I’m just wondering of the colored coatings don’t work for this. Very inspiring. Glad I came across your blog! Fun!
Hello! Yes, you surely can use the precolored melts. I just knew I wanted to use yellow, blue, and pink…and the store was out of one of the colors. So it was more efficient for me to just buy 2 bags of white and color them myself. :)
Cutest Valentine treats ever! Seriously cute!
Thanks, Lori! :)