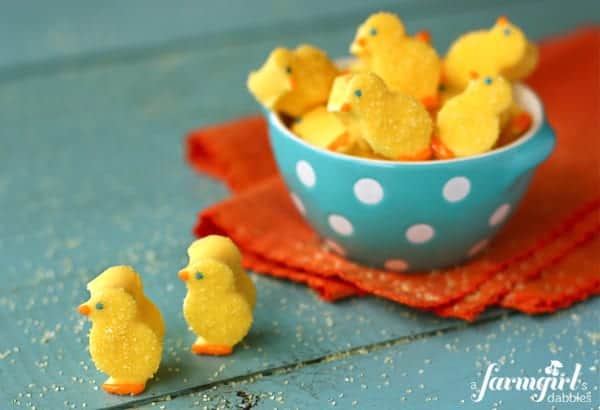
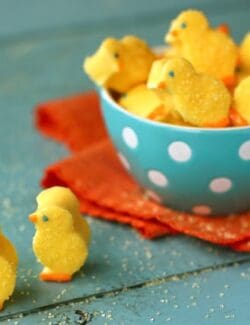
They delicious Homemade Marshmallow Chicks are covered in white chocolate and sprinkled with sugar. They are the perfect festive candy for Easter!
Homemade Marshmallow Chicks Are Perfect For Easter
Peep, Peep!
You know how much I love making (and eating!) homemade marshmallows. So would you be surprised to learn that I don’t like those famous marshmallow Peeps? I don’t think I’ve ever eaten a whole one, not even as a kid. I tried really hard to like them when I was young, I really did. But I always ended up trading them off for somebody else’s Easter basket confections. Probably for some chocolate marshmallow bunnies. Much more my style.

Can you see the yellow Peeps in my basket?!
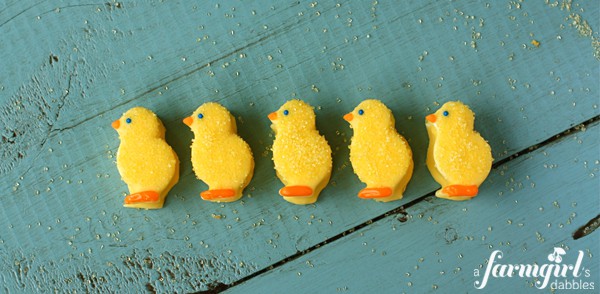
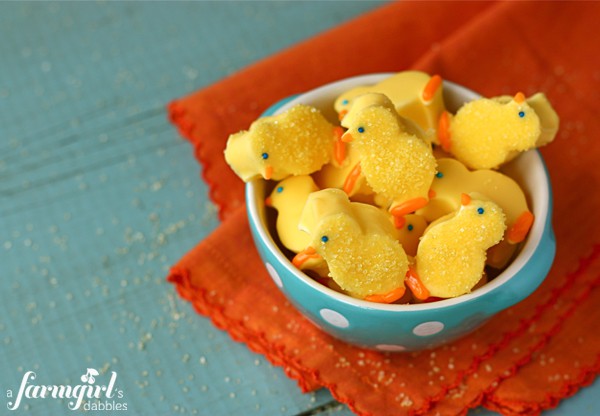
So, in an attempt to make up for lost time…I’ve come up with a way that guarantees my own indulging in some yellow chicks this spring. Homemade Marshmallow Chicks. Aren’t they adorable?! I dipped them in white chocolate, tinted a springy yellow. Then, per Tessa’s request for some feathers, I sprinkled them with a bit of yellow sugar. Adding some little blue eyes and glossy orange feet, we birthed a whole flock of sweet little chicks.
Now these are my kind of Peeps!

Homemade Marshmallow Chicks
Ingredients
- FOR THE MARSHMALLOWS:
- powdered sugar for coating pan
- ⅔ c. water divided
- 3 1/4 oz. envelopes unflavored gelatin (found by the Jell-O at the grocery store)
- 1 c. granulated sugar
- 1 c. light corn syrup
- pinch of kosher salt
- 1 tsp. vanilla
- FOR THE WHITE CHOCOLATE COATING AND DECORATION:
- 6 oz. good quality white chocolate You could also use candy melts, which is a little sturdier, but not as tasty.
- yellow candy coloring not icing coloring
- yellow tinted sugar
- small round blue nonpareils
- FOR THE GLAZE ICING FOR THE CHICK’S FEET AND BEAK:
- ½ c. powdered sugar
- ½ T. milk
- ½ T. light corn syrup
- orange icing coloring
Instructions
for the marshmallows:
- Lightly spray the inside of an 9” x 13” pan with cooking spray. Generously coat with powdered sugar and set aside.
- Pour 1/3 cup of the water into the bowl of a stand mixer. Sprinkle the gelatin over the water and stir briefly to incorporate. Let stand for about 10 minutes, or until the gelatin has softened.
- In a saucepan, off the heat, combine the remaining 1/3 cup of water and the granulated sugar, corn syrup, and salt. Place the pan over medium-high heat. Clip a candy thermometer on the inside of the pan, making sure it doesn’t touch the bottom. Cook the mixture without stirring until it reaches 240° F. Brush down the sides of the pan with a pastry brush, dipped in water, to gently wipe away any sugar crystals.
- With your mixer on low speed, very carefully add the hot syrup to the softened gelatin. Add the vanilla and increase the speed to medium-high. The mixture will start out clear, but quickly turns very white. Beat for about 8 minutes, or until the marshmallow gets very thick and sticky, and starts to pull away from the sides of the bowl, in string-like pieces. This will really give your mixer a workout.
- Spread the mixture into the prepared pan using a lightly oiled spatula. With wet hands, press the batter evenly into the corners of the pan. Just keep rewetting your hands to help with the stickiness. Set aside for at least 1 hour, or until the mixture is firm and cool.
- Run a wet knife around the edge of the cooled pan to loosen the marshmallow. Remove the marshmallow from the pan, onto a sheet of parchment paper.
- Dip your small chick-shaped cookie cutter (mine measures 1" wide by 1-1/2" tall) into a shallow bowl of water and then cut the slab of marshmallow into chick shapes. This is a sticky job, but just have patience. It’s worth it! It helps to dip the chick cutter into the water in between cuts. Repeat this process until the whole slab of marshmallow is cut.
for the white chocolate coating and decoration:
- Using the microwave, carefully melt the white chocolate in a glass, taking special care to not let the white chocolate get too hot. It’s best to partially melt the white chocolate and then just stir it until completely melted, then color with candy coloring to your liking.
- Drop a marshmallow chick into the colored white chocolate and dunk with a fork to completely coat. Pick the marshmallow up with the fork, allowing excess white chocolate to drip off while lightly tapping the fork to coax more of the excess off. Then slide the fork out of the glass, scraping the underside of the tongs along the rim of the glass. This will scrape off any remaining excess white chocolate, so you don’t have a pool of it form around your chick as it cools.
- Set the white chocolate coated chick on parchment paper. Then, while the coating is still wet, place a blue nonpareil for the eye and sprinkle a bit of yellow sugar on the body, staying away from the chick’s feet. Let the chicks cool and completely set up on your kitchen counter. It may help to let them sit in the refrigerator for awhile.
for the glaze icing for the chick’s feet and beak:
- Sift the powdered sugar into a small bowl and add the milk and corn syrup. Stir until well incorporated. Then color with orange icing coloring to your liking. If the icing is too stiff, add just a little more milk. If it’s too thin, add a bit of powdered sugar. Pour colored glaze icing into a pastry bag fitted with a small round tip. Pipe on a little orange beak and a line across the chick’s feet. This glaze is easy to manipulate and "stretch", using a toothpick, if needed. Let dry completely.
- Store in a single layer in an airtight container. The white chocolate will have a softer set than if using candy melts.
Nutrition Information:
If you liked these chicks, be sure to also check out my Chocolate Marshmallow Bunnies!

I love that you made these from scratch – and they turned out incredible! They’re so fluffy and vibrant in color… Thanks so much for showing how to make these and I am featuring this post in today’s Friday Food Fetish roundup (with a link-back and attribution), but please let me know if you have any objections. It’s a pleasure following your creations…
I’m so glad to have discovered your blog, and I definitely plan to post this one on StumbleUpon. These are so adorable and creative! And gorgeous photos too :)
Love this! We just posted our Kitchen Fun and Crafty friday link party and would LOVE for you to share this!
http://kitchenfunwithmy3sons.blogspot.com/2012/03/kitchen-fun-and-crafty-friday-link_15.html We have also included a Sugarlicious giveaway!
great job on these!!! so stinkin cute!
I’m with you, the store bought peeps, blah, yuck! Homemade mashmallows are one of my top 5 all time favorite things to eat. A homemade peep coated in white chocolate and sprinkles, for reals, that’s fantastic! And yours are waaaaaay cuter!
These look so professional. Love your sweet chicks. I just started a Spring contest, and you are welcome to link this post up for a chance to win some great prizes.
WOW! Just found your blog through Tidy Mom and I’m loving it! I’m gonna hang out here and drool over all your yummy creations! I am so wanting to make homemade marshmallows, but I am so scared to. You make it look so easy! I’m going to pin this and save it for later! You’ve inspired me to try making my own! Thanks!
So nice to meet you, Karyn – thanks for leaving a comment! I was once intimidated by marshmallows, too. But it’s so easy. Just make sure you have a reliable kitchen thermometer and a mixer!
Truly adorable! So glad I found your blog. :)
Thank you, Emily – nice to meet you!
These are too adorable for words! Marshmallows can be a sticky mess, but cutting these cute chicks out was so worth it!
Hi Mercedes! Thank you!!
I can see everything including your HAPPY FACE when you were small.
Wonderful post. Thanks for sharing!!!
Love from Spain
Marialuisa
Thank you! :)
i can’t take the cuteness!!!
so adorable.
Thank you!
Ummm those are just too cute. I couldn’t eat them, it would feel so wrong. lol
TOO cute!
Boy, did that picture bring back lots of good memories. Can you believe that sofa?? Anyway, you
know I love marshmallows, even the Peeps, so I’m hoping you still have a few of these stowed away
when we visit.
As I was writing, looking at that picture, I could feel the texture of that sofa. I could smell that sofa. I remember tracing my fingers along its swirly design. Love you, Mom. xo
Your chicks are super cute!
Those are ridiculously cute!!!!
Thank you so much, Heather! :)
So so cute!
Thank you, Shelly!
You can’t beat homemade! These are so very cute and I know that they are delicious.
These are so cute! They remind me of the little bunny ones you had last year. I’m off to hobbycraft at the weekend so I’ll see if I can find a chick shaped cutter, this looks like the perfect way to spend the Easter band holidays.
I think those bunnies are still my favorite marshmallow adventure…love the marshmallow dipped in chocolate!
OMG these are the most adorable little chicks. I can’t wait to try these. They’re going to be so much fun to make. I’ll have to share them with the kids in the lane since mine are gone.
Thanks for sharing.
Thanks, Vicki – have fun!