


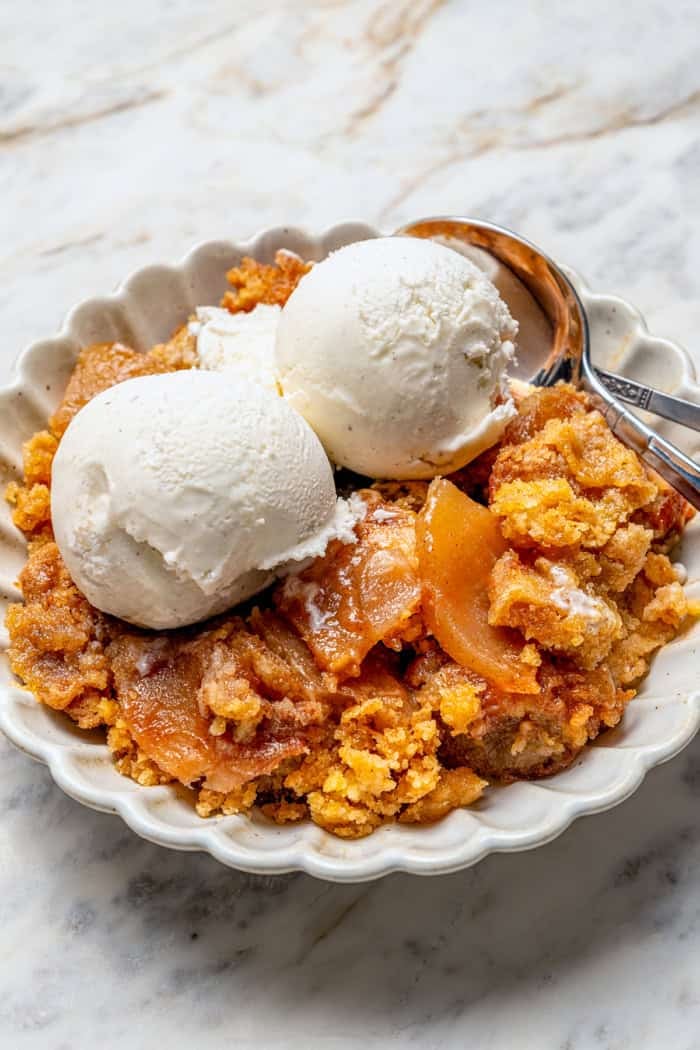
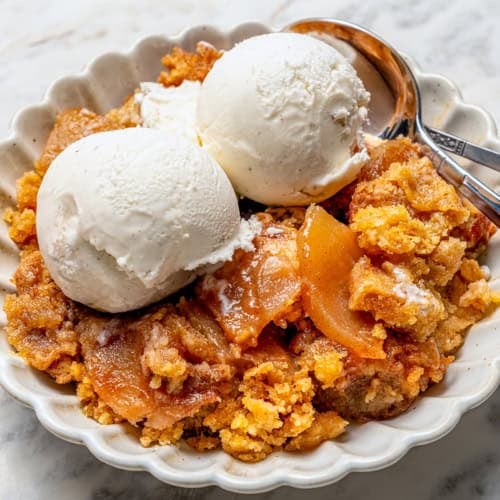
This Apple Dump Cake recipe uses the traditional boxed cake mix method, but gets a major upgrade from fresh, juicy apples in the spiced apple filling. It’s an easy fall dessert recipe you’ll make again and again!

My Rhubarb Dump Cake is perfect for springtime, while jammy Blueberry Dump Cake is a summertime favorite. And when apple season rolls around, it’s time to pull out this easy Apple Dump Cake recipe! You’ll love the layer of fresh, juicy apples tossed with brown sugar and cozy spices, baked under a buttery, tender topping that’s made with an everyday boxed cake mix. This dump cake is still simple, with its “dump in the pan” method – but with a fresh apple upgrade!
Why This Apple Dump Cake Is the Best You’ll Ever Make
I’ve never been a fan of apple desserts made with canned or jarred apple filling. I’m certain that comes from growing up with a mom who made fantastic homemade apple pies and other apple desserts – always using fresh apples we picked from the trees on our farm. Here’s what makes this apple dump cake recipe the best:
- Made with fresh apples. Canned apple pie filling pales in comparison to an apple filling made from crisp, juicy, FRESH apples – it’s just a fact. This apple dump cake with fresh apples is a fall and winter dessert that actually tastes like just-picked apple goodness.
- Moist, buttery topping. I use a combination of melted butter and pats of butter over the dry cake mix, to ensure every last bit of topping bakes up moist.
- So quick! I keep a boxed cake mix in the pantry for quick desserts when I’m in a crunch. This recipe is an easy way to bake up something homemade and delicious, and FAST!
What You’ll Need
Even with the from-scratch filling, this apple dump cake keeps the ingredient list simple. Scroll down to the printable recipe card to find the exact ingredient quantities and full recipe instructions.

For the Apple Filling:
- Apples – I recommend using a crisp, juicy, tart or sweet-tart apple variety that is known to be a good baking apple. I like Haralson and Honeycrisp. First Kiss is a newer variety that I’ve become quite fond of, too!
- Lemon juice – Use freshly squeezed, not bottled, for the very best flavor. This brightens up the flavor of the filling and keeps the apples from turning brown.
- Brown sugar – Just enough light brown sugar to sweeten the filling without making it too sweet.
- Apple Pie Spice – Or use the same amount of cinnamon, plus a big pinch of nutmeg.
- Cornstarch – To thicken the juices that bake off of the apples.

For the Cake Layer:
- Yellow cake mix – I use Pillsbury Moist Supreme Yellow Cake Mix.
- Apple pie spice – Or cinnamon + a little numeg. This adds some cozy flavor to the cobbler-like topping.
- Butter – Use salted butter, which balances the sweetness of the filling and topping.
How to Make Apple Dump Cake
Here’s a visual guide to the steps involved in making this apple dump cake recipe.


- Prepare. Preheat your oven to 350ºF and adjust oven rack to center of oven. Coat a 9×13 pan with nonstick spray.
- Make the filling. Gently stir the apples and lemon juice together, right in the pan. Then add the brown sugar, apple pie spice, and cornstarch. Spread the apples into an even layer in the bottom of the prepared pan.


- Add the topping. Whisk together the cake mix and apple pie spice, then sprinkle this mixture evenly over the spiced apple filling.
- Add melted butter. Pour the melted butter over the top, covering as much of the dry mixture as possible.


- Fill in with sliced butter. Then add thin slices of butter over any dry spots.
- Bake & serve. Place the pan in the oven and bake for 55 minutes, or until the apple filling is saucy and bubbly and the topping is golden brown. Serve warm, with ice cream.
Brenda’s Tips & Variations
I’ve got just a few more notes to share about this recipe!
- Use apples that are “baking apples”. I already talked about this, but it’s my most important tip, so I want to make sure you didn’t miss it! Seek out apples that have a good reputation for pronounced flavor and crisp texture, that do not get mushy when baked.
- Don’t slice the apples too thin. If the apples are too thin, they won’t hold their shape as well when baked. You also don’t want them too thick, or they won’t get as tender as you’d like. Aim for 1/4-inch thick slices.
- Plan on eating it the same day. Whenever I make this apple dump cake, I plan to let it cool for 25 to 30 minutes before serving, so it’s nicely warm and super fresh. This helps the layers of apples and cake to set, so the dessert is easy to serve. That said, it will keep at room temperature, uncovered, if you want to bake it in the morning and serve it later that day.
- Swap in spice cake mix. Spice cake mix is made with cinnamon, nutmeg, and allspice; you can swap that in for the yellow cake mix for even more spiced flavor. You could also use a white cake mix instead of yellow.
- Add some crunch. Fold toasted pecans or walnuts into the apple filling or chop them and add them to the topping mixture.
- Use store-bought apple pie filling. I hesitate to include this variation, as I do not care for desserts that use canned apple pie filling. But if you must…go ahead.

Serving Suggestions
We always always serve this apple dump cake with scoops of vanilla ice cream. (Butter Pecan Ice Cream or Salted Caramel Ice Cream would also be good!) If you want to go the extra mile, drizzle warmed Caramel Apple Dip over the ice cream or add crunchy Candied Pecans. Or do both!
How to Store Leftovers
- Refrigerator: As mentioned, this apple dump cake will keep well for up to 8 hours, uncovered, at room temperature. After this, I recommend covering the pan and refrigerating. It will keep well for up to 3 days in the refrigerator.
- Freezer: Freeze leftovers in a freezer-safe container for up to 2 months. Thaw in the refrigerator before reheating.
- To reheat: I recommend warming up your leftovers, as opposed to serving them cold. Heat individual portions in the microwave or warm up the entire pan in a 350ºF oven, lightly tented with foil to keep the topping from getting too dark.
More Apple Recipes for Fall
Apple Dump Cake
Ingredients
Apple Filling
- 8 cups prepared apple slices from crisp, tart baking apples, see Notes
- 3 tablespoons freshly squeezed lemon juice
- ⅓ cup firmly packed light brown sugar
- 1 tablespoon Apple Pie Spice (LINK), or substitute with cinnamon
- 2 tablespoons cornstarch
Cake Layer
- 1 box (15.25 ounces) yellow cake mix (I use Pillsbury Moist Supreme Yellow Cake Mix)
- 1 teaspoon Apple Pie Spice (LINK), or substitute with cinnamon
- 1 cup (2 sticks) salted butter, divided
Instructions
- Adjust oven rack to center of oven and preheat oven to 350°F. Lightly spray a 9" x 13" baking dish with nonstick baking spray and set aside.
Apple Filling
- Add prepared apple slices to prepared 9" x 13" baking dish, in an even layer. Sprinkle lemon juice evenly over apples, then fold a few times to incorporate. Spread apples into an even layer.
- Sprinkle brown sugar evenly over apples, followed by apple pie spice, and then cornstarch. Fold to evenly incorporate. Spread apples into a very even layer, arranging the apple pieces to fill in any gaps, etc. With a paper towel, wipe interior sides of baking dish for a cleaner finished appearance.
Cake Layer
- Add dry cake mix and apple pie spice to a medium mixing bowl; whisk to incorporate. Sprinkle mixture evenly over apple filling, then use a spatula to lightly even-out the mixture so it's level across the entire pan. Do not press on the dry mixture while doing so.
- In a liquid measure with a spout, melt ¾ cup (1½ sticks) of the butter. Very slowly drizzle the melted butter over the top of the dry cake mixture, to cover as much of the dry cake mixture as possible.
- Then slice off very thin pieces of the remaining ½ stick of butter (it helps if the butter is cold) and place on any spots of dry cake mixture. If you like the dry cake mix bites from a traditional dump cake, you can skip this step!
- Bake 55 minutes, or until apples are lightly thickened, glossy, and bubbling at the edges, and the cake batter topping is nicely browned.
- This easy dessert is best enjoyed on the day it is made, although it keeps perfectly well if you want to make it 6-8 hours in advance >> I recommend that you not cover the pan; just let it sit at cool room temperature uncovered. Our family especially likes to eat this while it's still a bit warm, about 25-30 minutes after it comes out of the oven – and with scoops of vanilla ice cream, of course!

get new posts via email: