Chocolate Marshmallow Bunnies
Chocolate Marshmallow Bunnies are the sweetest Easter treat! You can never go wrong with a chocolate covered marshmallow...
Ingredients
- for the marshmallows:
- powdered sugar for coating pan
- ⅔ c. water divided
- 3 1/4 oz. envelopes unflavored gelatin (found by the Jell-O at the grocery store)
- 1 c. granulated sugar
- 1 c. light corn syrup
- pinch of kosher salt
- 1 tsp. vanilla
- for the chocolate coating:
- 16 oz. about 2-1/2 c. good quality semisweet chocolate chips, finely chopped (I really like Guittard.)
- 3 T. shortening
Instructions
FOR THE MARSHMALLOWS:
- Lightly spray the inside of an 9″x13″ pan with cooking spray. Generously coat with powdered sugar and set aside.
- Pour 1/3 cup of the water into the bowl of a stand mixer. Sprinkle the gelatin over the water and stir briefly to incorporate. Let stand for about 10 minutes, or until the gelatin has softened.
- In a saucepan, off the heat, combine the remaining 1/3 cup of water and the granulated sugar, corn syrup, and salt. Place the pan over medium-high heat. Clip a candy thermometer on the inside of the pan, making sure it doesn’t touch the bottom. Cook the mixture without stirring until it reaches 240°. Brush down the sides of the pan with a pastry brush, dipped in water, to gently wipe away any sugar crystals.
- With your mixer on low speed, very carefully add the hot syrup to the softened gelatin. Add the vanilla and increase the speed to medium-high. The mixture will start out clear, but quickly turns very white. Beat for about 8 minutes, or until the marshmallow gets very thick and sticky, and starts to pull away from the sides of the bowl, in string-like pieces. This will really give your mixer a workout. (Just ask my aunt, Patsy!)
- Spread the mixture into the prepared pan using a lightly oiled spatula. With wet hands, press the batter evenly into the corners of the pan. Just keep rewetting your hands to help with the stickiness. Set aside for at least 1 hour, or until the mixture is firm and cool.
- Run a wet knife around the edge of the cooled pan to loosen the marshmallow. Remove the marshmallow from the pan, onto a sheet of parchment paper.
- Dip your bunny cookie cutter (mine is from this Easter set) into a shallow bowl of water and then cut the marshmallow into bunny shapes. This is a sticky job, but just have patience. It’s worth it! It helps to dip the cutter into the water after each cut.
FOR THE CHOCOLATE COATING:
- In a small, but somewhat deep, microwave-safe bowl, melt about 14 ounces of the chocolate in 30 second increments, stirring after each increment. Be very careful to not get the chocolate too hot. When the chocolate is almost all melted, stir by hand until it is completely smooth. Then add the remaining 2 ounces of chopped chocolate and stir again until completely smooth. This will help to cool down the chocolate. Stir in the shortening until completely incorporated. This will help to thin out the chocolate.
- Place a marshmallow bunny on the tongs of a fork and dip the bunny into the melted chocolate. If needed, use a second fork to help guide the marshmallow in and out of the chocolate. Allow excess chocolate to drip off, while lightly tapping the underside of your fork against the rim of your chocolate filled bowl.
- Then slide the fork out of the bowl, scraping the underside of the tongs along the bowl’s rim. This will scrape off any remaining excess chocolate, so you don’t have a pool of chocolate form around your bunny as it cools.
- Set the chocolate covered bunny on wax paper to cool and completely set up on your kitchen counter. After about an hour, they should be dry to the touch and ready to decorate.
FOR THE GLAZE ICING FOR MR. BUNNY’S EYES, NOSE, AND WHISKERS:
- Please visit my very talented friend, Amanda, from i am baker for her glaze icing recipe and tutorial. She’s just so great at using this stuff, and really is your best teacher! Be sure to check out all her awesome decorated cookies and cakes while you’re over there!
Notes
I do have a few things to add, though, specific to these marshmallow bunnies…
I used 1 tablespoon of milk, as little as possible. I wanted the glaze icing to be stiff and not spread all over Mr. Bunny’s face.
I did not add any lemon or other flavoring to my glaze icing.
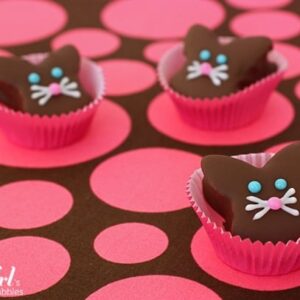
I used Americolor soft gel paste food color to tint the glaze icing, specifically #164 Electric Pink and #160 Electric Blue. The whiskers are not tinted at all.
For the eyes and nose, I used a Wilton #3 round tip.
For the whiskers, I used a Wilton #2 round tip.
Adapted from jam it, pickle it, cure it by Karen Solomon (I love, love, love this book!)
Nutrition Information:
Serving: 1 Calories: 117kcal Carbohydrates: 20g Protein: 1g Fat: 5g Saturated Fat: 3g Polyunsaturated Fat: 2g Sodium: 9mg Fiber: 1g Sugar: 19g
Nutrition information is automatically calculated by Spoonacular. I am not a nutritionist and cannot guarantee accuracy. If your health depends on nutrition information, please calculate again with your own favorite calculator.