Strawberry Cupcakes with Yellow Butterflies
Strawberry Cupcakes with Yellow Butterflies
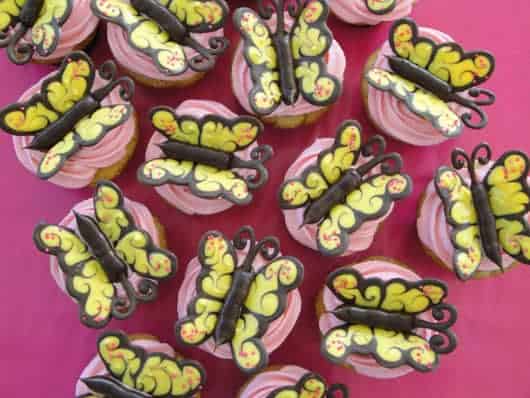
Today my baby turned 3! Happy birthday sweet Tessa!
I could just see the gears turning in that little 2-year-old head. My youngest daughter, Tessa, was listening to a conversation I was having with her older sister, Hatti, who was about to turn 8.
Hatti and I were trying to decide what kind of birthday cake to make for her party. After a little back and forth banter about several very tasty options, Tessa interrupted with, “What kind of cake will be at my birthday?” I asked her what she thought would be good. She said she wanted strawberry cake. Not surprising. She loves strawberries!

But…I’ve never made a strawberry cake before. So I did a little research (aka, I googled it) and came upon Annie’s Eats, where she featured some tempting strawberry cupcakes with strawberry cream cheese frosting. Helloooooooo! Cream cheese frosting, I’m so there.
Then I needed to think about what I could add to the cupcakes to personalize them for Tessa’s birthday. My thoughts turned to “yellow”, her favorite color in all the world!
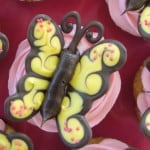
As I was browsing through Annie’s site, I came upon her Butterfly Cupcakes, an eye catching treat I had first seen on a friend’s facebook post. The recipe comes from the book Hello, Cupcake!, where the orange butterflies resemble beautiful Monarchs. Annie did her butterflies in an array of bright colors. I knew I wanted to try my hand at these. And I knew they needed to be YELLOW!
These strawberry cupcakes turned out to be the real deal, nice and moist, with fresh strawberry flavor throughout. My frosting turned out a bit soft for piping onto the cupcakes, but an hour chilling in the refrigerator did the trick. The frosting is YUM! And the butterflies, well, they are just the perfect adornment for my sweet daughter’s birthday celebration.

Strawberry Cupcakes with Yellow Butterflies
Ingredients
:
- 2.5 c. cake flour
- 1 tsp. baking soda
- .25 tsp. salt
- .5 cup unsalted butter at room temperature
- 1.5 c. sugar
- 2 large eggs
- ⅓ c. buttermilk
- .25 c. oil
- 1 tsp. vanilla
- 2 c. chopped strawberries
for the frosting:
- .5 c. strawberry puree instructions below
- 8 oz. cream cheese at room temperature
- 1.5 sticks unsalted butter at room temperature
- 1.75 c. powdered sugar sifted
- .5 tsp. lemon juice
- 1 T. vanilla
- a couple drops red or pink food coloring optional
Instructions
- Preheat the oven to 350° F. Line cupcake pans with paper liners.
- Sift flour, baking soda, and salt into a medium bowl. Set aside. In the bowl of an electric mixer, cream butter and sugar until light and fluffy. Add eggs one at a time until combined. Add buttermilk, oil, and vanilla and beat until combined. Add flour mixture and stir until just combined. Fold in chopped strawberries. Fill cupcake liners ¾ full with batter. Bake for 20 minutes or until a toothpick inserted in the center comes out clean. Cool completely on a wire rack.
- For the frosting, first, make the strawberry puree. Place a large handful of strawberries into a food processor and pulse until there are no more chunks. Strain through a mesh sieve to remove seeds. Set aside. Beat the cream cheese and butter in the bowl of an electric mixer until smooth and fluffy, about 5 minutes. Add powdered sugar and mix until smooth. Add lemon juice, vanilla, and about half of the strawberry puree. Adjust the puree to achieve your desired consistency. For a “pinker” frosting, just add a couple of drops of food coloring. If the frosting is a bit soft for piping onto the cupcakes, just put it in the refrigerator to firm up.
- Frost cupcakes when completely cool.
Notes
Nutrition Information:
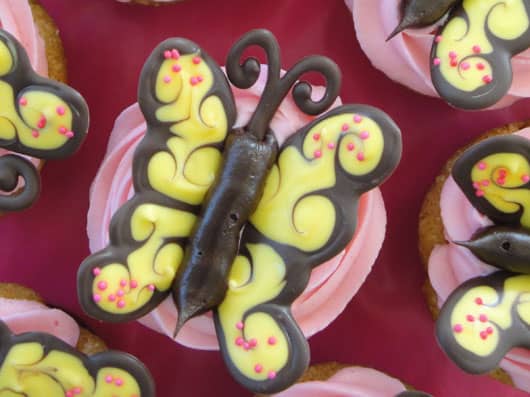
Butterflies
Supplies Needed:
Wax paper
Plastic baggies
Dark cocoa candy melts
Yellow candy melts, or white candy melts with yellow candy coloring added
Toothpicks
Pink nonpareils
1 batch Strawberry Cupcakes, frosted (or whatever cupcakes you prefer)
Canned chocolate fudge frosting
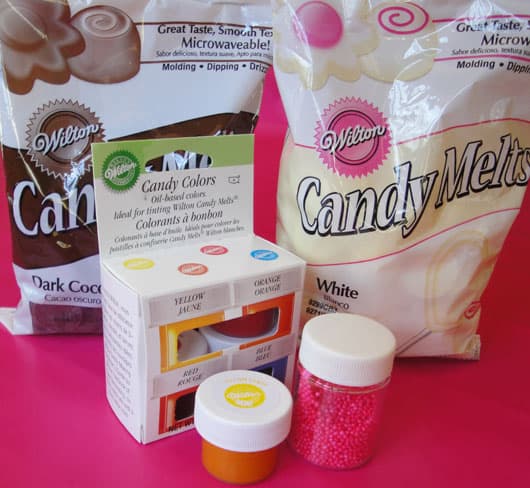
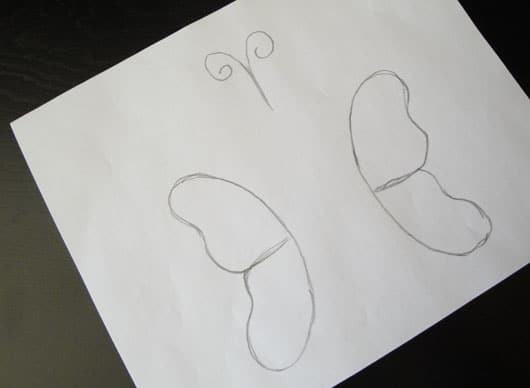
Draw a template for your butterfly, to include 2 wings and a set of antennae, on a piece of paper. My wings measured almost 3” tall. Cut out squares of wax paper large enough to hold your template.
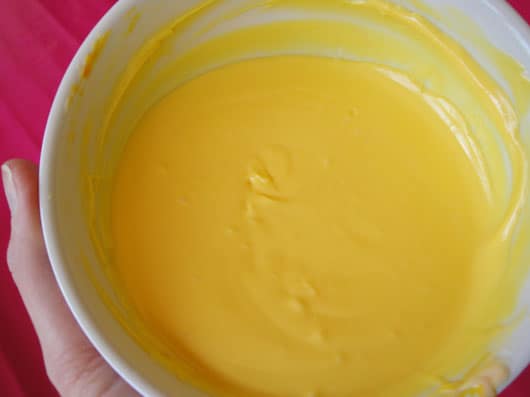
Place about ½ cup of dark cocoa candy melts in a plastic baggie, and the same amount of yellow in another baggie. To make the bright yellow, I mixed some yellow candy color with white candy melts that I had already melted. Pre-colored melts are available in many colors, but I wanted a brighter yellow than I saw at the store. If you tint your own candy melts, be sure to buy the “candy color” and not the “frosting color”, as the candy color is oil-based and won’t make your candy seize up when you melt it.
Microwave the 2 bags of melts in 10-second intervals, unsealed, gently squishing the candy melts in between, until the candy is completely melted. If you colored your own melts, just spoon your colored melted candy into a baggie. Press out the excess air in the baggies and seal. Push the mixture down to one corner of the baggie and snip off a very small corner. (Better to start small and cut larger if you need to!)
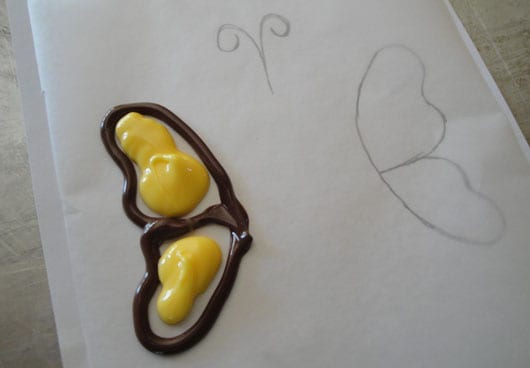
With the dark cocoa melted candy, trace the outline of one wing template. Do not attempt to do more than one wing at a time, as the candy sets up quickly. Just trust me on this! And I do have to be honest, it took me a few wings to get the hang of this. Keep the baggie tip close to the wax paper and take your time. Then use the bag of colored candy melts to fill in the outline. Be generous, so it will spread all the way to the sides.
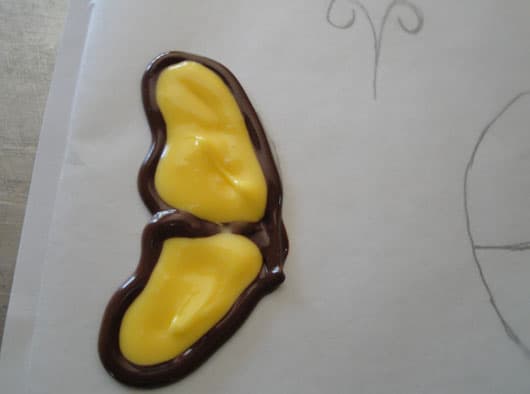
With a toothpick, quickly nudge the colored candy melt outward to fill in the wing outline, until the two colors spread together.
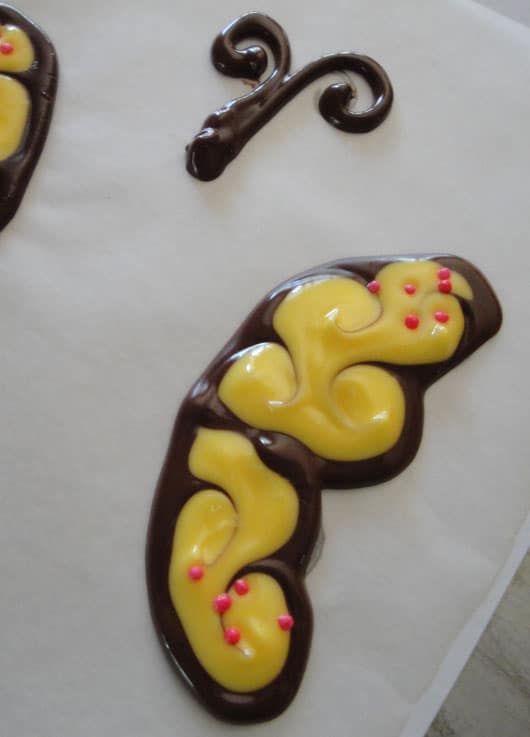
Use the toothpick to swirl the edges and the filling together by dragging the dark cocoa melts inward to the colored melts. Sprinkle the top and bottom of each wing with a few nonpareils. Trace the antennae as you did the wings.
The melted candy will cool and harden rather quickly as you work, so don’t dawdle! If it becomes too stiff to work with, microwave for 10 more seconds until melted again. I repeat: If it becomes too stiff to work with, microwave! Save yourself the calories of having to eat a bunch of messed up wings. :-)
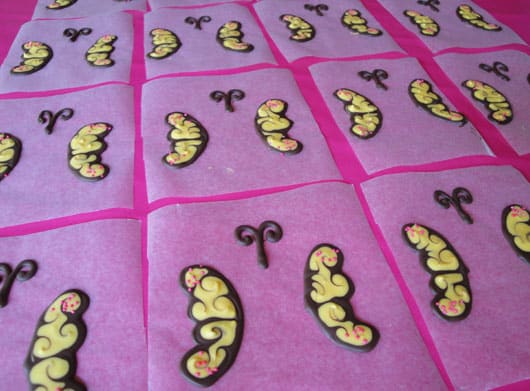
Repeat this process until you have enough for all your cupcakes. Let set completely. I had a feeling this was going to be more than a 5-minute project, so I actually made these a week ahead of time and stuck them in the freezer until I was ready to make the cupcakes. Do allow plenty of time for these – from start to finish, I spent a couple hours making the butterflies.
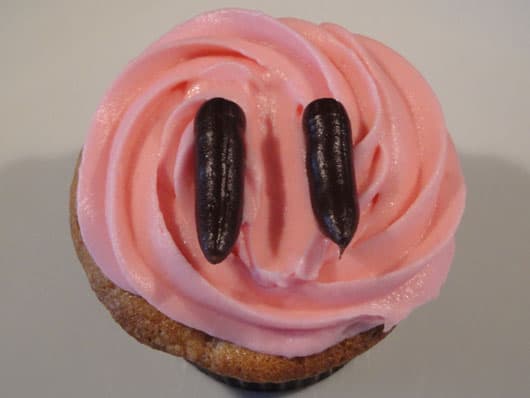
Now let’s assemble some butterflies! With the strawberry cream cheese frosting being a bit on the soft side, the wings need some support to sit up. First, swipe a small amount of strawberry frosting from the middle. Then place some fudge frosting in a baggie with a corner snipped off and pipe two small lines on either side of the swipe.
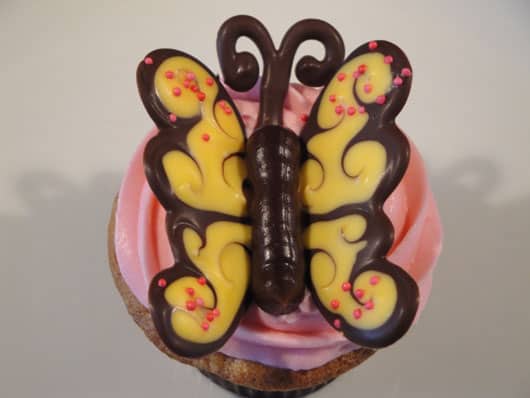
Rest each wing on a line of fudge frosting. Then pipe on the butterfly’s body in between the wings. Stick the antennae into the frosting at the head of the butterfly.
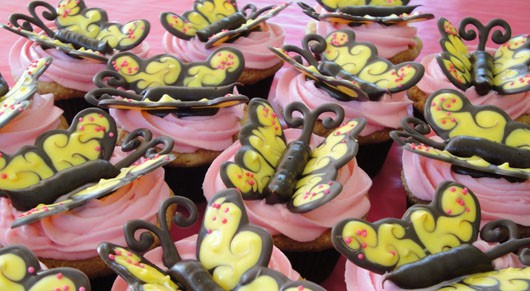
And there you go! Strawberry cupcakes with yellow butterflies. Beautiful AND yummy!!

Hi! I found your site a couple weeks ago, and so far I have made the Peach Cake, Grasshopper Cake, Peach Salad and these cupcakes. Oh my … I have gained a lot of friends;and also about five pounds! The peach cake was by far the biggest hit, even my very picky neighbour loved it! Fabulous. The salad was yummy and a nice change. The grasshopper cake was a big hit but I found the icing very soft. I don’t know how you got it so perfect in our picture. Mine was way too soft to be cut and look that perfect. Same with these cupcakes, I am exceptionally pleased with the cupcake and decoration, but found the icing way too soft to look as perfect as yours did. I couldn’t pipe it, had to put it on by knife. Now mind you, it is also one of the tastiest icings I have ever eaten, but to keep the concoction intact I ended up having to freeze them all. Do you find that or is there any secret I missed to making the icing less soft? I did have the icing cooling in the fridge first, the cupcakes were completely cooled. If not next time I may try with different icing. But thank you for posting … everything! Love your site!!
Hey there..thanks for the recipe..I do have a question about the icing. I made these last night and followed recipe strictly. Icing was very runny…did place in fridge overnight. I piped the icing on this morning but i fear the consistency will change with any temperature changes. Did you find these needed to stay refrigerated until party?
Hello Elisabeth! I do mention a couple times about needing to refrigerate the frosting before piping because it is so soft. I would try to keep them cool until shortly before serving. They are not a hot picnic kind of cupcake!
Brenda, Well I guess I know where I am going when I need a creative idea! Love the site! Julie
Hi Julie!! Thank you! It was fun to bump into you this weekend! Wish we lived closer to eachother, I miss you!
That’s right, my friends are awesome!! You go girl. LOVE these.
So Beautiful Bren! GORGEOUS!
WOW, my mouth is watering! You are amazing. I can’t believe you made those butterflies! WOWZA! Can’t wait to see what is next! Hugs, Kristen
Hey farm girl!,
Love your site.
Need some help. Having a retirement party this Friday and need some appetizers for 30 people. Any recipe ideas? Would like some easy finger food.
Thinking along the breschetta (spelling?) line.
Thanks for your help,
Kris
Hi Kris! I’ll get ahold of you with a couple ideas.
-Brenda
Hi Brenda,
Have you ever considered catering? Grace and I love to bake-we did spider cupcakes for a Halloween treat, but it involved boughten items to decorate (licorice-m&m’s etc). You must have a passion for baking and the details that make baking special! Beautiful! Fun to see what you are up too-we are family you know! Lets keep in touch…
Love Melanie
The butterfly cupcakes an awesome birthday dessert. Your creativity on the blog is inspiring. I like butterflies also and they are a very sweet treat for your daughter from a mother’s heart. I’m sure your daughters and Blake too are very blessed by your cooking.
Kiersten is a butterfly fan and we’re pretending to eat the cupcakes off your page – they look great!
Omgoodness, Brenda! These cupcakes are beautiful! I can handle making the cake and frosting…..but don’t have the patience to make the butterflies. Wish you lived back here. I’d hire you to make them for Emerson’s birthday! :-) Looking forward to what’s next on your blog.
Love, love, love it!!! This is so cool. I will be a frequent visitor :) And I love the Pioneer Woman too. My coworker friend got me hooked on that one. Can’t wait to see what else you create!
Brenda these are fantastic! I am looking forward to checking back often to see what’s new.
The blog looks terrific and so do the cupcakes! Can’t wait to see more of your yummy treats and creations. I’ve already added you to my blog reader :)
Love your site. It will be so fun to see your creativity on display.
And we can’t wait to share in the birthday celebration tonight
and taste those cupcake beauties.