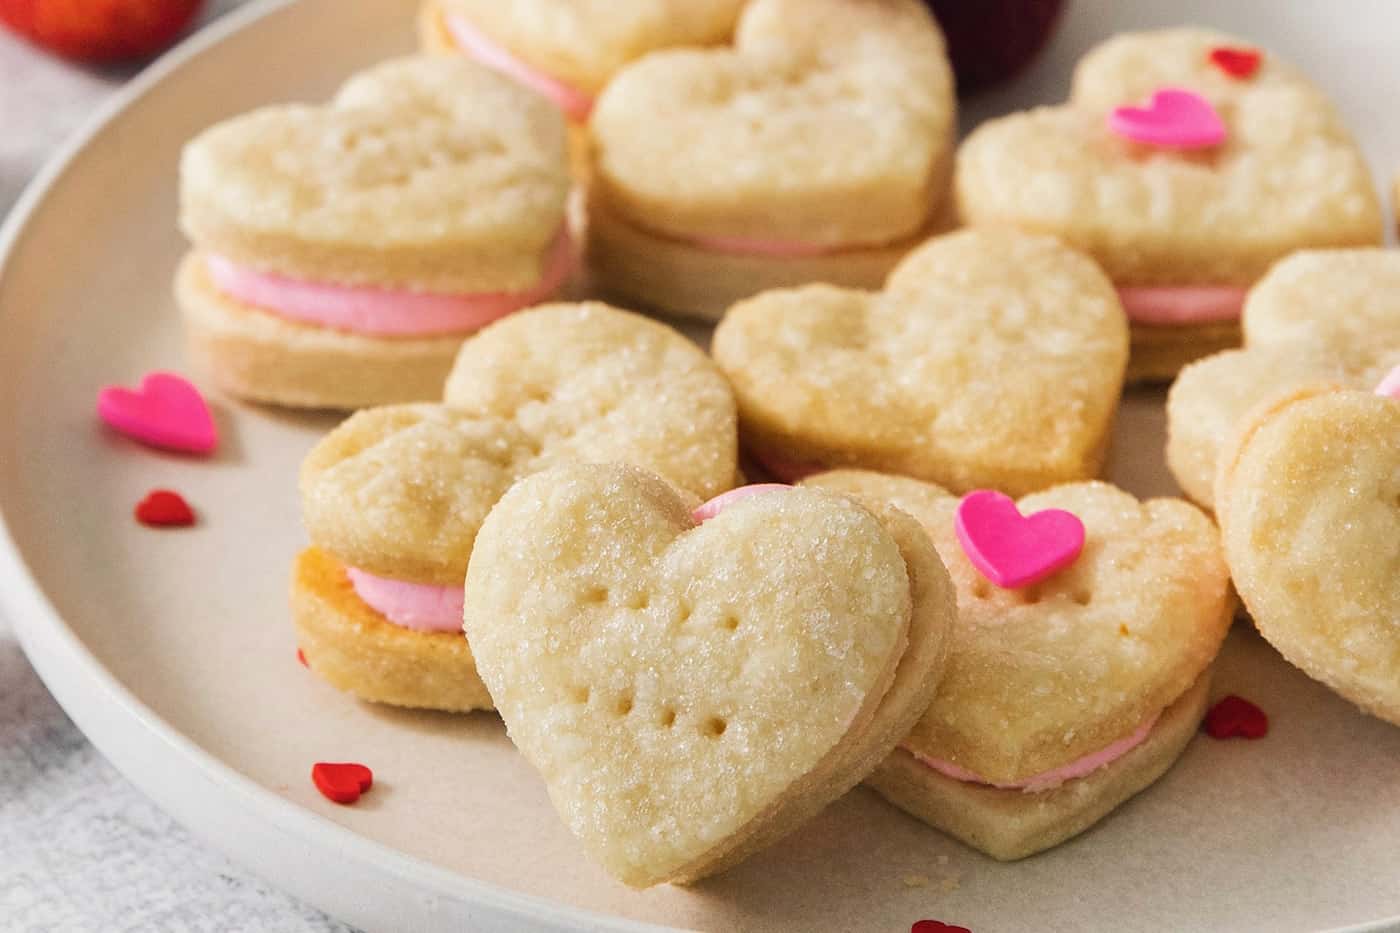
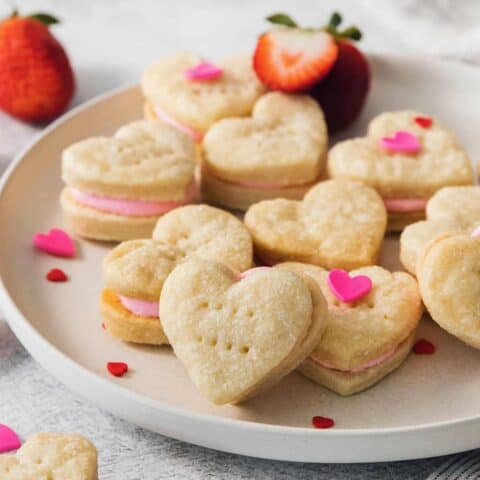
Strawberry Cream Wafer Cookies


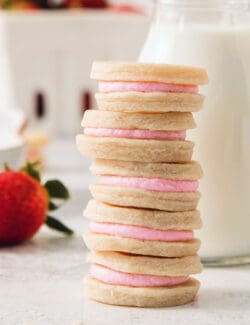


This Strawberry Cream Wafer Cookies recipe features tender cream and butter cookies that sandwich a pretty-in-pink strawberry buttercream filling. Perfect for Valentine’s Day, Mother’s Day, or any day in between!

Easy Strawberry Wafer Cookies
This sweet little Strawberry Cream Wafer Cookies recipe features tender, buttery cookies sandwiching a pink strawberry-flavored buttercream. The cookies are easy to make, have a simple ingredients list, and are easily adaptable to other flavors and shapes. I’ve featured heart shapes and strawberry filling for Valentine’s Day, but really, the possibilities are endless. This is the perfect sweet treat for any holiday or celebration!
Why You’ll Love These Homemade Wafer Cookies
These pretty strawberry-flavored wafer cookies are a family favorite. Here’s why you’ll love this recipe:
- Delightfully tasty and fun. What’s not to love about a little sandwich cookie (so fun!) with flaky, buttery wafer cookies and strawberry filling?!
- Simple recipe. This recipe for wafer cookies with strawberry calls for minimal ingredients. And even though there are a few different steps involved, they’re all very easy. These cookies are fun to make!
- Easy to adapt. I’ve been a huge fan of Christmas cream wafer cookies since I was a kid. So I thought, why not have more fun throughout the year with other shapes and flavors? Think green/mint for St. Patrick’s Day, yellow/lemon for a spring brunch, etc.
- Makes the sweetest gift. I’ve always been a fan of Valentine’s Day, both for the sentiment of love and for the treats. I used to put a lot of time into decorating my grade school Valentine’s Day box for our class party each year! These strawberry cream wafers make the sweetest gift – just package a few of them in a small bag or box and tie it up with a pretty ribbon.

What You’ll Need
Here what you’ll need to make strawberry cream wafer cookies. Scroll down to the printable recipe card at the end of this post for the exact ingredient amounts.
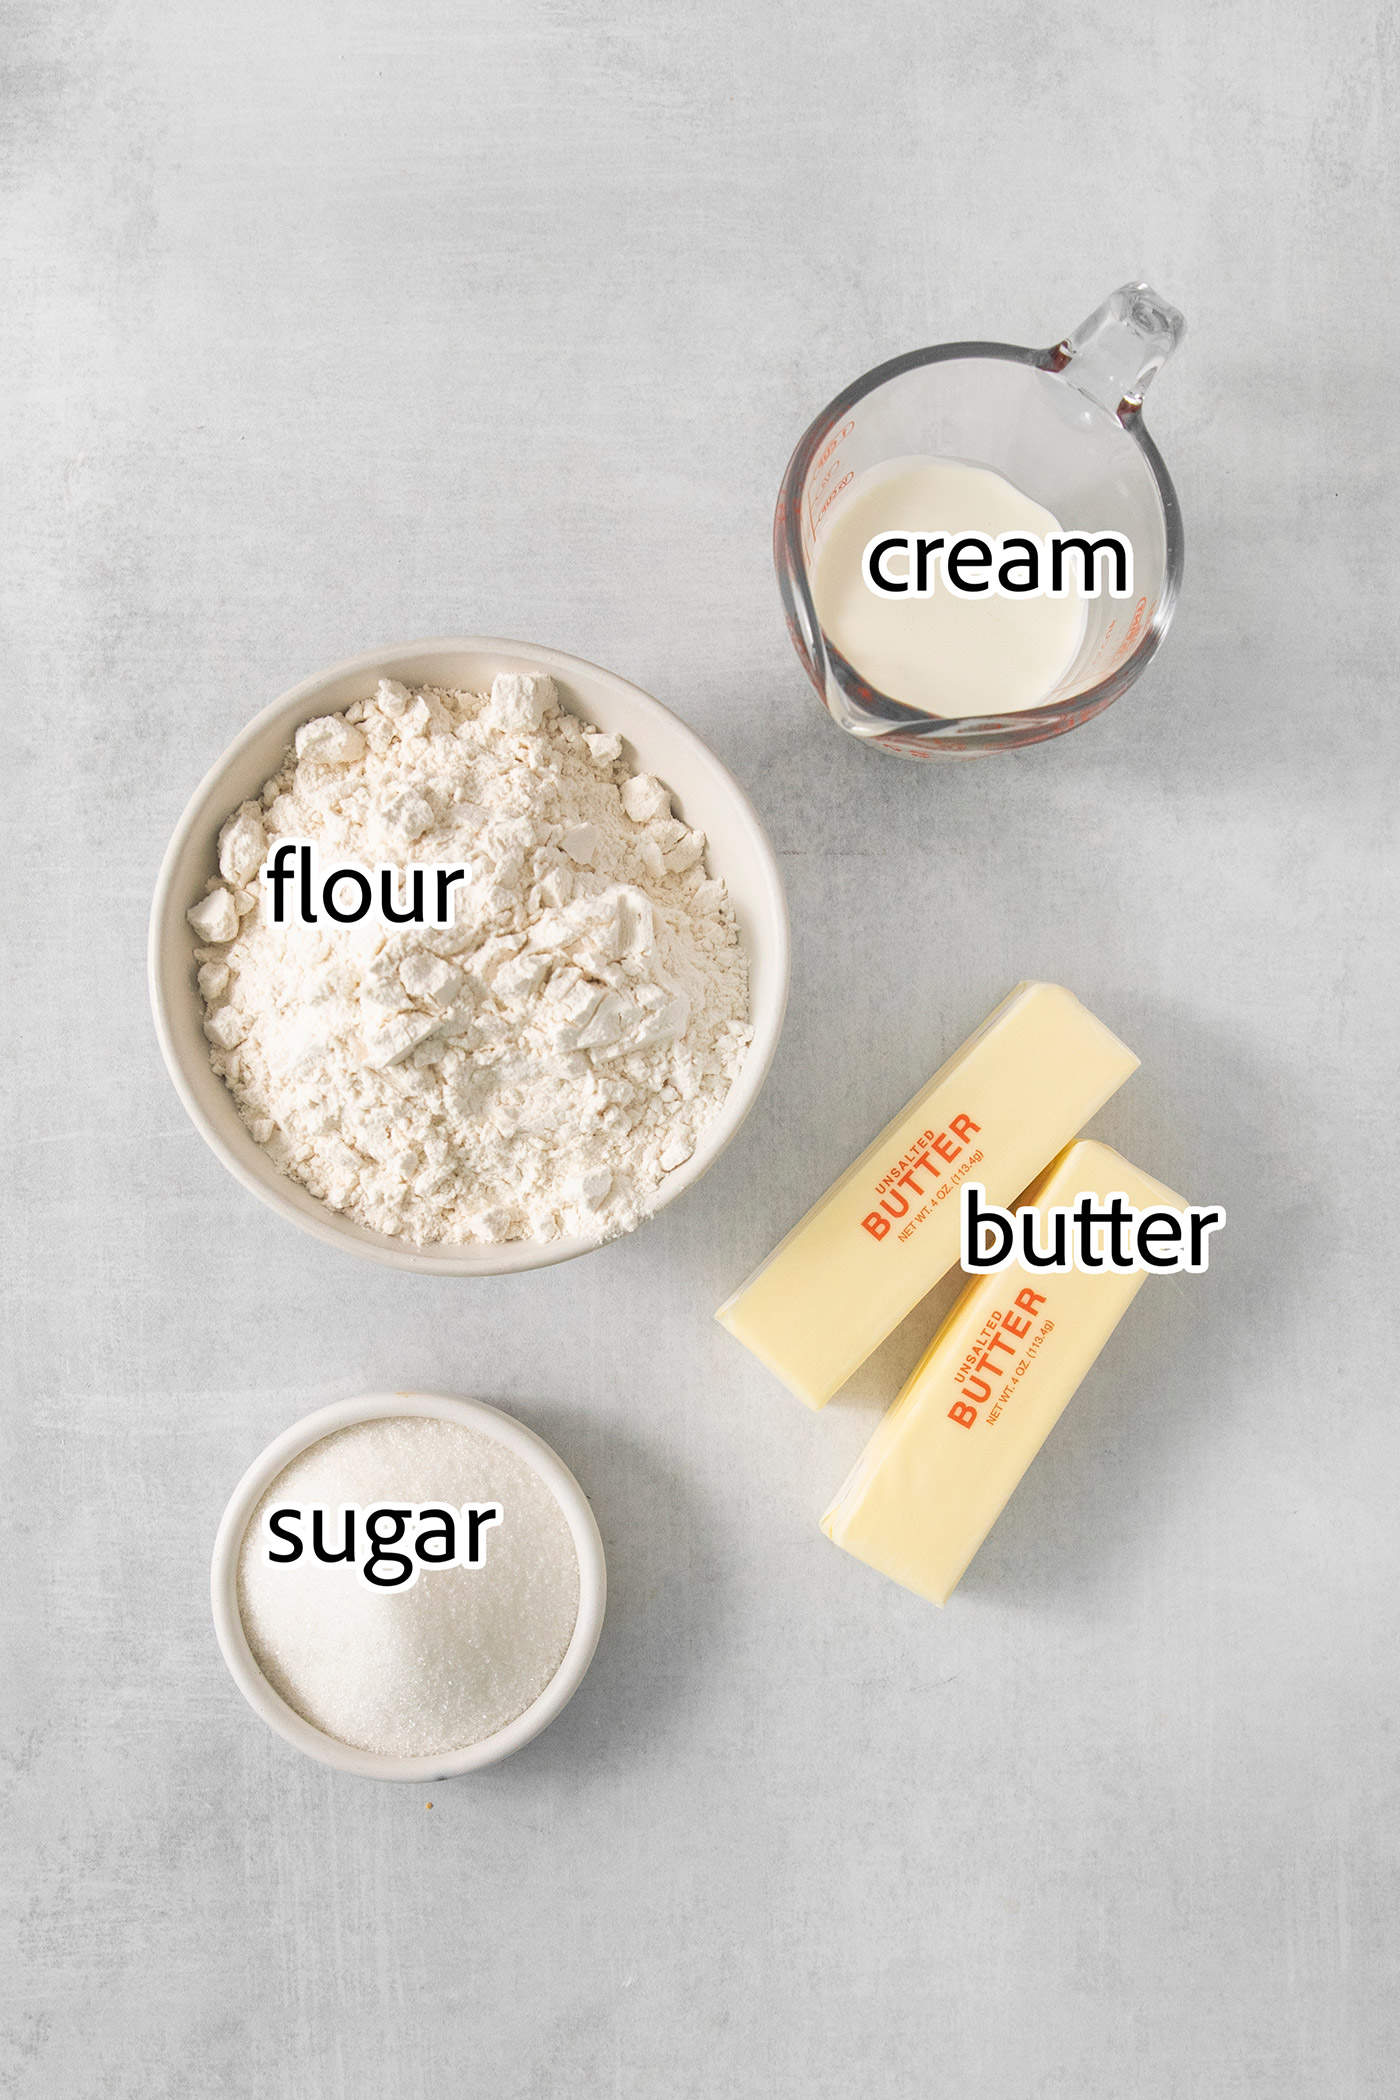
For the Cream Wafer Cookies
- Flour – Use the scoop and level method to measure the all-purpose flour, as too much flour can result in dry cookies.
- Butter – I use unsalted butter for the best delicate flavor.
- Heavy cream – This offers a gorgeous rich flavor and tenderness to the wafer cookies.
- Granulated sugar – The only sweetness in the wafer cookie dough is from coating the cut-out dough in sugar. It adds a delightful texture and a pretty sparkle!
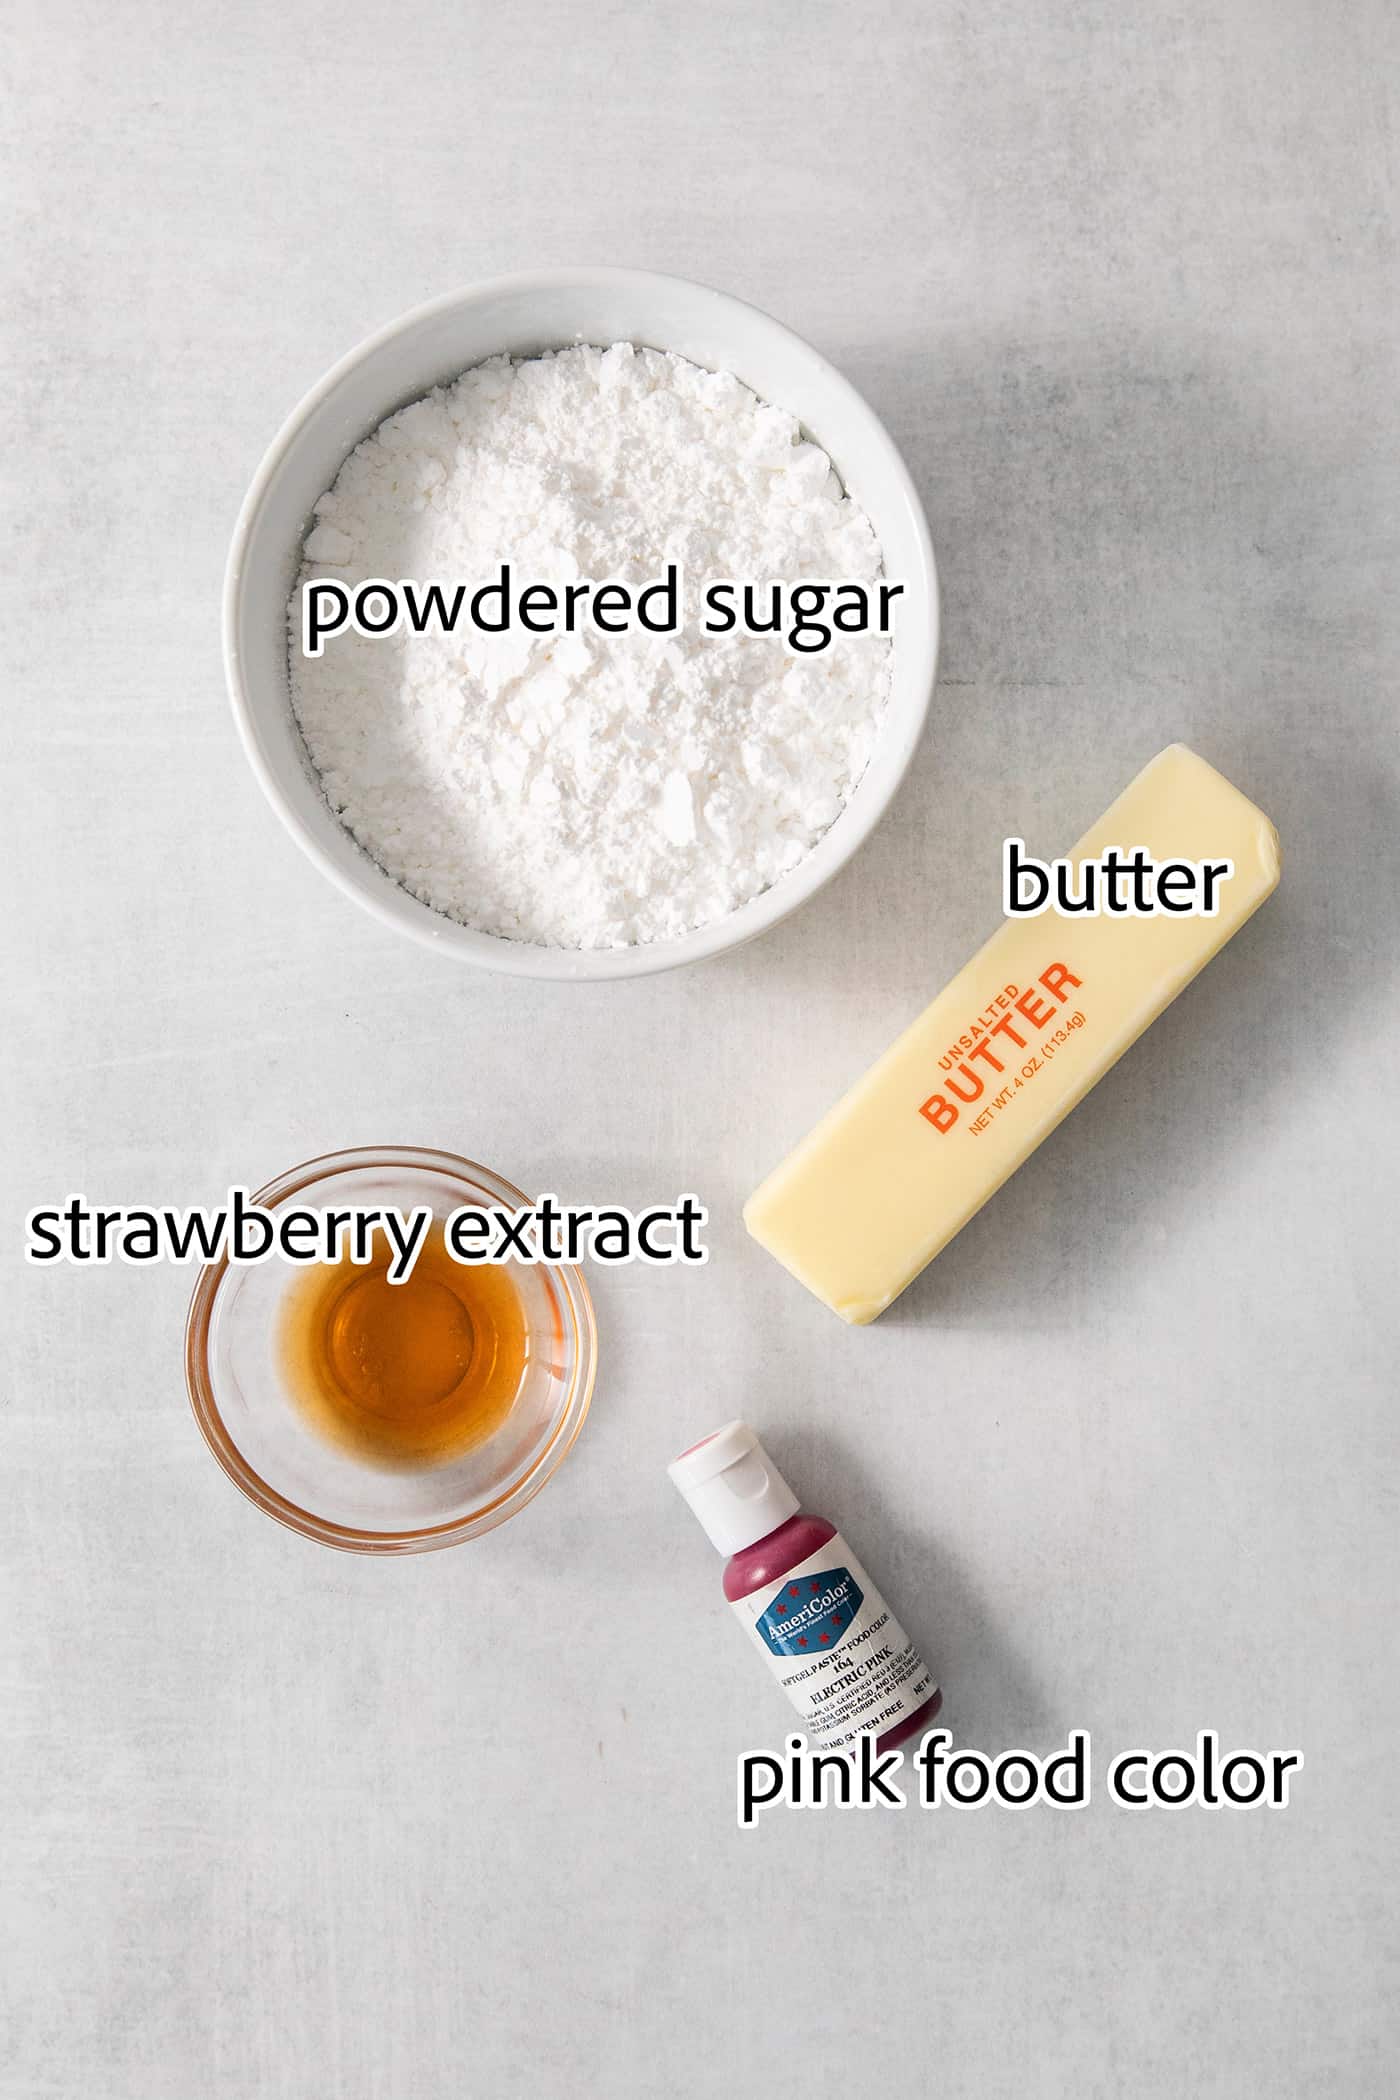
For the Strawberry Buttercream
- Butter – Use good-quality, unsalted butter for the buttercream.
- Powdered sugar – This adds fluffy sweetness to the buttercream. Make sure to sift the powdered sugar before using it.
- Strawberry extract – You’ll find this in the baking aisle near the vanilla extract, or buy it online.
- Pink or red food coloring – I use Americolor gel “Electric Pink” color.

How to Make Strawberry Wafer Cookies
Follow along with the photos below to guide you through making these pretty strawberry wafer cookies. The detailed instructions are in the recipe card lower down.


- Make dough. Mix the flour, butter, and cream until combined. Cover and refrigerate for 2 hours.
- Cut out. Roll out the cookie dough on a lightly floured board, and cut it into hearts or circles.


- Add sugar. Add sugar to both sides of the dough wafer, then place the dough wafers on a baking sheet.
- Prick dough. Prick the dough wafers with a fork.


- Bake. Bake the cookies until just set, then cool on a wire rack.
- Make buttercream. Beat butter until fluffy, then beat in the powdered sugar, strawberry extract, and food coloring.


- Add buttercream. Add strawberry buttercream onto the back side of one cookie using a piping bag or a small spoon.
- Assemble. Top with another cookie to form a sandwich cookie.
Tips & Variations
Feel free to use this wafer cookie recipe as a jumping-off place to make all sorts of flavored sandwich cookies. I’m sharing a few tips and variation suggestions below:
- Use fresh butter and cream. Because there are just a few ingredients in these cookies, you’ll want to make them count. Fresh butter and cream will give you the best-tasting strawberry wafer cookies with the best texture.
- Chill the dough. The cookie dough is very tender with butter and cream, so it’s important to thoroughly chill it before rolling and cutting it into shapes. This also helps the cookies hold their shape while baking.
- Poke the dough. Before baking the cookies, be sure to poke them a few times with a fork. This prevents air bubbles and helps them not puff up too much due to their high butter content.
- Make the cookies ahead of time. Cream wafer cookies freeze very well. Just follow the directions below for how to store these cookies in the freezer.
- Different shapes, colors, flavors. The sky’s the limit here – you can customize these cookies for any holiday or celebration! Heart shapes are great for Valentine’s Day, but you can use whatever shape you like – and simple circles work for everything. You can color the buttercream in bright or pastel hues, swirl a couple colors together (see my chocolate cream wafer cookies recipe for how to do that!), or keep it natural and without added color. And there are many different baking flavor extracts that you could sub in for the strawberry extract. We especially like to use almond or peppermint extract. If you’d like bright berry flavor without using extracts, make my fresh raspberry buttercream and use that instead!

Proper Storage
Cream wafer cookies freeze very well, so you can make them in advance and stash them away for later. Here’s how to store these cookies:
- Fridge – Place the cookies in an airtight container with a layer of parchment or wax paper in between layers. Store in the fridge for up to 1 week.
- Freezer – Store cookies in the freezer for up to 3 months, in an airtight container, with layers of cookies separated by wax paper or parchment paper. Thaw them in the fridge before serving.
More Cookie Recipes To Try
- Chocolate Covered Cherry Cookies
- Citrus Poppyseed Cookies
- Red Velvet Cookies
- Oatmeal Cream Pies
- Peanut Butter Blossoms
- Pan-Banging Chocolate Chip Cookies
Strawberry Cream Wafer Cookies
Ingredients
for the cream wafer cookies:
- 2 cups all-purpose flour
- 1 cup unsalted butter softened to room temperature
- ⅓ cup heavy whipping cream
- ½ cup granulated sugar
for the strawberry buttercream:
- ½ cup unsalted butter softened to room temperature
- 1½ cups powdered sugar
- 1 tablespoon strawberry extract
- a few drops of pink or red food coloring I use Americolor gel “Electric Pink”
Instructions
For the cream wafer cookies:
- In the bowl of a stand mixer, mix flour, butter, and whipping cream until combined. Cover and refrigerate for at least 2 hours.
- Preheat oven to 375° F. Add sugar to a separate small bowl and set aside.
- Take about one-third of the cookie dough out of the refrigerator, keeping remaining dough refrigerated. On a lightly floured surface, roll out dough to a ⅛" to 3/16" thickness. Cut into hearts or circles with a cookie cutter that is about 1½" wide. Work swiftly, as the dough softens quickly as it warms. With a thin metal spatula, transfer dough wafers to the sugar, turning them over so that sugar adheres to each side – the dough will be tender. Then place dough wafers on an ungreased cookie sheet, about 1" apart.
- Prick each dough wafer with a fork 3-4 times. Repeat with the rest of the dough, rerolling scraps as needed. After rerolling the dough more than once, the dough will start to lose its shape faster when rolled out and baked, so try to get as many cut-outs as possible out of each initial rolling.
- Bake 7 to 9 minutes, or just until set. Do not let them brown. Let cool a bit on the pan to set, then transfer to a wire rack to cool completely.
For the strawberry buttercream filling:
- In the bowl of a stand mixer, beat butter until smooth and fluffy, about 2 minutes. Add powdered sugar and strawberry extract, and beat until smooth and fluffy again, another minute or two. Add a little bit of pink/red food coloring, and mix to combine.
To assemble the cream wafer cookies:
- Add strawberry buttercream filling to a piping bag fitted with a medium plain tip – or just cut off the end of the piping bag, omit the tip. Pipe a single layer of buttercream onto the back side of one cookie. Top with another cookie and press gently to secure. (You can also just spoon the filling onto the cookie. This gives a more casual appearance.)
Notes
Nutrition Information:
This post was originally published in 2014, then updated in 2024.


I would like to know how you make the original buttercream frosting! I made the Strawberry and it is to die for. Unfortunately my mother does not like Strawberry and I would like to make these for her. I was not sure if you used vanilla flavoring instead or what. Thanks!
Ohhhhh, that strawberry buttercream is so delish! When we made this growing up, we used almond extract in the buttercream, which is divine. But vanilla would also work.
These are just so sweet and cute. I want a bowl on the table for every party.
These look divine – I can’t wait to try them!
Maybe you are signed up for both the Weekly Newsletter (usually sent out on Fridays each week), which includes snippets of the posts that I published for the week, AND the emails for each individual post? Or is what you are getting exact duplicates of eachother?