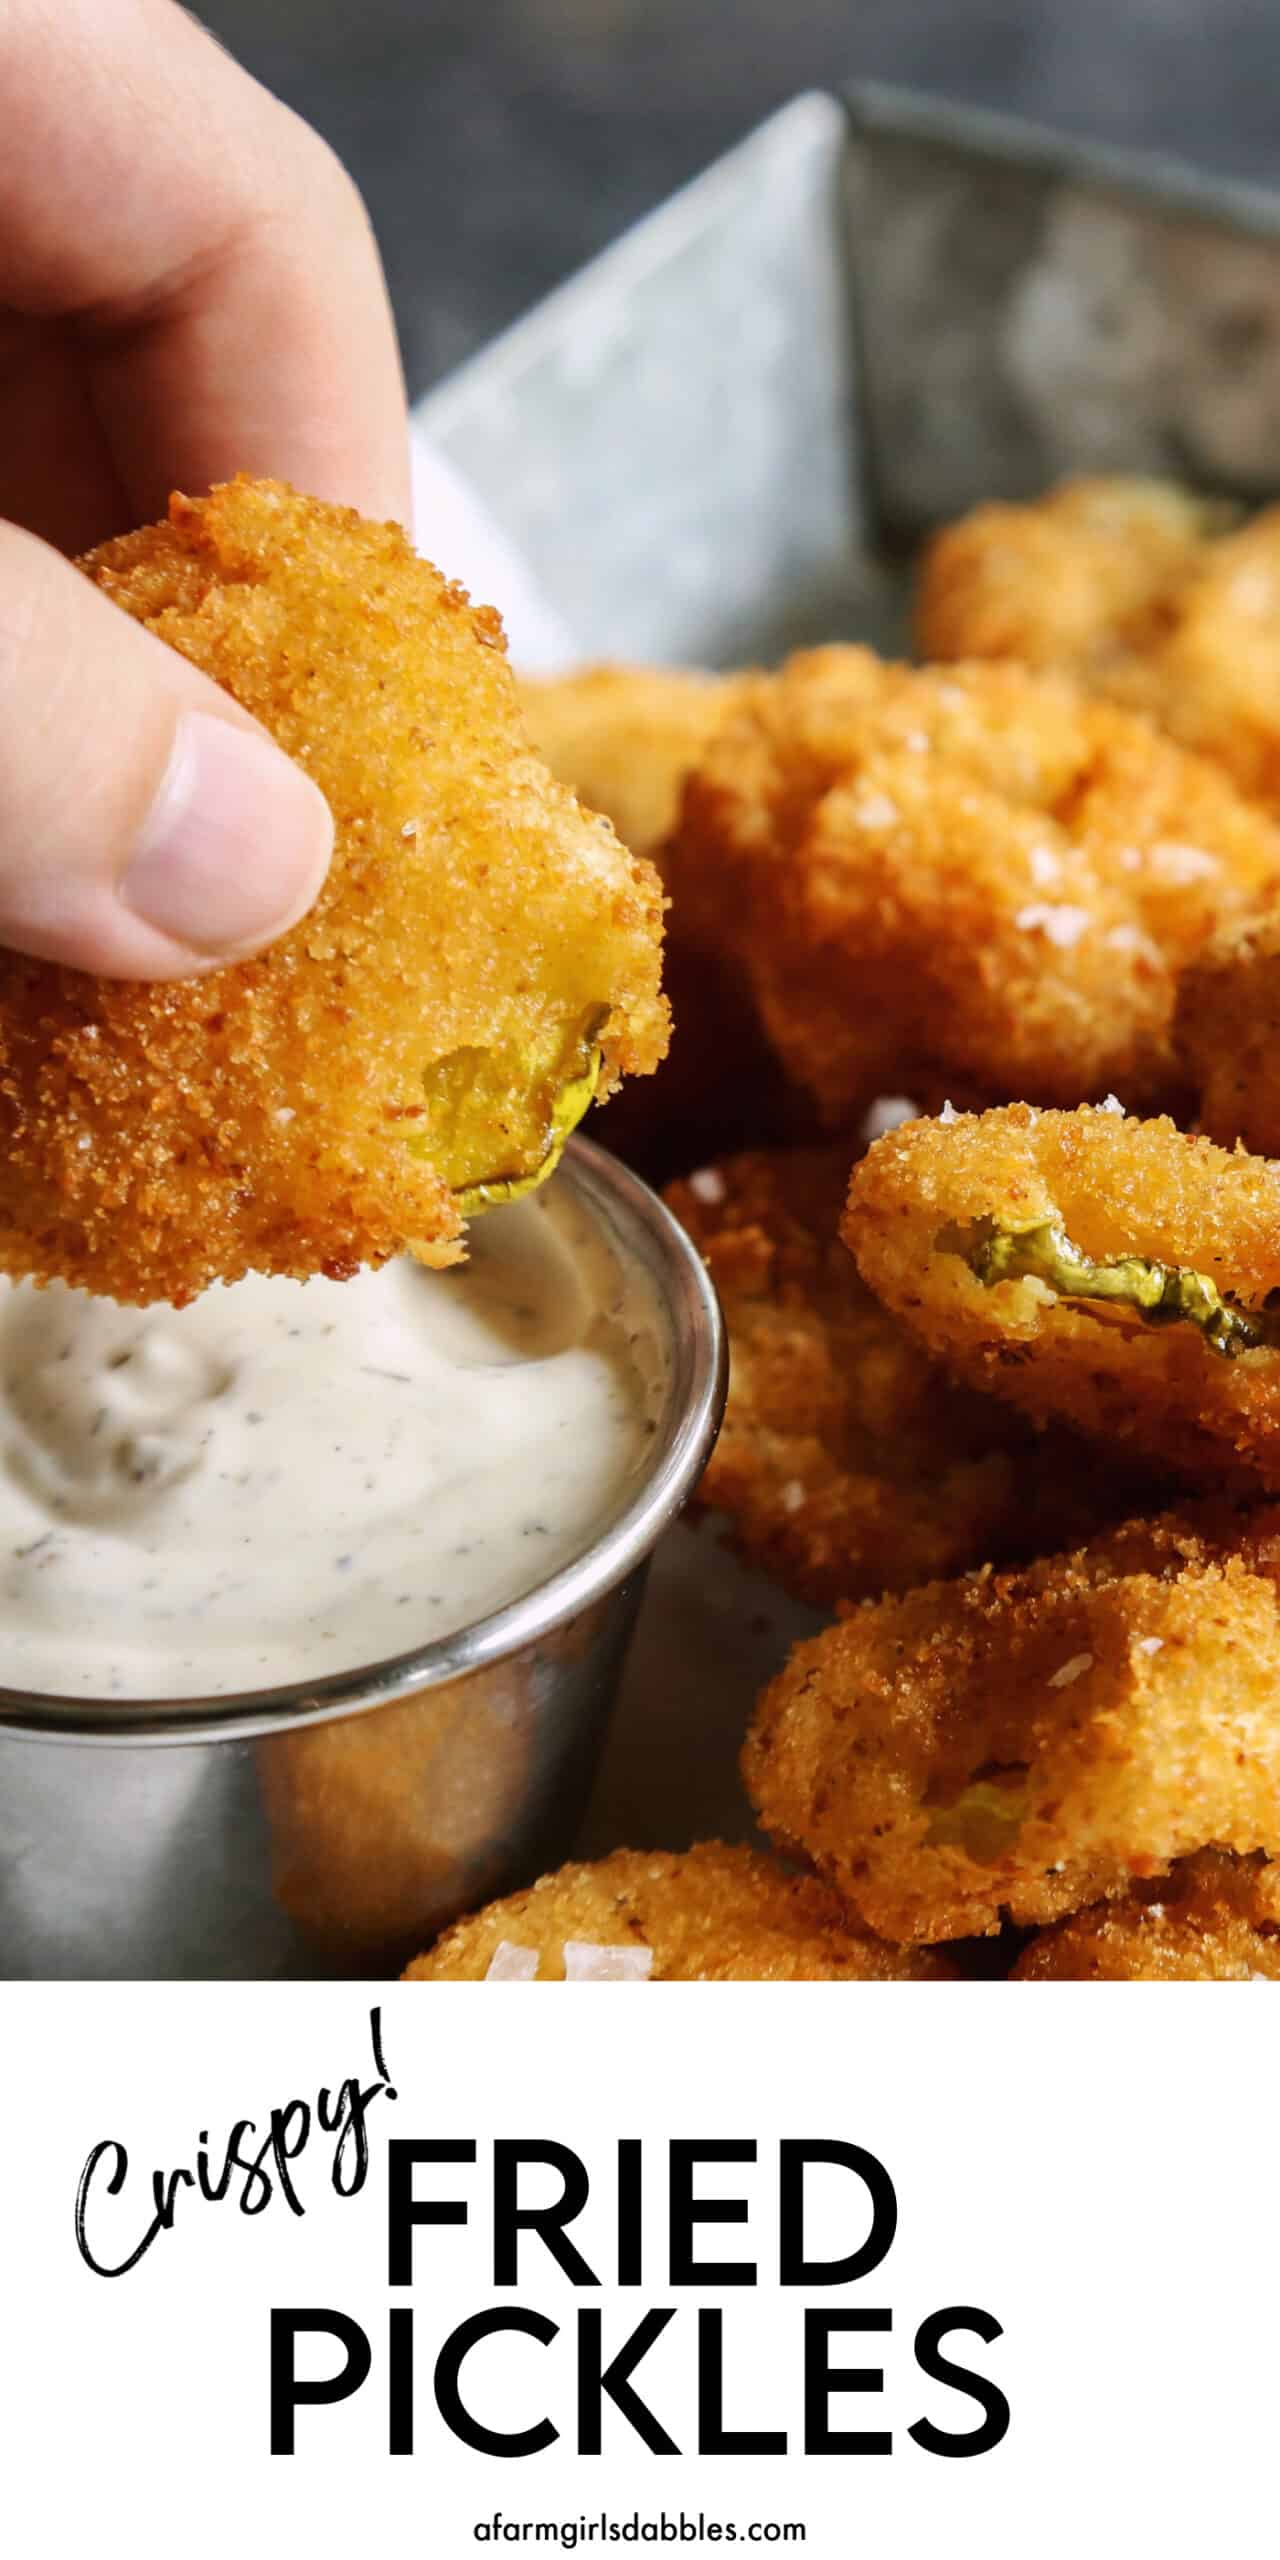
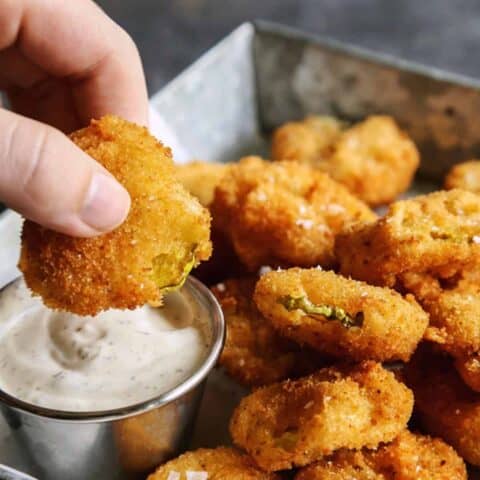
Fried Pickles
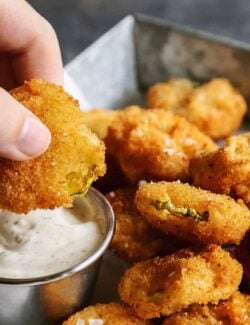
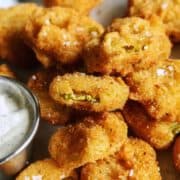
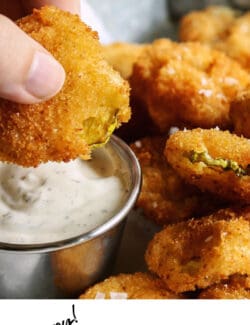
This easy Fried Pickles recipe features juicy dill pickle slices dipped in a perfectly seasoned batter and fried to crispy perfection. Enjoy this favorite fair food at home, any time you want, dunked in some creamy ranch dressing!

The Best Deep Fried Pickles
Fried Pickles definitely makes our Best Minnesota State Fair Food list. And you’re going to love my homemade version – I promise they’re just as awesome (and maybe even just a bit better?!) than those you’ll find at the fair!
With just a handful of ingredients and very basic seasonings, these deep fried dill pickles are perfectly dilly, salty, and crunchy.
Just imagine juicy dill pickle slices dipped in batter, fried to crispy perfection, and then dunked in some ranch dressing…ohhhhhhh my! They’re so good that our daughters – who don’t even like dill pickles – can’t resist them!

What You’ll Need
This homemade fair food has a simple ingredients list. See the recipe box for instructions.
- Canola oil – You can also use vegetable oil for frying.
- Dill pickle slices – I like to use thick, crinkle-cut dill pickle slices.
- All-purpose flour – The base of the batter.
- Yellow cornmeal – I add this to the batter, to mimic the fabulous deep fried pickles at the MN State Fair. Yellow cornmeal (affiliate link) offers incredible flavor and texture, for the best crunchy fried pickles!
- Baking powder – This helps give a crunchier, crispier texture to the fried pickles.
- Seasonings – The batter is seasoned simply, but perfectly, with salt, pepper, and a little cayenne pepper.
- Beer – I like to use beer to make the batter. It adds extra flavor and also helps keep the batter light and crisp. (Think beer battered fish.)
- Fine bread crumbs – Fine bread crumbs (affiliate link) are the final step to the best crispy deep fried pickles!
What Pickles Are Best For Frying?
When it comes to deep fried pickles, you’ll most often see that dill pickles are used. This type of pickle has a strong, clean flavor that goes well with being battered and fried. And it also pairs well with a variety of dips.
However, you can also deep fry bread & butter pickles or any other favorite pickle. I love bread & butter pickles, but I personally think dills win when frying!
For this recipe, I use round dill pickle slices, sometimes call dill pickle chips. I like to use thicker slices that are crinkle-cut. And I recommend staying away from thin-cut pickles as you’ll just end up with more breading than pickle.
You can also deep fry pickle spears and the long slices as well, just adjust the frying time accordingly.

How to Make Fried Pickles
These fried dill pickles are easy and fun to make. Let’s go!
- Heat the oil. You can use either a deep fryer or a heavy-bottomed pan on the stove with about 2″ of oil. Heat the oil to 350° F, keep track of the temperature with a kitchen thermometer (affiliate link).
- Dry the pickles. Set the pickle chips on paper towels to absorb excess pickle juice.
- Prepare the batter for dipping. Place 1/2 cup of flour in one bowl. In a second bowl, combine the rest of the flour, cornmeal, baking powder, salt, pepper, and cayenne, then whisk in the beer to make the beer batter.
- Dip the pickles. Use one hand to completely coat each pickle slice with flour, and then transfer to the second bowl. With other hand, coat the pickle slice with the beer batter. Shake off any excess batter. Finally, lightly coat the pickle slice with bread crumbs, using a fork to flip.
- Fry. Gently drop the coated pickle slices into the hot oil, taking care to not crowd the pan. Fry until golden brown, about 1 to 2 minutes per side. Remove the pickles with a kitchen spider (affiliate link) or slotted spoon, letting the excess oil drain back into the pan, then transfer to a paper towel-lined pan. Repeat with the remaining pickle slices, frying a few at a time.
Then enjoy! Grab your favorite dipping sauces and start dunking!

Tips for Crispy Fried Dill Pickles
Here are a few tips to ensure you get perfectly crispy fried pickles every time.
- Dry the pickle slices first. It’s very important that the pickles don’t have excess pickle juice on them, to properly adhere the batter and reduce splattering in the hot oil.
- Monitor the cooking oil temperature. It’s easy to keep track of the oil temp with a thermometer (affiliate link). If the oil is too cool, you’ll have limp, greasy fried pickles. If it’s too hot, the pickles will burn up on the outside without properly cooking on the inside.
- Wet/Dry Hand Method: Use one hand to dip the pickles into the flour, the other hand to dip into the beer mixture. And then use a fork to flip the pickle slices in the breadcrumbs. While this is still a bit of a messy process, having dedicated wet and dry hands will definitely help!
- Let the oil drain. It helps to have a kitchen spider (affiliate link) or a large slotted spoon to remove the finished pickles from the hot oil. Then transfer them to a paper towel-lined plate or pan, so the paper towel can absorb any more excess oil.
- Don’t crowd the fryer. Cook the pickles in small batches, depending on the size of your fryer. Adding too many pickles at once can lower the oil temperature more dramatically. Since they only need to cook a few minutes, it goes by quickly.
- Keep Warm: When we make fried pickles, it’s usually a family affair, all of us gathered at the kitchen counter. And we eat the fried pickles as fast as we can make them! But if you’d like to make them all first, then enjoy them once they’re all made >>> keep a baking sheet in a 250° F oven and add each new batch of fried pickles until you’re done frying. This will keep them hot and crispy.

Serving Suggestions
Deep fried pickles should be served immediately, while they’re still hot and crispy. Dunk them in your favorite dipping sauce, like ranch dressing, hot sauce, or barbeque sauce.
Besides just dipping and enjoying, these are also super fun on burgers, wraps, and other sandwiches.
As for what to drink with fried pickles, I think a crisp, cold beer is perfect. If you lean more to wine, try a crisp white sparkling wine, such as prosecco.
How to Store Leftovers
As I mentioned, I highly recommend enjoying these immediately. But if you do have leftovers, store them in an airtight container in the fridge for a day or two.
To reheat, pop them in the air fryer for a few minutes or place under a broiler in the oven. Note that they’ll likely still have a softer texture, but these methods will help crisp them up just a bit.
More Dill Pickle Recipes:
- Dill Pickle Potato Salad is your next best potato salad recipe.
- Dill Pickle Dip is an easy, creamy, crowd-pleasing appetizer.
- Bacon Cheeseburger Pizza Rolls are extra fun with bits of dill pickle!
- Cheeseburger Soup features the flavors of your favorite cheeseburger, including dill pickles!
Like this recipe? Save it to Pinterest!
Fried Pickles
Ingredients
- canola oil for frying
- 40 thick-cut dill pickle slices
- 1½ cups all-purpose flour divided
- ¼ cup yellow cornmeal
- ½ tablespoon baking powder
- ¼ teaspoon Morton kosher salt
- ¼ teaspoon black pepper
- ⅛ teasoon cayenne pepper
- 1 cup light flavored beer
- ½ cup fine bread crumbs
Instructions
- Heat oil to 350° F. If using a deep fryer, use the amount of oil specified by the manufacturer. If using a heavy-bottomed pot on the stovetop, fill oil to about 2'' deep. Monitor oil temperature with a cooking thermometer. Line a baking sheet with paper towels and set aside, for your finished fried pickles.
- Line a separate baking sheet with a layer of paper towel. Set pickle chips on paper towel to absorb the pickle juice. Pat the tops of the pickles with another paper towel.
- For Bowl #1: In a cereal-size bowl, place ½ cup of the flour.
- For Bowl #2: In a medium bowl, whisk together the remaining 1 cup of flour, cornmeal, baking powder, salt, pepper, and cayenne. Add the beer and stir until all lumps are gone.
- For Bowl #3: In a cereal-size bowl, place the bread crumbs.
- Add just a few pickles at a time to Bowl #1, tossing to completely coat each pickle with flour. I like to use separate hands for the different coating dips, which helps to keep the multiple dipping process a bit cleaner. So here I use my right hand to coat pickles with flour, and add them to Bowl #2.
- In Bowl #2, turn floured pickles to completely coat with batter, now using my left hand. This coating will be wet/messy – and then lightly shake off excess batter and transfer pickle to Bowl #3.
- In Bowl #3, lightly coat each pickle with bread crumbs, using a fork in my right hand to gently flip the pickle. Then, using the fork, carefully release the coated pickle into the hot oil. Cook until golden brown on both sides, about 1 to 2 minutes per side. Using a kitchen spider or large slotted spoon, lift pickle up out of the oil, letting excess oil drain away for a couple seconds, and then remove fried pickle to prepared paper towel-lined pan. I like to do 4 to 5 pickles at a time, rotating them in and out of the fryer.
- Enjoy immediately. Fried food is always best when eaten right away! Serve with your favorite ranch dressing, hot sauce, or BBQ sauce.
Notes
Nutrition Information:

This post was originally published August 2012 and updated in 2023.

1
Can the beer be substituted for anything else? Thank you!
I haven’t experimented with this myself, but I might suggest another carbonated beverage, maybe 7-UP or something like that??
The proportions are off. After adding the 1 cup of beer my mix was still soo dry I ended up adding almost the whole bottle. Also the mix is enough for triple the amount of jalapeños I ended up having so much extra. The flour before the mix batter was only made the batter mix stick to the pickle less, the think that step could be skipped. Other then having to adjust the recipe a little bit they turned out very tasty.
Is something missing from this recipe? I was very excited to make these for our at home State fair party since the original was cancelled this year. When I combined all the ingredients for bowl 2 is was a stiff dough and was not wet at all? I couldn’t get anything to stick to the pickles???
Hi Nikki – The recipe is correct. Did you add 1 cup of beer to bowl 2?
sucks ..nasty..dry
Oh, I can’t wait to make these! I usually have to stay away from things like this because of an egg allergy in our family. I would imagine the type of pickle used is rather important? Did you use pickle slices that already come sliced in the jar, or would you recommend buying a jar of dill pickles and slicing them yourself? Thank you!
I really want to get this right. What type of pickles were used? Can anyone help? I would greatly appreciate it, thank you!
Hi Cyndi – I use ripple-cut dill pickle slices. Whatever brand you like. :)
Thank you so much, Brenda!
Hi, I’ve had the MN State Fair Fried Pickles twice now in the last 2 years, they are absolutely amazing. I thought to myself, “self, you can copycat those” and looked up any other duplicate recipes and yours was the first I saw. Thanks for the inspiration. #mnlove
Awwww, I love to hear this. Isn’t the fair (and those fried pickles!) awesome?!
What can I substitute beer with? Love the fried pickles!
I tried the fried pickles and I would prefer to have mine not fried. The children and grandchildren love them. Will definitely give them a try at a family get-together. Thanks.
Aaaaaaaaand you had me at beer. I adore fried pickles but I don’t think I’ve eaten them with beer in the batter! Have you ever eaten fried avocado? Dude, I could eat fried pickles and fried avocado without gaining 5,000 pounds, I would. This recipe looks so delicious, great job :)
hey girl- these look so yummy!
Love fried pickles! We get them from Buffalo Wild Wings, but I have been wanting to make them at home. What could I substitute for the beer?
I absolutely adore fried pickles! Why have I never thought to try making them at home?? Definitely trying this soon.
Great to hear from you, Russell! These are so much fun, hope you like them!
This was the first year we didn’t make it to our South Dakota State Fair, and I am so sad about that. I love, love, love fair food because calories don’t count there, right? Right??! But I always go back to the homemade lemonade, cotton candy and pork loin sandwiches w lots of BBQ sauce. Mmmmmm Our local restaurant makes these pickles, but I am sure eating them at the Fair is much more fun! :-)
So sorry to hear you couldn’t get the fair. My dad made the trip without Mom this year, due to my grandma being in the hospital. It’s a great childhood memory – we used to camp there every year. Great to hear from you, Lisa!
If this isn’t perfect pregnant food, I’m not sure what is! They look delicious!
Oh, my husband would LOVE these!!